Author: wpengine

This is the "wpengine" admin user that our staff uses to gain access to your admin area to provide support and troubleshooting. It can only be accessed by a button in our secure log that auto generates a password and dumps that password after the staff member has logged in. We have taken extreme measures to ensure that our own user is not going to be misused to harm any of our clients sites.

Disappointment

I know you’ve experienced the feeling of disappointment in others- We all have. Times when we’re appalled at someone’s minimizing remark, at their lack of sensitivity, when we feel unappreciated and misunderstood. Times when we hoped someone would sincerely apologize, but they don’t-or they don’t do it in a way where we buy it— Disappointment deepens, a feeling of mistrust emerges and only gets further fattened by avoidance.

Each time the story replays in our head, our mood gets darker because we just can’t understand why this person that we think should know us, should understand us and should be better than whatever it is that they did or didn’t do-We think: “Why can’t they just own it?” –So we can stop feeling consumed by disappointment!

Well, another word for disappointment is disillusionment and buried in that word is at the heart of the issue. “Illusion” is what makes us believe that our soft spots are as visible as the text on a billboard-and that others are supposed to not only be awake to our sensitivities but also to always understand how to navigate around them so we can feel heard, loved and valued.

Not so.

Our perceptions of current situations are usually seen through habitual, murky lenses that keep historic wounds alive. So, today’s incident isn’t usually only about today. Our reactions/conclusions are often an internal “I told you so” by a part of us that sits waiting to pounce on our self-esteem, on our worth, on our lovability. Oddly, although we cast the distraction of blame outward, the feeling of distress festers on the inside, because we’re not being truthful about what we’re asking for, which is: “Why can’t/won’t that person, this job, that scene finally validate who I want to be?!!”

The Truth: Our soft spots are not supposed to be fixed by the behavior of others. Regardless of how the world treats us, our job is to love ourselves anyway! It’s why we get to experience disappointment-first, in order to be presented with our current level of powerlessness-and then to move through that in a way where we’ve pushed beyond the usual response. It’s the only way to feel the weight of, and then share a better, stronger and, ultimately, happier version of ourselves.

The Point: If we choose to shift out of old perceptions and, instead, see the initial pain as the way to true-gain, we can view the person or event that triggers our discontent as the actual catalyst for positive change! Instead of creating a “story” that takes us to a place of anger, resentment and mistrust in someone else, we can choose to use a disappointing event as an opportunity to shine a light on our own fragility and, ultimately, on the work we need to do to grow.

How Religious are You?

I went to a beautiful bar mitzvah ceremony a few weeks ago and, while watching and taking it all in, I was thinking about what it means to live a religious life. Is it about familiar foods? Is it about being with family and friends? Is it about steeping ourselves in ancient philosophic text to connect us to the principals that brought us to where we are now?  Is it all in order to help us navigate how we will live tomorrow?  Yes, maybe, but it’s an opportunity for more than that.

Anyone can be “religious” without a calendar dictating their moves. Every day, we can establish and revisit our core values. Every day, we can get out of bed with a sense of purpose and then do things to support that purpose.  Every day gives us the opportunity to practice how to be what we want to see in the world. Being religious is when we do things to push through those pesky, limiting beliefs even when it feels really hard-Because nothing short of the bigger picture will suffice.

To me, holidays are here to help us to stop- and to examine how religious we are in life, in general. This year, since the week of Passover begins on Good Friday, it’s a particularly great time to begin. Sending love to you.

Some foods to always have prepared and ready.

Life at home (in the kitchen) is a continuum of preparing, enjoying and then replenishing. Yesterday I a batch of roasted, peeled and seeded red and yellow peppers, that I keep in the refrigerator to serve differently throughout the week. If you’re interested in learning more about peppers, in general, click here.

003-001

You can watch the video of me roasting peppers in the “Learn the Basics” section of this website.

I also replenished a big bag of cleaned and cut up aromatics (leeks, onions, celery and carrots) in a doubled freezer bag (I use a 2 gallon size) and store this in the freezer so I can quickly flavor the liquid used to poach ribs, chicken, potatoes, etc.

002-001

Remember to dry your vegetables as well as possible to help prevent the formation of ice crystals.

003-001

Here (above) is a large batch of my balsamic vinaigrette. It’s fabulous as a marinade for boneless chicken, hanger (or skirt) steaks, whole fish-the list goes on.


005-001

Here is a mixture that’s just indispensable and it’s ridiculously easy. Extra virgin olive oil, minced garlic, freshly ground black pepper and lots of chopped flat-leaf Italian parsley. You can add other herbs–thyme, rosemary, fresh (or dried) oregano. I also usually add some crushed red pepper flakes.  I use it all week long. on foods like duck breasts.

012-001

Here the top fat is closely scored just down to the meat (not through it). The fat is rubbed with salt and pepper.

The other side (the meat side) is brushed with this garlic-parsley mixture. So the fat-side gets slowly cooked over a low-medium flame (in a cast-iron skillet), occasionally dumping out excess fat. When all the fat has rendered and the skin is perfectly crisp, turn the breasts over and stick the pan under a hot broiler to cook the meat-side just until seared. Make sure to keep the meat medium rare.

014-001

Below are grape tomatoes tossed with some of the garlic-parsley oil. Then they’ll get roasted at 450F for 20 to 25 minutes, or until blistered, tender but still maintaining their shape. Toss with some slivered basil leaves and, if you have them, dot the top with some small (halved) balls of fresh mozzarella cheese.

011-001

And then there’s garlic toast–(swab slices of bread on one or both sides with the garlic-parsley mixture, then sprinkle one side only with freshly grated best-quality parmesan cheese. Broil on the cheese side, turn and broil on the second side. Turn back over so the cheese sides are facing up.

008-001

These are just a few of the things I do in the kitchen, on a rotating basic, all for the purpose of being able to create delicious meals, at whim.

Marinated Chick Peas

Isn’t it funny how the easiest dishes to toss together are often the ones that people love the most? Take these marinated chick peas, for example. .

All I do is drain chick peas and fold throughout some extra-virgin olive oil with minced fresh garlic, black pepper and minced flat-leaf Italian parsley.

garlic olive oil chick pea salad

There is not a recipe for this–it’s just an eyeball thing. Trust yourself and feel free to add things like olives, chopped roasted peppers, minced jalapenos, poached or grilled shrimp. You can change the parsley to cilantro and add corn kernels (blanched briefly if fresh, drained if canned). You can also swap black beans for the chick peas–or mix them. Just play and go where your taste buds lead.

Marinated chick peas:

  • 1 or more cans of chick peas (also called garbanzo beans) drained in a sieve and rinsed and drained well again
  • Garlic-parsley oil, to taste (mix minced or pressed garlic into a bowl and add enough extra-virgin olive oil to cover generously. Stir in some chopped parsley, black pepper and, if desired, some crushed chili flakes).
  • Extra virgin olive oil, to taste
  • Freshly ground black pepper and Kosher salt, to taste

When a cook crumbles.

A year and a half ago, just after completing a national TV series (from my home kitchen) Jon looked at me and said “Honey, I think it’s time we moved.” Thus, the reason why you haven’t heard a peep from me in such a long time. The process of leaving the home where I lived, loved, raised my three children from infancy, shot two television series and one extensive video series, authored two general cookbooks was, to say the least, formidable, and resulted (in me) being rocked to my core from emotional stress and physical exhaustion.

The beginning of this chapter was marked by something called “the staging process;” professionally defined as the time people get their home “in shape” to go on the market for sale-although I personally describe this as the step-by-step process of being literally erased from one’s home…

Anyway, our 100 year old house was, as instructed by our chosen team of realtors, swiftly wiped pretty clean of our family’s essence (personal photos taken away, valences and all shades and draperies carted off (to showcase the beauty of the original decorative windows), ceilings repainted (to feature the specialness of the molding) and some carpets ripped out (to boast the untouched hard-wood floors)– not to mention having to go through over 25 years worth of accumulated “stuff” from 5 people.

But, to me, what happened to my small but perfect kitchen was the hardest to bare. My natural wood cabinets were painted nurse-shoe white, the pot racks with all my tools were removed (to reveal more of the hand-painted tiles on the walls), my butcher-block island, which was on wheels, was “wheeled” away in order for things seem more spacious AND my fully equipped “workshop, ” built on our lower level (which had been in full swing for my most recent TV series) had to be completely disassembled because, apparently, having two kitchens in one home (in NY) would deem the house to be a “two-family residence.” (Wouldn’t you be depressed??)

Anyway, I’m here to report that today Jon and I are in a new house that we love, in a completely new area that we love and we’re now eyeball-deep in building my dream kitchen. Although still living within the enormous chaos of a major kitchen renovation we have become closer as a couple and more resilient and resourceful individuals. And, through it all, my determination to cook and bake, through all of the challenges, has deepened my awareness of how, for me, “home” is wherever my pots are.

In my upcoming blog posts I will be sharing with you my cooking and baking journey– from times both “then” and “now” (like these muffins below that I used both then (for the slew of brokers that came for our open house) and also now (for the team of men building our new “indoor” wood-burning oven).

The point: Cooking and baking have, throughout my life (and continues to) help me to cope, to heal and to (no matter what) reaffirm that this IS Lauren Groveman’s Kitchen. I’m back!!

Candied Citron

Contrary to what most think, citron is not the plural of all citrus fruit. Citron is actually it’s own breed and is said to be the oldest form of citrus that originated in Southeast Asia. Although citron is now grown in many more countries around the world, it’s rarely found fresh in the US and, when it is, it’s usually only available in specialty food shops and high-end grocery stores like Whole Foods. Having said this, if you ever see it, I suggest you hoard it since, when freshly candied, citron tastes unbelivably floral and has a dense, chewy texture that translates into an overall exquisite eating experience. Oh–and just in case you think you’ve tried citron and don’t like it because the only kind you’ve had is store-bought–There is NO comparison between homemade candied citron (as well as candied orange and lemon rind) and the small, hard, placid squares found in the supermarket (or even on the web)! Trust me, it’s like comparing a gorgeous palace with a bowling alley.

Now that I’ve hopefully peaked your curiosity, here’s what a fresh citron looks like…

They can grow to be ridiculously large–but are most often sold like above, the size of a very large pebbley looking lemon that’s the size of a grapefruit–This (above) or a bit smaller is the size I’m talking about and is what you should use to make candied citron.

The interior of citron is not at all the prize–the flesh is dry (like an over-the-hill orange) and a bit leathery–It’s the outer rind that you want. Fresh citron has a hard, thick outer rind and the fruit looks like this when cut open. (The “rind” is considered everything above the interior fruit-flesh.)

See how thick the rind is?? After a series of blanching, draining and then long, slow cooking in a thick sugar syrup, the thick, initially intensly bitter layer of white pith is rendered much less bossy– retaining just enough bite to spar playfully with the candy.

See how little fruit there is in comparison to the rind?

After cutting citron into wedges, you need to remove the inner fruit. You can use a grapefruit spoon. I just use my fingers to pry it out.

Boil the peel 2 times (uncovered), over high heat, in two separate batches of rapidly boiling water, for 10 minutes each time. (8 minutes each for thick-skinned oranges, lemons and grapefruit). As a time saver, I bring two pots to a boil, then after blanching the first time, I just drain the peel and then dump the pieces into the second pot. If you use one pot, rinse the interior after draining and fill with fresh water–bring to a boil and proceed.

Here (below) is the citron after the first blanching. Although initially very rigid, the rind starts to soften.

Here is what they look like after the second blanching. Much more bendable.

For 1 or 2 citron (or 2 oranges and 2 lemons and 1 grapefruit): After draining the blanched citron strips, I make a sugar syrup in a 12-inch, deep-sided skillet with 3 cups water, 3 1/2 cups granulated sugar and 1/2 cup light corn syrup. The syrup is important to keep the citron supple, after cooking.

After whisking together the syrup ingredients, bring the mixture to a boil. Add the blanched citron to the boiling syrup.

Place a sheet of parchment paper directly over the top (actually sitting on the fruit and syrup).

Place a heat-proof bowl on top of the paper, to help weight it down.

This set up (above) helps to prevent excess condensation from forming and diluting the syrup. The goal is to reduce the syrup slowly–keeping the peel submerged.

Turn the heat to low and simmer the citron rind at a slow but bouncy bubble for between 1 3/4 to 2 hours (about 1 hour for oranges, lemons and grapefruit).  After each 30 minutes, lift the paper and check how things are doing.

The point is to simmer until the syrup completely penetrates (permiates) the white pith. Once very tender, remove the paper and raise the heat, only to medium.—Now you’ll cook the liquid a bit more briskly in order to evaporate some of the water in the already reduced syrup. The syrup will seem very foamy on top and will bubble quite furiously.

As the liquid reduces, lower the heat. At this point, let your nose be your guide. Don’t allow the liquid to color beyond a very light amber. You will smell the syrup turn–this is when it becomes candy–if you let this go too far, the syrup will be too flavorful and will overwhelm the citron with an overly cooked taste.

Here is how the citron should look when you remove it from the syrup. It should be perfectly tender and the syrup should hug the rind.

Spray a wire cooling rack with flavorless vegetable spray and lay the candied citron on the rack in a single layer. If planning to sugar-coat the pieces, only allow them to settle until just warm. If allowed to sit too long, the outside will lose it’s sticky quality, which is what the sugar needs to adhere to.

After rolling in sugar, place back on the rack and allow them to dry for a few hours. Cover and store at room temperature.

Below is a combination of candied and sugared orange and lemon rind.

(Be forwarned, all types of sugared-candied citrus rind are, for me, a real weakness. When it’s in the house, it haunts me until every last strip is gone!)

If not planning to sugar-coat, then allow the pieces to dry on the rack for a few hours or overnight. Use an oiled chef’s knife to cut into small pieces …

Chopped candied citron…

Chopped candied orange and lemon rind…

Isn’t it amazing how you can almost experience the vibrancy of flavor just by looking? Just delicious!!

Oh–and if wondering what you might do with the candied chopped up citron, lemon and orange rind. How about some Panettone!

And how about…

Hot cross buns! (Recipe coming…)

The Point: Although, because of lack of availablity (and or timing constraints) we will, at times, need to use store-bought candied citron as well as other kinds of rind. But, since oranges, lemons and grapefruits are always available and since the eating experience with the homemade version is so elevated, I wanted to show you how do it yourself. I promise–the taste and texture is worth every second!

A Potato Galette (AKA an Uncle Buck Latke!)

I’ve always had a major love affair with potatoes and could easily eat them every day, twice a day, for the rest of my life. So, I’m certainly not one of those that waits for Hanukkah to make, share and enjoy things like potato pancakes. Although making latkes (individual potato pancakes) is more traditional, I wanted to give you another (and more elegant) way to experience the same crisp exterior and a deeper, even more velvety interior.  I often like to make one large circular cake, called a potato “galette.” (What my son Ben would comically call “an Uncle Buck latke!”) which is the perfect accompaniment to a gorgeous seared steak, veal chop, a regal roast prime rib of beef or thinly sliced duck breast –and let’s not forget duck confit!!

Making a potato galette is easy and beyond delicious.  Here’s how to do it…

Before you get started, preheat the oven to 450F.

Tools you’ll need:

  • A food processor with a shredding disc (which is certainly the easiest way to go) or use an-old fashioned box shredder. (Have band-aids handy.).
  • A seasoned cast iron pan, 10 1/2 inches in diameter, which will produce a galette that feeds 4 well and 6 adequately.

Ingredients you’ll need:

  • 4 medium-large Russet (Idaho) potatoes (Russets are the best breed for this, whether making potato pancakes or a galette, because of their higher starch content. This enables the interior of the cake to homogenize yet remain beautifully textural after cooking.  Just thinking about this recipe is making me salivate…)
  • 1 medium yellow onion, peeled and quartered
  • 1 extra-large egg
  • 3 tablespoons matzo meal (not flour, which tends to make both latkes and a larger potato cake gluey. If matzo meal is not available, grind up some salted Saltine crackers and use an equal amount)
  • 1/4 to 1/3 cup chopped fresh chives (or use flat-leaf Italian parsely)
  • Kosher salt, freshly ground black pepper and cayenne (all to taste–but don’t be stingy with the seasoning since the flavor of potatoes can seem muted when insufficiently seasoned).

  • 4 rounded tablespoons fat (your choice: extra-virgin olive oil (not my first choice), clarified butter (a fine choice, but my third choice) rendered chicken-fat (a finer choice, which is my second choice), duck fat after making duck confit (MY FIRST CHOICE!)

Above is some fat I’ve scooped out of the container of my duck confit. It’s flavored with garlic, shallots, thyme, rosemary, salt, pepper  and, of course, duck!–And, like chicken-fat that’s been rendered down with onions, duck fat simmered low and slow for hours with duck legs and the above mentioned ingredients, produces one of the worlds great delicacies and is MUCH more flavor enhancing than when used plain–without being first first melted down and simmered with aromatics.

The Point: Since we’re about to embark on the last nights of Hanukkah, I thought it especially fitting to give you something especially delicious to celebrate the final blazing! And, since we’re also about to say “bye-bye” to 2011, this is also a great time to expand on an already established traditional recipe –with an over-sized potato pancake to help ring in a wonderful New Year in a big, beautiful and extra savory way!

To Make

Peel the potatoes, cut into chunks and shred in the food processor along with a medium yellow onion that’s first been quartered.

Pour the shredded potato and onions into a bowl, lifting handfuls at a time, squeeze out the excess moisture over the sink. Place this on top of doubled, cotton kitchen towels (not a hairy kind) and continue until you’ve squeezed all of it. Gather up the ends of the towels and twist, squeezing out as much of whatever liquid is left as you can (don’t stop twisting until you express an audible “grunt.”)

Pile the shredded mixture back into the cleaned bowl and add 3 tablespoons matzo meal, 1 extra-large egg, a fat pinch of kosher salt and lots of freshly ground black pepper (adding some cayenne also wouldn’t hurt…). Add chopped fresh chives or use flat-leaf Italian parsley, or a combo.

Use your working hand to combine everything.

  • After mixing the ingredients, cover the bowl with a towel to help prevent the potato mixture from oxidizing, while you move on to heat your pan. (Trying to coat as much of the potato with the egg will also help to seal the exposed potato flesh.)
  • Heat a 10 1/2 inch seasoned cast iron skillet, over medium heat, with 4 rounded tablespoons of your choice of fat (you want a shallow, but even layer of melted fat). When the fat is hot, add the potato mixture and spread it into an even layer, pressing down with a turning spatula.

  • Cook over medium-high heat, until the bottom of the cake is seared, 4 to 6 minutes. (You’ll be able to smell the browning process happen (which is when the potato mixture starts to caramelize on the bottom)–you’ll also be able to smell over-browning, so let your nose help you to know when to proceed with this next step.
  • Reduce the heat to quite low, place a lid over the pan (this does not have to be a close-fitting lid). Steam the potatoes this way for 10 to 20 minutes. (Do what works for you, timing-wise, since at this point, it’s all about making the interior tender, which is very forgiving).

  • Uncover the pan and poke the blade of a turning spatula around the rim of the cake, making sure it is free, then place the pan (uncovered) into the 450F oven. Bake until the top is golden brown and crisp, 35 to 45 minutes. If you need to make the cake wait for another dish, once golden, loosely cover the top and reduce the temperature to 325F. Uncover for 2 to 3 minutes before removing from the oven.

The potato cake should be extremely crisp on the bottom and, if your pan is well seasoned, should be able to simply be lifted out and slid onto a serving platter, using a large, off-set turning spatula.

Use a large pizza wheel to cut the potato galette into wedges and serve hot with applesauce (smooth or chunky) or sour cream and fresh chives.

A great side dish with legs!

Sorry I haven’t written in a bit!–I’ve been working so hard, preparing and shooting new episodes of Baking Made Easy! Since I know that many of you (like me) are busy working, shopping (and schlepping) I wanted (so much) to teach you a really delish side dish–that’s easy enough to gussy up a soothing weeknight meal and also gorgeous enough to earn a place on even the most “special occasion” menu.

So, since at this particular moment—with time constraints as they are–and with my wanting to connect to you at the risk of being quick–(and admitting that there probably won’t be much literary poetry in this blog) I trust that the food I’m about to share will take care of everything I’m lacking.

I am now going to show you how to make roasted chunks of butternut squash, tossed with garlic, olive oil, curry and seedless grapes–SO GOOD and would be perfect with a holiday roast turkey or goose (or a weeknight roast chicken)! And then, I’m going to show you how to use the beginnings of one recipe (the seasoning base for the squash) to create a soothing main dish (an herb-roast chicken) as well as give you lots more ideas for other ways to use the same seasoning mixture.

First, let’s take care of the squash …

You have a choice–You can either start out with a whole butternut squash, which looks like this:

Or, you can also buy squash already peeled and cut into squares, which looks like this:

If you decide to work with whole squash, just peel it with a sturdy swivel vegetable peeler, then cut the squash in half, vertically…

Use a spoon to remove the seeds and any stringy stuff…

And cut the squash into cubes (not too small, not too big)–like this…

Then toss in some seedless grapes. (Don’t be shy–you’ll be amazed at how unusually delicious they are after roasting!)

Per each squash, you’ll use 1 1/2 to  2 cups grapes.

To season the squash and grapes, mix a few cloves of minced garlic with some extra-virgin olive oil, some crushed red pepper flakes and ground black pepper, to taste.

I suggest you make a larger batch than you’ll need for this recipe (so, to what’s above, just add more garlic, more olive oil and more black pepper).

Now, spoon some of the garlic oil onto the squash and grapes–enough to lightly but evenly lubricate them.

Now sprinkle on some curry (onto the squash and grapes, not into the garlic-oil). Again, don’t be afraid–Curry and butternut squash have a natural affinity for each other. Having said this, if you’re not sure about your audience, go slow–And, then after you hear raves at the table, you’ll can be more generous the next time around.

By the way, curry is not one spice–it’s actually a blend of over twenty herbs and spices–and each “blend” varies in taste and color. Some are quite sweet and others are more hot. My favorite is Madras curry, said to have originated in South India (and the blend I like is produced by Sun Brand) which tastes bright and hot and is, to me, just perfect.

Add salt and pepper and then use your hands to rub everything together.  Pile onto a shallow baking sheet that’s been first lined with several sheets of aluminum foil and rubbed with olive oil. Scrunch up the sides of the foil, which will help create low walls to contain the squash and grapes.

Season the top with more salt, pepper and curry, then cover with another sheet of foil  (dull side up, so you don’t deflect heat away from the pan) …

And use scissors or a skewer to poke holes in the foil, which will help hot air enter to soften the squash during the first half of the roasting process. This “set up” can be done early in the day and kept at a comfortable room temperature.

When getting ready to cook, preheat the oven to 450F.

(Oh, and don’t throw away any extra garlic oil. Here’s where the squash recipe grows legs!)

A roast chicken recipe moment…

Sorry for the digression but I can never resist an opportunity to teach yet another way to season, sear and roast a chicken…(I’ll be quick about it!)

Add some chopped thyme and rosemary to the garlic-oil (fresh is best, here…) and use it to rub on a raw chicken! If you need to add more oil, do it now.  (This is why I didn’t add curry to the seasoning mixture for the squash–I wanted to keep it as neutral as possible.)

Place a 3 to 3 1/2 pound chicken into a bowl lined with aluminum foil. Sprinkle all sides the bird with Kosher salt and freshly ground black pepper, then rub the herb-garlic-oil liberally onto the skin (all over).

The bird should glisten. Tie the legs shut with kitchen twine. Add more salt and pepper. Cover with plastic wrap and refrigerate until 30 minutes to 1 hour before roasting. To get ready to roast, preheat the oven to 375 to 400F.

By the way, any extra herb-olive oil mixture can be refreshed with more oil, garlic, herbs etc. refrigerated and used the next night to season lamb chops, whether just for yourself or, as below indicates, for a crowd…

Or to season and roast whole fish, like these sea bass…

How about poached, seasoned and roasted crinkle-cut potato wedges…

See how that first garlic-oil mixture now has many uses! )

Anyway, back to finish up the bird. and then the squash..

Brown the seasoned chicken on the stove, in a heavy (and hot) nonstick skillet (no need to add extra fat because the bird is lubricated) and, after it’s brown on all sides (turning with tongs), over high heat, take the chicken out of the pan. If the pan isn’t able to go directly into the oven, switch to one that is. If the first pan is oven-proof, wipe it out and stick the chicken back into it. Squeeze some lemon over the top (1/2 juicy lemon per chicken) and, if desired, scatter some drained capers around the bird. Pour 1 generous cup of chicken stock into the pan. You can also quarter a couple of medium yellow onions and large button mushrooms and rub some garlic-herb-oil on them, and then scatter the vegetables around the chicken (with the lemon and capers). Roast in a preheated 375F oven for 1 hour to 1 hour 15 minutes, or until golden, crisp and the juices in the thigh run clear when pierced. (Add a bit more stock while roasting, if it seems to have evaporated.)

Herb-Roast Chicken.

Ok, now let’s finish the squash…

After cooking at 450F (covered) for 20 minutes, remove the top foil and allow the squash and grapes to roast another 20 minutes, or until blistered and looks like this…

Butternut squash, roasted with grapes, garlic, olive oil and curry.

Above are all dishes that will produce heaven on a plate.

The Point: Whether cooking on a random Tuesday night or for a major holiday, wanting something nurturing and delicious is always the goal–And, since it’s so easy to get bored with the same old side dishes, I thought I would show you something new and really yummy–and in such a way that would help you to understand the fluidity that’s inherent in the art of cooking. When assembling a side dish or a main dish protein (using one seasoning mixture), you can also create the seasoning base for several other entirely different dishes. So, think BIG and conceptually, when cooking. Ask yourself “How can I give this “mixture” legs?” Meaning, If you make this now, what else can it be used for, whether in this same meal–or when kept refrigerated and used throughout the week? This is how to not just be a good cook–but also a smart one.


Wait! Before you throw away that turkey carcass!

I woke up this morning and thought–“Oh no! I hope I’m not too late to remind you to NOT throw away your turkey carcass from Thanksgiving!” If I’ve caught you in time, I’ll try to make it quick! And, if you haven’t thought about it and are still picking the meat off the bones–today is also the day to remind you that TODAY is the last day it could possibly be good.

(But before I continue, let me first say that not all Jewish mothers enjoy instigating guilt–although most of us mothers, Jewish or not, will do it happily when it serves an important purpose–and what I’m about to say about making turkey stock certainly does–so listen up! )

Throwing out a cooked turkey frame should make you feel bad—awful–like dumping out a vat of ice-cold, crystal-clear water in the middle of the sun-parched Sahara desert. (Don’t worry, if you’ve still got the carcass, there’s still time to save yourself.)

Turkey bones make the most fabulous broth!–Especially if you add some raw poultry parts, which will augment the taste substantially–See–it’s the bones (cooked or not) that lend texture (a discernible physical dimension) to stock that will make it seem almost thickened, yet still esthetically clear–This “thickness” comes from both, gelatin (contained in bones) and the breaking down of cartilage which, after enough simmering, creates a liquid with more depth. The fact that the bones have been initially cooked –provides a “browned” part–and it’s this that offers not just an amazing depth of flavor but also a noticeably rich color that is simply not attainable when using all raw components. So, when you add raw poultry–you are bringing the sweet, pure taste of virgin skin and meat to the table (to the pot) and, adding something cooked adds the flavor and color benefits (coming from a special kind of brown-color compounds– from caramelization). Each offers a completely unique set of attributes to your finished stock.

So, today, since Thanksgiving just passed–the star “cooked component” is the turkey carcass.

And making stock is so easy!

Instead of throwing the cooked carcass into the garbage, toss it into a big pot with aromatic vegetables.

(Cut up lots of carrots, celery, onions, cleaned and sliced leeks–and what you don’t use today, simply freeze in a doubled freezer bag.) I also add some whole cloves of garlic and a bushy bunch of Italian parsley–stems and leaves), whole black peppercorns along with some other chicken parts that I’ve always got stashed in the freezer. I usually keep a whole chicken or two frozen-as well as some boney wings, necks, backs, etc. (To see me cutting up a chicken in a way that will forever help you to replenish your supply of boney poultry pieces, click here.)

Then cover the contents with cold water (not hot, which is oxygen-deprived and isn’t as fresh-tasting) and add some whole black peppercorns. Bring the whole lot to a bubble, skim off any gray, bubbly scum that rises to the top, which is the impurities from the bones leaching out.

Here is a skimmer…

Here’s how to use it…

(This stuff won’t kill –it’s just not appetizing.)

Then, let the contents of the pot bubble gently, with the cover ajar, for a few hours–

Occassionally adding more vegetables, if you like.

After that, remove the pot from the stove and place on a sturdy wire rack, which will help facilitate cooling. Allow the solids to cool as long as you can, then use a large ladle or a big liquid measure, to strain the solids out of the broth (into a large sieve positioned over a large bowl).

Here (below) is something you never would have had if you threw out the turkey carcass!

Now–you can finally throw away all those solids.

But make sure to close the lid of the garbage!

Be careful–your dog will have an entirley different set of reasons why making stock is extremely valuable!

Now, chill the stock and allow the fat to rise to the top.

Skim off the fat–then ladle the pure stock into freezer containers and store in the freezer.


Now…whenever you or someone you love needs it bad, you can easily make a nurturing soup!

With or without matzo balls.

To watch me make chicken stock, click here. To learn to make an amazing pot of chicken soup, click here.

The Point: Thanksgiving gives us many reasons and ways to celebrate some of life’s most humble, albeit valuable, offerings like love, family, hospitality and friendship. And, choosing to make stock–whether from the bones of a holiday turkey or a weeknight roast chicken is one simple, yet far-reaching way to, at whim, provide more of these same offerings–especially needed and appreciated during the cold winter months. It’s also a way to revisit (and to teach to our 21st century children) the importance of being resourceful–and of living each day on purpose.

A Seedy Little Question.

I’ve been asked a few times since my pumpkin blog if there is an easy way to separate the stringy pumpkin matter from the seeds (when wanting to cook the seeds). The answer is “yes” and here’s how:

After halving the pumpkins and scooping out the seeds and strings, place all of it into a bowl.

Then cover the contents with cold water. Use your hand to swish everything around, helping to separate the seeds from the strings, so it all sits freely and then watch what happens! After a minute or two, since the density of both are different, each will behave differently in water. The pulpy pumpkin strings will sink and the seeds will float and will look like this…

Then, just use your hand to scoop (skim) the seeds out of the top of the water. Pick out any few stray pieces of pumpkin strings. Then rinse, blanch, season, roast and eat up!

Shrimp Stock is BIG on Flavor!

I’ve gotten so many wonderful emails about your pumpkin cooking success that I thought I would keep the ball rolling by showing you something that’s really delicious– that most never even think to do!

Today, you’ll learn how to make shrimp stock; a savory, amber-colored broth made from the shells of fresh shrimp that can be used as an incredibly flavorful (thus valuable) component of rice, soups, stews and sauces. And, the craziest part, most people toss the shells in the garbage! I’m also going to show you how to remove the gritty intestinal vein (to devein) and then to butterfly shrimp, which helps them to curl nicely when they simmer.

By the way, although shelling shrimp is, as you’ll soon see, easy to do yourself, you can ask your fish-monger to do it–But remember, shrimp are usually first weighed with their shells on, so you’re paying for them and have every right to ask to take them home!

OK, first, let’s remove the shells: When you take shrimp home, put them in a colander and rinse them well under cold running water. You’ll need a thin, preferably serrated knife since the jagged edge of the blade helps to easily sever the shell.

Working with one at a time, hold a shrimp in your nonworking hand, tail at the top and outer (larger curved side) of the shell facing out (like below).

Holding your knife handle in your working hand, insert the tip of the serrated blade inside the bottom of the shell (blade facing outward toward the shell–not toward the shrimp flesh). Like this…

Now, while holding firmly onto the shrimp, bring the blade of the serrated knife upward, toward the tail, splitting open the shell as you go. (Only about 1/4 of an inch of the blade should be inserted.)

When you get to the top (the tail) you can either continue, in order to remove it along with the rest, or leave it on–Depending on what you intend to do with the shrimp. (Leaving the tails on, when simmering shrimp in a hearty stew, gives the dish a nice rustic touch.) Pull off the outer shell which will also carry with it the legs that are located in the inner curved portion of the shrimp.

Before you put each shelled shrimp into a bowl, you need to rinse it well (especially where you cut open the shell) since this is where you’ll find the intestinal vein. (By the way, if you don’t devein the shrimp, eating the vein won’t physically kill you–but it’s pretty gross, don’t you think??)

Below is a fully cleaned shrimp (meaning, it’s been shelled and deveined).

So, you’ll accumulate all your shells in one bowl and all the shrimp in another.

At this point, after patting the shrimp dry, you can season and skewer them for the grill or you can chop them to use as part of a stuffing, or anything else that your recipe instructs.

When simmering clams (in a red sauce, for instance) I like to “butterfly” shrimp, which simply means that I take the same knife used to remove the shell and I cut a bit more deeply into that same crevice. Like this…

Here is a perfectly butterflied shrimp.

Now, let’s make shrimp stock.

Rinse the shells under cold water in a sieve.

And drain them well.

Fat or no fat–You have a choice (and I opt for a bit of butta, baby!)

Add a couple of tablespoons of full-butter (not clarified) to a skillet and, when hot and bubbling, add the drained shells. (You can omit the butter and just add the shells to a dry, hot skillet). Stir the shells in the pan until they go from their natural grayish transclucency to…

A deep salmony pink color. Keep sauteeing, over high heat, stirring pretty constantly until the shells begin to caramellize (and here’s where that butter helps because the milk solids candy along with the sugars in the shells (this smells amazing). This step is the equivalent of browning bones (chicken, beef, veal, etc.) before simmering them in liquid.

You can see this caramelization….Look (above) at the bottom of the pan…This brown stuff holds amazing flavor (it’s called “the fond”) and when released with liquid, it leaves the bottom of the pan and goes into the stock (which will happen now).

Add to the pan, cold water to cover the cooked shells along with some aromatic vegetables (carrots, celery, leeks, onions) and whole black peppercorns.

By the way, I always keep a doubled jumbo bag of cut up aromatics in my freezer.

So I’m always ready and able to quickly put a pot of shrimp stock together…

And, since browned shrimp shells offer their goodness so readily to liquid, after just 30 minutes to 1 hour of simmering, drag the pan to a cool burner and allow the solids to cool in the broth.

Then, strain…

Discard the solids and what you have is quite the bowl of deliciousness!

Shrimp stock can be used right away or you can store it in the fridge for a few days, or in tubs in the freezer for several months.

Here are just a few uses….

Here the shrimp stock has been brought to a boil in a pan with sauteed vegetbles and toasted raw rice, to make a rice pilaf …

Here is the rice after simmering…

(A detailed rice lesson is coming…)

You would choose to use shrimp stock in this pilaf when serving a dish that features a complimentary protein. Like this…

Clams and shrimp simmered in a spicy red sauce (detailed blog coming).

Or you can butterfly the shrimp (remember I showed you how about 3 minutes ago) and you can simmer them gently in red sauce (with lots of garlic and basil. Then, you would ladle the piping hot, cooked shrimp (with an ample amount of sauce) into a heatproof dish and then scatter some shreddeed cheese on top. (I mix Italian fontina, mozzarella, parmesan and muenster). Then, just run the dish under a hot broiler until the cheese is all hot and bubbling, and you’ve got yourself an amazing Shrimp Parmesan!

You could serve the above with a side of cooked pasta (angel hair) that’s bathed in some melted butter and hot shrimp stock. Yikes, that’s good!

The Point: Shrimp shells are not just something to throw away. They can be used to create a truly heightened level of flavor in many dishes that feature seafood. I hope today’s lesson has helped you to feel more inspired and able to do so. Please let me know! I’m here for you. Laur..

Baking Made Easy (with Me) is on TV! (Yay!)

dates

I’m (finally) so excited to share with you that my new television series called Baking Made Easy with Lauren launched on PBS in late-September and is now able to be seen nationally on both PBS (check local listings) and also on WE tv®, beginning Monday, October 31!  Many of the recipes are in The I Love to Cook Book and some are in my first cookbook, Lauren Groveman’s Kitchen. And there are also many that have never been published! Also, check out my recipe section of this site. You can be sure that ALL of the recipes featured are tried, true and cherished.

This new series is produced by Multi Media Productions, Inc.and they created a website just for the show! So, for more baking tips (from me) and more information (from them) on the schedule nitty-gritty, as well as featured recipes from the series, click here!

The recipes and techniques in Baking Made Easy cover everything from simple sweets to artisan breads. Throughout the series,  I aim to satisfy bakers of all levels, whether a beginner, a holiday baker and also those who are more experienced “every day” bakers.

Now…Just to wet your appetite, here are just some of the things you’ll learn to bake in this series…

On one show, one of the recipes featured, is my Chocolate, Chocolate-Chip Brownies that are swirled with a luscious sweetened cream cheese filling.

Here’s a slab of them cooling…

Do I really have to tell you how good these are?

Can’t you just taste them???

And, this is a batch of savory muffins, that’s perfect for Thanksgiving or for a soup and salad lunch or supper! It’s my Triple Corn and Pepper Muffins–tender, textural and yummy.

Then, in another show, I demonstrate a professional formula to turn out beautiful 6-strand braided loaves of Challah.

I also show you how to turn the same dough into chubby sandwich loaves. This dough is so versatile– that I call it “a bread for life!”

Wouldn’t you love to serve this elegant marbled pound cake?

And, what about these Peanut Butter and Jam Hearts–which are my best friend, Kathy’s, favorite cookies! I’ve never met anyone that didn’t go crazy over them!

On another show I feature my homemade biscuit mix which has really helped me, as a busy mother, to get some of our family’s favorites into the oven much quicker. Below is just one of the ways I use the mix on the show–to turn out these outrageous Orange-Scented Currant Scones.

On another day, I share my secrets for having a pizza party (even for a crowd!).

And then I take the same dough and turn it into all sorts of delicious things…

Just one being  a gorgeous focaccia…

And also Herb-Parmesan Grissini…

On yet another show, I teach how to make a delicious assortment of homemade flat-breads which can be enjoyed all day long.

Here’s a collossal stack of my crisp and savory sesame matzo crackers–that (I promise) will change your opinion of matzo forever!

And here (below) are some light and tender homemade flour tortillas, whether for breakfast burritos,  lunch time wraps or dinner-time fajitas!

And who wouldn’t want to wake up to these??

Fresh baked Cinnamon Buns on a cozy holiday morning!

There’s Jumbo Black and White Cookies–A perfect example of something that’s usually purchased that, when made at home, is so much better!

The texture of these cookies is so tender–with just a hint of lemon, making their taste bright and light–while being oh-s0-rich at the same time!

Oh and here’s Miss Mango, my sweet Lab. She’s always standing by, hoping, wishing and praying that something falls on the floor. (I have not used a dust-buster once since she was born…no joke.) Mango is always around during the shows. She’s my “baking-bud.”

Here’s a parmesan crisp–a disc, that can be made and broken into shards and either eaten “as is” or served as a savory garnish on a salad. I also show how to mold this disc, when hot, to form individual serving bowls –which is an awesome thing to do for guests to turn an ordinary “salad course” into something really special.

Ahhh…Here’s one from the American Pie show…Lemon-Orange Meringue Pie; tangy, sweet, crisp, fluffy-totally delish.

Here’s another–My Crisp Apple-Cinnamon Galette…

Here’s a Mixed Berry Double Crust Pie…

Here are some examples from one show that’s all about “baking with whimsy”…Here are my life-size cigar cookies which I show you how to make–and serve with an edible ash mixture– which elevates the experience of these cookies to crazy heights. What an amazing dessert to help celebrate something wonderful–A new baby, a new job, a New Year!

And they’re easier than you think!

And how about a savory cookie! That’s right–here’s my crisp Garlic and Chive tuiles –beyond delish–and just perfect to serve with wine and cheese during the holidays!

Everyone loves Rugelach! Well, these are just over the top –texturally, taste-wise and aesthetically–all completely homemade (even the fillings!) And, if you follow my timing strategy, putting these beauties together is really a snap!

Mango letting her nose be her guide—She wants those rugelach SO badly….

So…I hope I’ve given you enough to want to chew on! Now, it’s time to learn how and I hope you’ll let me teach you. Be sure to check out your local PBS stations. (If you don’t see the show listed, ask for it!) And, if the PBS station in your area hasn’t yet picked up the show, the series begins airing nationally on WE tv® on October 31.  Check out the Baking Made Easy website for more timing information. Can’t wait to bake with you! Laur..

Hi Pumpkin!

It’s pumpkin time again!…. So, since the holidays are just around the corner, now is a great time to get set up for those busy baking days ahead! And, since fresh sugar pumpkins are now so abundant –and since their softer texture and soothing flavor is so wonderful, I thought I would teach you how to stock your freezer with fresh pumpkin puree. That way, when making a recipe that calls for “pure pumpkin,” you won’t have to always rely on the canned version.

For instance, you can use fresh pumpkin instead of canned when making a pumpkin bread.

And that goes for pumpkin muffins, too!

And even something as amazing as this pumpkin custard torte!

Oh, you can too make this torte!–And I’ll show you how to do it, step by step, on my new television series called “Baking Made Easy with Lauren” which started airing in September on PBS (check individual markets). The show is also launching nationally on We-TV on October 31 at 9 am! The recipe is here, on this site  and also in my cookbook.

Ok, before I show you how to cut, gut and cook fresh pumpkin, you should know that the canned version is not made solely from the orange-skinned sugar pumpkins that you find everywhere at this time of the year. Canned pumpkin uses a combination of the sugar pumpkin and the Hubbard squash–and the latter, which is drier and produces a thicker puree,  usually dominates.

When at the market (or when pumpkin picking), when wanting pumpkins for the purpose of cooking, choose a few small sugar pumpkins. For ease of transporting and cutting, they should be between 2 and 4 pounds. Although I like the smaller ones, everything I’m going to share with you applies to pumpkins of all sizes–even those really big ones–although you might need a buzz-saw to cut it!

Here, each one is about 2 pounds.

A 2 pound pumpkin will yield about 2 rounded cups of cooked puree…

Preheat the oven(s) to 350 to 375 degrees F (350 if using a glass baking dish and 375 if using metal).

Wash your pumpkins and dry them. Insert a sharp 8-inch chef’s knife into the top of the pumpkin, to one side of the stem. Hang on to the handle of the knife (you might want to choke up on the blade a bit) and pull the blade down on that side, toward the bottom.

Do this on the other side, then pull the two halves apart, like this…

Do this with all of the pumpkins…

Pull off and discard the stems. Scoop out the seeds and stringy pulp from the pumpkin halves and put this into a bowl…

Seperate the seeds from the pulp–discard the pulp and rinse the seeds in a sieve.

Set the drained seeds aside for now (but DON’T throw them away!) We’ll do something delish with them in a few minutes.

Cut each pumpkin half, in half again–or, if larger, cut the halves into a more manageable size. Place the pumpkin “quarters” in a baking dish (skin side down).

Add about 1/4 inch of hot water to the dish and cover the dish with aluminum foil (shiny side down. Perforate (make holes or slits) in the foil, using either a skewer, two-prong fork or a knife. Bake for 1 to 1 1/2 hours, or until the pumpkin is very tender and starting to turn golden…

A short recipe moment…This (above) can be an amazing side dish with roast chicken or roast turkey! Just baste each piece of cut pumpkin on both sides with melted butter and maple syrup. Roast at a higher temperature of 375 degrees F (400F if using metal) for 40-50 minutes (or until just tender), then uncover and baste again with butter and syrup. Continue to roast until the flesh becomes nice and caramelized (this will take another 20 to 30 minutes). Sprinkle lightly with some Kosher salt. Eat up!

Back to the sugar-pumpkin puree: When cool enough to handle, separate the skin from the cooked pumpkin flesh…

Then put the flesh in the food processor fitted with the steel blade and whirl away…

Just right!

Now, use a rubber spatula to transfer the pumpkin puree to a fine-mesh sieve that’s placed over another bowl. Cover the puree loosely with piece of wax paper.

Let the puree sit there for a couple of hours, occasionally pouring out the liquid that accumulates in the bowl beneath. (You’ll be surprised at how much liquid comes out!)

After about 2 hours, all the liquid should have been drained off. Divide the puree into 2 cup increments (which is the equivalent of a 1-pound can of pure, solid-pack pumpkin).

Label and date the containers and refrigerate for a few days or freeze for up to 6 months. To thaw, place in the refrigerator overnight. It’s best to bring the puree to room temperature before using in a recipe or you’ll need to adjust (lengthen) the cooking time accordingly.

Now, back to those pumpkin seeds!

While the pumpkin puree is draining, it’s a perfect time to blanch and roast the un-hulled seeds, which are not only delicious but they’re also a great source of fiber. (BTW: Un-hulled means that the seeds are still in their shells. The shells are not easy to chew, even after roasting, so I blanch them first in rapidly boiling salted water for 4 minutes.)

Don’t be stingy with the salt, here. For 1 1/2 cups seeds, fill a  2 1/2 quart saucepan 3/4 full with water Bring the water to a boil, then add to the pot 1/4 cup salt. Bring the water back to a rolling boil, add the seeds and boil for 4 minutes, uncovered.

Drain the seeds well but don’t attempt to dry them because they will just stick to the towels (trust me…).

Preheat the oven to 300 degrees F. Line a shallow baking sheet with nonstick aluminum foil or parchment paper.

Pour the drained seeds into a bowl and toss with some extra-virgin olive oil (or melted butter), Kosher salt, freshly ground black pepper and a little cayenne, if desired. Pour the seasoned seeds onto the prepared baking sheet and roast at 300 degrees F until the seeds are golden, crisp and dry, 35 to 60 minutes. Shake the pan occasionally to redistribute. (If wondering why we’re not using a higher temperature, it’s so that the seeds don’t burn on the outsides before they dry on the insides.)

Let the toasted seeds cool completely on their sheet that sits on a wire rack, which will help them to become even crisper.

(If you used butter instead of olive oil, keep leftovers in the fridge–since the milk solids in the butter makes the toasted seeds more perishable. If chilled, reheat briefly in the microwave to liven them up.)

Just delicious–and a perfect nibble when trying to wait for dinner!

So, here’s what we did today…

Fresh sugar-pumpkin puree and also blanched, oven-roasted pepitas!

The Point:  Fresh pumpkins aren’t around all the time. And, although there is absolutely nothing wrong with using canned pumpkin, knowing how to utilize seasonal abundance enables us to make more cooking and baking choices out of strength and understanding. Additionally, choosing to use a fresh ingredient that’s commonly purchased in a can can help to increase the overall  level of creative and nurturing ownership we feel when preparing and sharing foods– Which feels really good!

Apples in Autumn.

Although leaving summer is depressing for some, each year I’m always eager to see this seasonal shift. Like how the first buds on spring-time bushes signify the promise of eventual heat, seeing firm apples either draped on bowed tree limbs, or heaped in paper bags at local farmer’s markets, nudges cooks of all levels to turn the culinary page and embrace an entirely different kind of cinnamon-scented warmth. 

You see, regardless of the time of year, I’ve usually got something in-route to crispness in the oven and/or blipping its way to succulence on the stove–Yes, I make stock, fresh breads, duck confit, stews and homemade pasta–even during the dog-days of summer! Trust me, this is not to be a brat–although I do! get an occassional adolescent surge of defiance when I feel the professional tug to comply with what’s expected–with what’s considered “normal summer cooking.”

But when it comes to apples, things are different. Cooking apples in the fall makes me (and apparently a lot of other rebellious types…) happily comply with a culinary calendar–And it’s this ingredient that, more than any other, for many, initiates the cuisine of autumn. Anyway, since I rarely cook by a strictly-seasonal book –and since this can sometimes make me seem brazen– I think that’s one of the reasons why I feel so happy when the apple-abundant season of fall rolls around. Because “now” –almost everyone that loves to cook and bake seems to be on the same page. (Believe me, wanting to kvell about the many life-enhancing benefits of waking up to the insane aromas from an herb-stuffed pork belly (porchetta) after slow roasting all night long–in August–Well, let’s just say, it can get a little lonely over here…)

Anyway, in the spirit of unity, I thought I would give all you apple-lovers a few things to do in the kitchen…

If you love to bake, THIS APPLE TART IS A MUST….

A Crisp, Apple-Cinnamon Galette

Or, if you’re looking for something savory to slurp, here’s a hearty, yet elegant soup…

An Apple-Scented, Curried Butternut Squash Soup sprinkled with toasted pepitas (so delish!).

Or if you’d like to make a gorgeous, chock-full of chunk, applesauce to serve with your roast chicken

Here you go

Here’s what my daughter Jessie requested for breakfast, after waking up to the scent of a fresh batch of applesauce.

Warm applesauce, served alongside oatmeal.

Last weekend’s batch.

And, if you want something smooth and luscious to serve along side a platter of potato latkes

This version of applesauce (above) is perfectly smooth and made from a wide variety of apples after an amazing day of apple-picking. Here’s my blog that gives a step-by-step illustration of how I made that particular batch, which was probably my best one yet–I also share what I learned,  that day, about the bigger picture of life….And, if you want to learn all about the many different types of apples and also get recipes that celebrate each types uniqueness, here’s a new book, all about it.  

The Point: To me, the sudden appearance of mounds of apples in September signify more than a seasonal change. Their comforting look, smell and taste remind me of their most valuable quality; their simplicity.  People like to complicate and label things–we especially like to label ourselves and others. In terms of cooking, we deem ourselves to be either “good, so-so, brave, scared, lousy, brilliant, brazen or conformist.” We often either claim to “cook but don’t bake” or it’s the other way around.  But, in the world of apples, things are simple.  Though each variety has specific nuances that highlights their individuality–there is a very distinct and common thread that ties them all happily together. 

Whether we leave apples whole and take a shiny bite, or peel, slice and bake them buried in a pie, or simmer them vigorously and mash them to a pulp–all apples are valued for exactly what they are; an entity that has the potential to bring deliciousness to the world. So, no matter what type of apple you are, I want you to know that you’re also filled with delicious potential. (And, if anyone reading wants to share notes about the gorgeous “crackling” song-sung as a  fresh, crusty loaf cools, we must be from the same heap. I’m just an email away!…)

A bread-fruit that didn’t fall far from my tree.

Jon and I were coming back from our usual morning walk with Mango and as we approached our house we smelled a wood-fire burning.

Now, I know, I know….most people would be more than a bit un-nerved, seeing that we were out of the house and, when we left, our grown kids were sleeping on a lazy Labor Day morning. 

But that’s not how things seem to work in our house.

Anyway…instead of going into the house through the usual front door, we followed the scent–and went into the backyard through the side.

And…low and behold (not surprisingly) there he was!

My son Benjamin was standing in front of a fully fired up grill–

He was roasting a bread fruit over direct flame (no–actually– IN the flames) in our barbecue, using hardwood (at 10 am in the morning!).

When I saw him I remembered that, the day before, Ben brought this–this odd looking thing into the kitchen. I actually took a picture of it because I had never seen it before.

See, my son Ben loves everything about Jamaica–especially their cuisine–so he’s always shopping at West Indian markets so he can cook their native ingredients. To say he loves to cook is an understatement–and his absolute favorite way to cook is using wood, over open flames.

Maybe it’s partly because he evolved in a home where he experienced cooking as anything but a wussy sport! It wasn’t uncommon for my kids to come down the stairs on a random winter day and see me basting chickens as they would roast (in the fireplace!), using a home-made, slow-twirling, string-spit-concoction. SO MUCH FUN!


And here (below) I’m tending the fire in our wood burning oven….(Truly an athletic experience!)

And just this weekend, on Saturday night, Ben helped me maneuver a 2 foot wide paella pan (no joke–the pan covered four burners!).

The next night (Sunday) I cooked polipo (young octopus). I bought them at Randazzo’s my favorite seafood market on Arthur Avenue in the Bronx.

Aesthetically-speaking (be forwarned) polipo is certainly not for the faint-hearted, but this has never bothered Ben.   

Here they are, after cooking at a brisk simmer (covered) in a pot of vegetable broth for 45 minutes–they then were allowed to cool in the broth…Oh, and don’t panic–The poaching liquid is supposed to turn dark purple.

I drained them…  

 Then I used paper towels to gently pull off the outer skin and fat layer (this takes several paper towels). Expect many of the suction cups to come off, too. (This is good.)

Then I cut up the flesh which is now so tender…

See–it doesn’t look so scary anymore!

Then I added some chopped vegetables…

(Celery, jicama, sweet onion, roasted red pepper, pitted oil-cured olives, chives and jalapeno)

And tossed the whole thing with a perky vinaigrette –and then stuck it in the fridge to chill.  

That same day, Ben came into the kitchen and saw that I was about to wrap whole red snappers in leaves from our fig trees.

 The fish are seasoned with extra-virgin olive oil, minced garlic, fresh herbs (thyme, oregano, chives and Italian parsley) and Kosher salt and fresh black pepper).

So, Ben requested that I put some chopped scallions, hot finger peppers and a squeeze of fresh lime juice underneath and on top of each fish (before enclosing them in the leaves)…So, I did!

Ben helped me tie the leaves around the fish with kitchen twine. (He rinsed the strings in water first, to keep them from charring on the grill–such a smart young man…) I chilled them –and took them out of the fridge about 30 minutes before they would go onto the grill.

I filled two chimney starters with hard-wood charcoal and stuffed the bottom with crumpled newspapers (I don’t stuff too tight or it becomes too hard for the paper to ignite the coals–there needs to be some air in there to help feed the fire once you light the paper on fire).

Once I saw flames at the top of the starters, I dumped the coals out onto the grill (underneath the grate)–this usually takes 15 to 20 minutes after fully igniting the paper. I put the grate down and allowed it to get good and hot–then I waited for it to calm down a bit (about 30 minutes after lowering the grate over the hot coals, I was ready to sear the fish).

Just before laying the fish on hot grate, using long tongs, I swabbed the grate liberally with a towel dipped in some vegetable oil (I used a towel that I don’t care about–for obvious reasons). 

I seared the fish over direct heat (the outsides of the leaves should also be brushed with some of the same seasoning mixture used for the fish).

The fish sear for a few minutes, then they get turned (brush some more of the seasoning mixture on top before turning)…

Then they sear well on the second side, then get moved to a cooler part of the grill (to now be cooked using in-direct heat). Yes, the leaves are supposed to become nice and charred –this is what releases their unique flavor onto the fish (and into the air!).

Once the fish are repositioned, the lid goes down–but not all the way. (I stick a piece of wood under the lid so that it doesn’t close fully–it should have an opening that’s about 2 1/2 inches–

If you have vents, just open them, forget the wood).

This next part is determined by the size of the fish, the intensity of the heat and the internal temperature of the fish when it goes onto the grill…This time, for me, after searing on both sides, was about 15 minutes (covered) –They were perfect…

Ta-dah!

Beyond delish–At the table, we  cut off the strings, divided the fish (each one was between 1 1/3 to 1 1/2 pounds–three fish fed the 5 of us-generously (especially since I also served the polipo salad and some other stuff)–6 would be fed adequately).

We just peeled back the leaves, which revealed the most succulent fish flesh–loaded with flavor! And, Ben was right! The added aromatics made both the taste and texture more savory and diverse.

So, back to Ben in the back yard, cooking a bread fruit over a wood fire (not sure if I need to remind you that it’s 10 am on Labor Day…)

We looked closer to see what he was up to…

He started here…

He nestled the fruit in the fire …and he let it cook.

And cook…The entire cooking process took about 1 1/2 hours–He kept turning it with tongs until completely blackened and the fruit became tender, which is what makes it edible.

I’m talking really BLACKENED!

Once Ben deemed it “done” he took it off the grill and threw it onto the grass until it was just cool enough to handle, then he hacked it in half with this “major” knife.

 He brought it into the kitchen and cut it–removing the blackened skin and nudging the flesh off the central pit.

Ben tasted it while still hot….Just look at him work that knife!

I tasted it too–It was really good! The taste is a combination of a potato and a chestnut (delicious)–with a consistency that’s a bit like home-insulation (that last part I could do without).

Here, we’re making pasta together….Dat-sah-my-boy!!

The point: I’ve never pushed cooking on my children. I always trusted that if I cooked and baked from a genuinely loving, playful and curious place–then they would naturally gravitate toward the kitchen; toward the ability to create joy. Now, as a mother, seeing Ben (my eldest) so happily and so deliberately shop, schlep, chop, knead, sear, simmer and bake–my love and gratitude for my kitchen has deepened. This special room has helped my grown children to nurture themselves and those that they bring into their own homes and hearts, as adults. As a parent, there is nothing that could make me happier. (Well…maybe a wedding??…)

Bread for a long delicious weekend.

I was literally aching to make challah this weekend. I skipped a few weeks and I was craving the eggy, buttery, milky, yeasty aroma and taste. So, since I knew the kids would be around, I decided to shape my usual dough into three 8 x 4 inch sandwich loaves instead of my more usual braided loaves.

I wanted to make two loaves with seeded tops (for toast and for sandwiches) and one specifically for French toast (no seeds). The fully risen loaves that  get seeds first get swabbed liberally with an egg-wash (before the seeds go on top)–And the one for French toast gets slathered, both before and after baking, with melted butter. Yum.


In case you’re wondering…

Buttering a loaf before and after baking is the way to get a really nice supple (soft and tender) yet still golden crust. Using a beaten egg (with an extra yolk or two) will give the tops a rich, crisp, shiny finish–especially when the egg is given a small splash of water–Adding milk to the egg, on the other hand, will create more of a matt finish–Adding an extra yolk will create an even deeper outer hue. The glaze also acts as a glue for a seeded top. It’s all great –just personal preference.  Anyway,  when using an egg glaze, I suggest straining it after combining the egg with your choice of liquid. This helps to homogenize the two textures (the white and the yolk) making it less gloppy, thus easier to apply with a pastry brush. Allowing the glaze to sit out at room temperature for a while also helps.

Here are two of the loaves just before baking–One glazed with egg plus 2 yolks and a small splash of water…


Above, one loaf is glazed and then striped with sesame and poppy seeds. The other one is brushed with melted butter).

Just out of the oven…Can you detect the subtle differences in the color of the top of these?…Most of the difference is experienced as textural.

Here’s a broader view…

I’m sure you can see why I was craving this amazing bread…My kids love it–Jon loves it and I’m sure if Mango could get her paws on a loaf, she would love it too… 

The Point: My ache to bake is not just about taste. Knowing that the people I love have enjoyed this bread for so many years helps me, as a nurturer, to be the one that connects my family to a wonderful part of the past–while at the same time, making our “present” so special! Plus, the entire bread-making process is  just so much fun…truly.

So, if you’ve never made bread before, I truly hope you’ll make challah your first!–You certainly don’t need to go very far to get the recipe since it’s right here!  You’ll learn how to make both sandwich loaves and a beautiful 6-strand braid like this…

And, to watch the entire process, my new baking series for TV is about to be born (coming this fall!!)–Stay tuned…

My hand is all betta and I’m cooking & baking like crazy!

My hand is all better and I’m back to my old cooking and baking ways…Although it didn’t take long, it felt like an eternity.  Anyway, the second I healed, I started roasting chickens…

And simmering stews–then rolling out pasta– 

And filling the pasta with leftover stew!!! (Small pasta pockets called ” agnolotti.” Actually, these tiny ones are further refined with the name “agnolotti dal plin”–plin means “pinched”–for little pinched pockets of filled pasta.)


Filled with braised rabbit, vegetables and Parmesan…

 I also did this with sheets of spinach pasta—these are filled with a mixture of cheese and sauteed vegetables.

Then, last weekend, in celebration of Jen’s birthday …

I made my ice cream cake! (To see the video of me making this cake, click here).

Jen is my son Ben’s wonderful girlfriend and since her favorite is gnocchi, WE ALL made gnocchi together (me and the kids)–Although my husband Jon didn’t get his hands involved, he very happily ate! The detailed photos and instructions will all come to YOU in a separate gnocchi-lesson-blog  (coming…) But, just to get you in the mood…


I was also, of course, aching to bake! (Even after being SO exhausted from shooting my new baking TV series–It’s coming this fall!)

So, as soon as I was able, there I was, in the kitchen–working on these delish cinnamon buns so that I can teach YOU an easy way to make them first thing NEXT Christmas morning!)

I know, I know—you must be thinking “this girl is crazy–summer just started and she’s busy making holiday desserts!”

Yes, it does seem a bit strange—but this is what we do–those whose mission it is to teach! We spend the months when nobody is thinking of these things to create. That way, when holiday-time is here, we’re ready to help you to take care of  yourselves and those you love in a way that will make you proud.  

Here’s a linzertorte–before being dusted with powdered sugar (a holiday must!!) …I created this torte years ago for my brother Richard–On June 18 (in celebration of his birthday) I brought this (below) to him as one of his birthday presents.

Such tender nut-filled pastry, filled with raspberry jam. It’s a great edible gift because it’s easy to transport.

Since we were children, the smaller version (cookies called linzertarts) have always been Richard’s favorite….but they’re more delicate, thus harder to transport.

Here is what the cookie version looks like.


I made these (above) with strawberry jam because my kids aren’t crazy about raspberry–See, that’s the beauty of home cooking–things are custom made to make “individual” people happy!

Yesterday, I cradled one in a napkin and gave it to a neighbor (Bruce) who stopped by with two huge Great Danes (Val and Leo–who happen to be my dog Mango’s best friends). You should have seen him (Bruce)–walking down the street–attempting to hold two leashes that were attached to two dinosaurs–He was determined to eat this huge cookie while walking. I was watching him walk down the street… it was SO FUNNY!

Also yesterday,  my computer consultant was here (also named Bruce) and his mom just passed. I gave him one of these giant cookies–which seemed to make him feel a bit happier internally–which made me feel happy, too!

And here’s is my kid’s favorite bread (absolute favorite)….made this past weekend.


My “no-knead” bread, with sauteed onions and olives. It’s baked in a cast iron pot (in a very hot oven) and cradled in parchment.

Below is a simlar loaf  made without the onions and olives–and the liquid component (in the bread below) is all beer (that’s right…beer).

I just wanted to connect and to say a BIG “thank you” to all of those that were worried about me and my hand after my little mishap while making corn fritters…The burn is all better and, as the photos convey–I’m just fine and dandy!!

Love, Laur…

When Frying Corn Fritters

So sorry to have been so non-communicative! But, it’s been for good–no GREAT reasons. I just finished shooting a new television series called “Baking Made Easy with Lauren”…(more details to follow). I’m typing slow at the moment because (wouldn’t you know), a few days after we finished shooting, I burned my hand making corn fritters! Had to make a trip to the emergency room–Don’t panic (although we did) -I’m very lucky…the doc says I’ll heal perfectly, just need a week or two of MINIMAL cooking or baking (a fate almost worse than death to me). My guess, I’ll be trying to get back to my old cooking ways by tomorrow–Jon, of course, will meet me at the door to try to block my entrance, but I have my ways!

Oh..by the way, if you didn’t know this (I obviously didn’t)..when making corn fritters, the whole kernel corn (those closest to the outer surface of the batter), when in the hot oil,  they act like popcorn!! So, even though I used a spatter shield on top of the pot, when I lifted it to turn the fritters, the corn “popped” carrying with it the hot oil–which is what caused several burns on the outside of my right hand.

The Point: Although I’m bummed that my paw is wounded, I’m so happy that I get to help you to avoid the same fate. So (unless you have a full body shield), if making corn fritters, it’s best to chop the corn before adding it to the batter (chop enough to get to the same amount of whole corn asked for in your recipe).  My recipe uses delicious sautéed corn with red bell peppers and onions (BTW: the best corn fritters I’ve ever had…sans the drama, of course.) I’ll get you the recipe asap.

Oh, I’ve missed you! I can’t wait for you to see the series!!! (Coming this fall…)

Laur..

I always have room for Vitello Tonnato

Because vitello tonnato is a specialty of the Piedmont region, this dish was on every menu in every restaurant we visited all through our trip. Having said that, it was only one extremely random and casual eatery that had me driven to make it myself as soon as I got back home–so random that I don’t remember the name of it–bummer. Anyway, I’ve made Vitello tonnato lots of times in a very short time since I’ve been back and so far everyone goes crazy for it–I hope you will, too!

 Vitello tonnato is roast veal that’s chilled, sliced paper thin–and served surrounding a generous dollop of tonnato sauce, which is made mostly from canned Italian tuna (packed in olive oil), anchovies and a homemade mayo. After that–each person has their own rendition–adding things like capers and minced fresh garlic. I’ve made mine with those additions–as well as a few others–that makes this sauce extra savory and delicious.

Here is what the dish looks like –and it’s the picture of the first time I made it (the day after getting home from Italy!).


Quite the home-run, if I do say so myself–(although, since this first time, as already mentioned, I’ve added a few savory accoutrements–but we’ll get to that in a minute).

Let’s start with the meat. In Italy, the cut is different than what I can get here in NY. The meat used by many of the restaurants (in Monforte d’Alba) is from a small shop run by a fabulous butcher named “Bruno Ruddolo”–he’s one of the absolute sweetest men I’ve ever met.

Here’s Bruno…

 In addition to being a very trusted (busy) butcher, he’s also an artisan cheese maker–

This (above) is Bruno’s delicious cheese –one of the ones he’s most proud of–it’s made with Barolo wine, from the Nebbiolo grape, which is native to Piedmont.

The meat used for vitello tonnato, in Italy, seemed to be a much larger slab–than the more petite veal tenderloins I use in NY. But Bruno’s meat was impeccable –Here is the meat from Bruno’s shop.

Below is a picture of what veal tenderloin that I get in the US –On this particular night, since I was cooking for a crowd, I needed two. These (below) are about 2 pounds each, and each which will feed 6, when sliced very thin.

Unless you have an ethnic Italian neighborhood near you, you’ll need to special order veal tenderloin. I get mine at Peter’s Meat Market, on Arthur Avenue, in the Bronx. They freeze well so it’s a great thing to have on hand–just thaw it in the refrigerator overnight.

So, (drum roll pleeese….!) here’s my rendition of vitello tonnato–which, I really do think is the best version yet!

Line a baking sheet (two if making two fillets) with aluminum foil, then top the foil with a sheet of parchment paper (preferably unbleached parchment). Preheat the oven to 325 degrees.

 Season the veal with salt and pepper–then rub the seasonings into the meat with some extra-virgin olive oil. Add a couple of tablespoons of olive oil into a large skillet and heat the pan, over high heat.

Sear the veal on all sides, turning it with tongs, then remove the meat to a plate. Dump out any oil from the pan, then put it back over high heat and deglaze the pan with 1/3 to 2/3 cup of red wine–use 1/3 cup wine for each fillet being seared (a Dolcetto or Nebbiolo is a great choice!) and reduce it to half it’s original volume (it will be syrupy). Place each seared fillet on the prepared baking sheet and drizzle the reduced wine over the fillet–along with any accumulated meat juices from the plate.

Place the veal into the preheated 325F oven and roast until an instant meat thermometer reaches 130F (stick the stem of the thermometer into the top of the thickest spot –until the tip reaches the center–the dial will quickly register the temperature), around 30 minutes, after the initial sear–but start checking at 25 minutes. (The roasting time will depend largely on the girth of the meat and the initial temperature of the meat before searing. Avoid overcooking!)

Remove the meat from the oven and, soon after (while still warm), roll the meat up (with any juices) in the paper and foil, then chill for at least 2 hours–to make the meat easier to slice. (Roasting can be done a day ahead of serving)

While the meat cools, make the tonnato sauce, which combines ingredients that are just to die for! (As, Rudston, our wonderful guide would say “la morte sua!!”)

For the tonnato sauce, you’ll need:

  • 3 extra-large egg yolks, made tepid (Submerge the whole egg in the shell in a bowl of hot tap water for 15 minutes. Separate the yolk from the white and reserve the whites for another purpose.)
  • 2 tablespoons strained fresh lemon juice
  • 1  to 1 1/2 tablespoons Dijon mustard
  • 1 garlic clove, minced
  • 4 anchovy fillets, drained and chopped (if salted, rinse well and pat dry)
  • ¼ cup extra-virgin olive oil
  • Vegetable oil (flavorless) as needed to reach 2/3 cup (after first adding the extra-virgin olive oil to the cup)
  • One 5-ounce can Italian tuna, packed in olive oil, undrained
  • 3 scallions, chopped (remove roots and use all of the white and only 1 ½ to 2 inches of the tender green)
  • 1 tablespoon drained capers, chopped, plus more for garnish, if desired
  • Freshly ground black pepper, to taste
  • Extra sliced scallion greens, or chives, for garnish

Put yolks into the bowl of a food processor with the lemon juice, mustard, garlic and anchovies. Process until homogeneous. Slowly, while the machine is on, drizzle in the combined oils. When done, the mixture should be emulsified and should look like a soft mayo.

Add the tuna with the oil from the can, the scallions, capers and black pepper. Process, by pulsing, until smooth. Refrigerate until ready to serve.

To serve, lay the thinly sliced meat (very thin) on the sides of a plate (so it looks like carpaccio) and spoon some of the sauce into the center. Place some thinly sliced red and yellow roasted peppers on the open sides of the plate (sometimes I’ll add some sliced, pitted calamata or oil-cured olives and a little extra-virgin olive oil to the peppers). Garnish the sauce with some snipped chives or scallion greens and a few more whole capers, if desired. (If you want a thinner sauce, you can stir in a tablespoon or so of water–but the consistency I’m showing you is how it’s done in Piedmont and how I like it best.)

Ta-dahhhh! (Leftover veal stays good for several days in the fridge– Try to slice only what you need since unsliced meat always keeps better (for longer). Also, leftover tonnato sauce is a great dip for raw vegetables and hot, freshly broiled slices of garlic toast.

Candied Poached Pears ala Bruna Alessandria

As reported yesterday, one of the many things I watched being prepared and thoroughly enjoyed eating was Bruna’s poached pears. They were actually amazing–and one of the highlights for me–which isn’t easy since this meal was truly terrific from top to bottom.

This is what the pears looked like right before serving…

Now, don’t get all hung up on perky looks–tight skin, etc.–that is the opposite of what you want here. These pears, which started out hard, were poached extremely gently–for a VERY long time–so, when done, they are meltingly tender.

Since Bruna had the pears started before I arrived, I really wasn’t sure of the exact amounts –and she indicated that she saved the poaching liquid from each batch in the refrigerator and simply added to it for each subsequent batch–So, when I got home from Italy and wanted to recreate these luscious pears, I had to experiment until I got them just perfect…And, here’s how I did it.

Take hard winter pears (that are at room temperature) and place them into a nonreactive pot. The pot size should fit the pears in a single layer on the bottom of the pan. Once you’ve secured the pan, take the pears out and set them aside. (For 4 to 8 pears, I use a 4-to 6-quart enamel-coated cast iron pot.)

Pear note: I’ve done this recipe several times. So far, my favorite type of pear to use is this one (below)…

What’s most important, when choosing pears, is their texture at the onset, which should be good and firm! This way the fruit can withstand long, slow exposure to very gentle heat, which is what will impregnate them with all of the wine’s goodness.

Add two bottles of Nebbiolo or Dolcetto wine (which is the grape most noted for being grown and turned into wine in Piedmont) to the pot and add 1 cinnamon stick, 6 cloves and 4 whole cardamom pods, crushed (my addition), and 6 rounded tablespoons of granulated sugar (3 rounded tablespoons for each bottle of wine). Stir–bring the wine to a bubble, stirring occasionally–then add the pears, put the cover on and leave it slightly ajar.  

Turn the heat down very low (as low as it goes) and let the pears float in this very hot liquid for (depending on the size and firmness of the pears) 4 to 6 hours! (Yes, that’s right.) These pears are very accomodating, as long as you don’t cook them with any aggression.

Important to remember: If possible, work the flame so that the liquid in the pot doesn’t visibly move–Every once in a while, uncover the pot, use your finger to poke the top of the pears to check their tenderness–and twirl them so that the exposed tops of the pears switch positions with the bottoms–giving them equal time in the hot wine. You can also shimmy the pot gently by the handles–which will help them to reposition without risking injuring the fruit.

If you are working with a stove where you don’t have a great deal of control over the heat generated by the burners, use a flame tamer once the pears have been added and the wine has been allowed to come back up to a very hot temperature–Then, just allow the pears to tell you how done they are, as you check them–Use your instincts here–longer or shorter–it’s up to you, your stove and your pears.)

Over this time, you will notice that the wine is slowly reducing and becoming more concentrated–this is good! The skin on some of the pears will start to appear a bit dimpled–but the skin on some will still look taut. The important thing to look for (to feel for) is tenderness–The pears should look swollen and feel very supple–as they say–“like butta.”

When the pears feel extremely tender–the wine is reduced and getting syrupy–take the pot off the heat and let sit for 15 to 30 minutes (which encourages the syrup to cool down and get a bit sticky–which is what you want.

Using a slotted utensil, remove the pears to a platter and immediately sprinkle them liberally with granulated sugar. The sugar will stick to the pears and make them look like a Christmas ornament! Expect the sugared pears to become a bit more dimpled as they cool.

Let them sit out–at room temperature–until you serve them. (These can be served warm, at room temperature–or chilled.)

My favorite way to serve these pears is at room temperature (or even a bit warm)with slightly sweetened crème fraiche…Take a container of crème fraiche and whisk in a few tablespoons of super-fine granulated sugar (this sugar instantly dissolves), along with a few drops of pure vanilla extract. Keep it in the fridge until ready to serve, then drizzle some on top of the pears.

Here is what my pears look like…

Let the syrup cool–strain it and store it in the fridge in a screw top jar–This stays for weeks! Then, the next time  you want to make these pears, just pour this into the pot–add more wine–repeat the spices and sugar–and, once the mixture comes to a boil–add the pears and follow the same poaching procedure. I hope you love these pears as much as I do–and I hope Bruna would be proud of my rendition.

Enjoy! (And please, DO tell me if you try them–and let me know if you need any further clarification)! More to come about my fabulous trip to Italy…

Day 1 of Cooking in Monforte d’Alba, Italy

See, I told you I’d be back soon! 

Ok–We flew, from JFK International airport and landed in Malpensa, the airport in Milan.  Our first two nights were at Relais San Maurizio, a gorgeous spa/hotel (that is a converted Monastery) that’s in the area of Piedmont –a  2 hour car ride from the airport.  Going to a spa was a great way to soften the effects of jet-lag while also breaking up a long trip from the city to the country side, which is where we would spend most of our trip. 


Our first dinner in Piedmont was in the hotel–and it was AMAZING. Ristorante di Guido da Costigiole is a wonderful family-owned restaurant, located in the cellar of the hotel and is still used for wine making and ageing. And, it was here that Jon and I, for the first time, got our first real whiff (and taste) of gorgeous white truffles–And trust me, this was the first of many on this yummy trip. 

The next day, with Rudston Steward (our wonderful guide from Trufflepig) we had a tour of the town of Alba, where we got to go to the very famous truffle market. 


Here are both white and black truffles, displayed in long rows of glass cases, for people to examine, select, weigh and purchase. 


This guy (the big one) had, to me, the best specimens… 

This is me and Rudston (our guide)– 


Can you believe the size of these truffles?! 


Piedmont (Alba) is also known for Hazelnuts–This is where Nutella was born. 


Every place we ate they served a specialty of this part of the world–Tajarin (a thinner version of a tagliatelle) with butter (sometimes sage) and a big fat pile of thinly shaved white truffles. 


This pasta dish isn’t just popular in restaurants–Below is a common “Sunday” activity. Pasta making in the town square! 


And whenever we ate–whether in a person’s home or in a restaurant, we were always presented with a bowl of white truffles to sniff, choose and have shaved on our pasta. Before you think I’m rolling in money…truffles are a fraction of the cost here–This was at lunch–I think–I actually don’t remember because, although the size of the truffles (and my clothing) varied, this picture could have been me at every meal! 


After one night at a hotel in the heart of the city of Alba, the next morning, we drove deep into the countryside, to the heart of Piedmonte, and stayed at a truly magical place, the Villa Beccaris, in Monforte d’Alba. These next three days were so much fun, I could barely catch my breath …and were truly transforming for me as a cook. 

Before leaving for Italy, I had described what I wanted to experience to Rudston (our guide). I said something like this: “I want to be in the kitchen with anyone that really loves and owns the craft of cooking and baking–I didn’t care where. I said “Rudston, please don’t get stuck in “chefdome”–I want to be with mammasitas, balaboostas, grandmas! —Anyone that lives to cook  and bake delicious things!! ” I also said that I want to go truffle hunting. 

Well, to say I hit the “mother load” is quite the understatement. 

Rudston had arranged for us to spend the day cooking (and eating) in the home of Bruna Alessandria, who several years ago was one of the famous “Mothers” at the Restaurant “Le Madri.” She lives in a small farm-house in Monforte d’Alba. Here she is… 


And here (below) is Bruna’s mother, Maria, who just turned 90! Bruna lives with her mother in the same house where she was raised. 


But that’s not all–Bruna also lives with her two brothers Aldo and Flavio–who are both truffle hunters! Below is a photo of me and Aldo–and he’s holding a photo of one of his beyond amazing truffles!  


And, in addition to the the cat and a couple of dogs (and chickens), there was Mickey–an eleven year old Lab. who is their star truffle hunter! 


Mickey and Aldo are a great team!….I’ll write more on our truffle hunt in an upcoming blog. 

This day was all about cooking with Bruna. 

The first thing Bruna got started was the Bagna Cauda, a hot, garlicky dip, to serve with raw and cooked vegetables.  

Bruna’s Bagna Cauda starts with A LOT of thinly sliced garlic… 


The garlic was covered in water and boiled for 4 minutes, then drained (to remove some of the strong taste–you can see why, when using so much garlic). 

Then Bruna covered the garlic with olive oil (pure not extra virgin, which Bruna says is too heavy and strong) and slowly brought it to a simmer, over low heat.  She let this cook approximately 30 minutes, then stirred in some anchovy fillets (only a fraction of the amount of anchovies to garlic.)  

Rudston would translate for me since I don’t speak Italian. 


Then, she cooked this very, very gently, stirring frequently so the anchovies and garlic don’t scorch–Stirring was Mama Maria’s job for most of the day–who stayed glued to the best spot in the house (it was a cold, rainy day)–next to the wood burning stove. 

While the bagna cauda simmered–Bruna got started on the carne cruda (raw veal (extremely lean and of high quality) sliced and chopped (by hand!). 

First the meat is sliced 1/3 inch thick. 


Then the slices are cut into small cubes. 

Then the cubes are chopped (“CHOP, CHOP, CHOP”)– This is not like chopping vegetables where the handle of the knife comes up but the tip of the blade stays down…no, here, the entire knife is lifted up and the heavy blade is dropped down repetitively in one direction, then back to the beginning–to “CHOP, CHOP, CHOP”). She did this (for quite some time) until the meat was chopped small but still had integrity–this is a rhythmical process–the sound was like music (to someone like me, anyway…). 


Brava, Bruna! 

Then the meat gets chilled–so it can relax–until it gets seasoned and promptly served.  

To season the meat, Bruna added a generous amount of olive oil (again, she used pure oil for it’s neutral taste). She would fork the oil into the meat gently–to keep the texture light–she would squeeze in some fresh lemon–and a little salt–then taste–then add a bit more oil–a bit more lemon–a bit more salt–then fork it in and taste again and finally (when not dry but not wet–when you taste just a bit of lemon–and just the right amount of salt–she deemed the mixture “perfecto!”– 


Bruna took a round biscuit cutter and used it to fill with the meat mixture to create uniform servings–actually (since this was the first time I ever had carne cruda and wasn’t sure if I’d like it–I asked for a small portion–So she took out a smaller cutter… 


 Mine is the baby in the middle. 

To serve, the meat was showered with shaved truffles. Shaved Parmigiano-Reggiano is what to use when there are no truffles to be had. 


Geeze, I could get used to this! I couldn’t believe how delicate the flavors were–and how light and gorgeous the texture. I had seconds! 

Before we ate (while the chopped meat was chilling–Mama Maria continued to stir the bagna cauda (with the cat on her lap)–Flavio was on the couch and Aldo was dealing truffles…) 

Bruna put two large boards over the dining table. She lugged out the pasta machine– 


And she went to work on her pasta dough… 


She used the machine to cut the dough into tajarin (long, thin, yellow strands), which she served tossed with yummy butter and… (what else?) MORE shaved white truffles! I’ve made this wonderful pasta, and several others, many times since I returned from Italy. I will show you how to do this very soon. 

After we ate the carne cruda, the tajarine w/ tartufo bianco, then Bruna came out with the bagna cauda –hot–accompanied bya big platter of assorted vegetables (raw bell peppers, endive, cooked potatoes, beets and crusty bread)–Grissini (long bread sticks, which are another food native to Piedmont) were also on the table–and were on every table we ate at during our trip–a recipe is coming. 

Then came dessert–Hard winter pears that Bruna poached for hours in Nebbiolo wine with some cloves, a broken cinnamon stick and a little sugar (a grape native to Piedmont). 


For me, this was one of the highlights of the meal and, when I got home, I quickly wanted to recreate it–So, tomorrow, I will share a recipe that I adapted, in honor of Bruna. 

What a delicious amazing day! 

 I love you Bruna, Maria, Aldo, Flavio, Mickey and…el ghatto! Grazie mille!! 

The trip of a lifetime.

Did you ever experience something that you felt was really personally transforming–and then wanted to share it (talk about the experience) with others but the thoughts and feelings felt so big–too big to begin? Well, that’s how I’ve felt about my recent trip to Piedmont, Italy–which was just before Thanksgiving (thus the reason why you haven’t heard a peep from me since my last blog about making duck confit!).

So, first, I want to apologize–I’ve recieved many sweet, kind (and concerned) emails asking me “where are you??” Please know that I’m never “missing” because I don’t want to connect–I just sometimes become very filled with what’s going on around me and, quite honestly, ever since this past trip (and then with the holidays), I’ve had an incredibly hard time getting out of my kitchen –not a bad thing–it’s because I’ve been having so much fun (no joke)!  I will admit, though, that the continual nagging question “should I or shouldn’t I tell you every little thing about my fabulous trip to Italy?” has helped to keep me in a continual state of procrastination with this blog. Sorry about that.

First of all, I’d like to share why these kinds of journeys are so special to me.

When I travel to Europe, I don’t shop. My goal is to get under the skin of a culture by exploring, in depth, the unique cuisine of a particular region. Why? Because that’s how I get to keep it all alive–When I get home and bring to life the cooking techniques that I’ve learned, this enables me to make (and keep) cherished scents, sites and tastes an integral part of my everyday existance–This way, all my cherished experiences in far away places can continue to color my life and, ultimately, to create the feeling of joy–and not just for me.  I’ve found that learning authentic Old World cusine (for modern folks like you and me) is a wonderful way for me to”get” and then, by teaching others, I also get to “give.” I love that. 

So, because this particular 8 day trip was so extensive and so valuable to me (and kept Jon and I so busy that we could barely breathe–in a GOOD way) …and because it would take the length of many blogs to convey every single step–I’ve finally decided to take you, one experience (and recipe) at a time, through my amazing journey.

But, before I do anything, I need to tell you about the fantastic company that designed this trip of a life time, for Jon and I.

Late last spring, when I started to think about where Jon and I should go on our next trip, I started to think about the best meal I ever had, which was last December, in a restaurant in Barcelona. (If you read my blog called “My birthday in Barcelona” you know that I (as are most sane people) am in love with white truffles.” So, I waited for the right moment and said to Jon …Honey, why don’t we go truffle hunting in Italy next fall?” I immediately got really quiet and waited to hear him laugh. (No laughing –Yay!!)

A few weeks later, Jon came home and told me about a company that he heard about from a friend called Trufflepig (There’s no space in-between truffle and pig–just one glorious word.) Now, before you get the wrong idea, despite their name, this company, that’s based in Canada and Paris, “truffles”are not their specialty–The name Trufflepig is actually meant to convey their metaphorical specialty, which is to sniff out all the sources to create a custom-made, dream vacation for their clients (sniffing– truffles– pigs, get it??) It just so happens that my absolute dream vacation would test their ability to provide both, a literal and figurative translation, which they did so perfectly–so beautifully. (BTW: this company is certainly not limited to do “foodie” vacations–they do custom trips that aim to float the boat of clients with a wide range of interests and they do it all over the world, not just in Europe.) Jack Dancy is who you want to talk to at Trufflepig (tell him I sent you)–and Rudston Steward was our more-than-amazing guide, who planned everything from the hotels, to the restaurants, to the very specific people and places that we went in order to build us a trip that was not just dripping in truffles but also filled with culinary adventure, real learning and also resulted in many new friends.

 By the way, when in season (which this was) truffles in this part of the world are like chocolate in Hershey Pennsylvania—There will be more about that to come…)  

So, to begin to finally share with you my culinary growth spurt–I want to start at the beginning with my first request for Trufflepig–before I even left for Italy. Since I wanted to use this trip to learn about the foods of northern Italy–not just about truffles–I did some research. When reading a recent issue of La Cucina Italiana, I saw a book that they recommended that was all about the foods of northern Italy, called “Italian Farmers Table“–which I promptly bought on Amazon.com. (A fabulous book!!!)

In this book, one of the recipes that immediately caught my attention was for “Croxetti” also called “corzetti”–coin shaped pasta that’s embossed on both sides with an ornate design–usually a family crest. When I tried to find an online source for the wooden stamps, I learned that only a very few artisans make them–all in Liguria–which, although it’s not Piedmonte, it was in northern Italy and I was hoping that Rudston (our guide for our upcoming trip) could help “sniff out” an artisan who could make me a custom-made (corzetti) stamp. Rudston went to work and, of course, he came through!–and this was just the very first thing he did to help my dreams come true on this fabulous trip.

Now, it’s time to share with you what I learned! First of all, since I’m sure (if you love to cook) I’ve stirred up your curiosity about croxetti pasta–So, let me give you the name and contact of the wonderful artisan who made me my stamp and sent it from Liguria, Italy. His name is Franco Casoni and his email is: studio@francocasoni.it As soon as I got home from Italy, I emailed Franco the artwork and my stamp arrived about three weeks later. The cost, all in (with postage) was about $65.00)

This is what my stamp looks like when put together (raw rounds of pasta dough get sandwiched in between the top and the bottom):

 Here’s the stamp opened revealing the concave side that cuts coins (rounds) out of the sheet of pasta dough (the other side of this part has my LGK logo embossed on it). The other part has a floral design embossed.

 Below (although it’s hard to see) is the other side of the part that cuts the dough into coins (showing my logo).

So, first you need a nice and firm-yet totally supple– pasta dough… (2 cups OO flour, 2 extra large eggs, 3 extra-large yolks, 1/2 teaspoon Kosher salt).  

After dividing the dough into pieces, you’ll roll it out using a pasta maker only through the second setting (but do it three times!). (Although I love rolling pasta by hand, you won’t be able to get smooth coins out of scraps of dough–so it’s best to use a machine, whether hand-cranked or electric). So, divide the dough into quarters and, working with one piece at a time, flour the piece and roll it through the first (widest) setting four times, folding and flouring in between–this strengthens it. Then, go to the second setting and roll it through three times, flouring when the dough feels at all sticky. Then, lay the sheet out and cut out coins (rounds), using that side of the stamp.

Now, take the rounds of dough and place them over the inverted side that you used to cut. Place the other part of the stamp on top of the round of dough and “press” to emboss it with both, your insignia and the design that’s on the other side (By the way, all of this design stuff is all up to you–you design it, Franco makes it and sends it!

After lifting off the top part,  you can see the floral design on the top of the dough. The bottom side of the dough has my LGK logo

Here are my little bubalahs drying…don’t you just love them?!

Place the coins onto a floured sheet pan (I place a silicone mat on a baking sheet and rub some flour into it). Leave them out to dry for 1 hour or longer before cooking them in plenty of boiling, salted water for anywhere between 10 to 15 minutes. This will depend on how long you’ve let them dry before cooking them.

Before putting the coins in boiling water, have your sauce started…

Melt some butter in a 3 1/2 quart, wide, sloped saucepan. Add a good handful of pine nuts (pignoli) and, saute the nuts, stirring frequently, until both, the milk solids in the butter and the nuts turn a toasty brown (not black–just nice and golden brown).  Remove the nuts with a slotted spoon to a bowl. Add to the browned butter, 2 cloves of garlic (minced or pressed through a garlic press), a generous splash of cream, a double generous splash of good homemade chicken stock and a tablespoon or so of chopped marjoram (use fresh oregano, as a substitute–a couple of chopped sage leaves (called “salvia” in Italian) is also good. Heat the liquids and butter together to release the flavors of the herbs and to get things piping hot–then add the cooked pasta coins (make sure they’re tender first!) and, if needed, thin the sauce with pasta water.

Once the pasta is added, stir in the toasted nuts and a good handful of freshly grated parmesan…


Shimmy the pan to help everything dance together well, then hurry up and eat! BEYOND DELICIOUS! (Serve with extra grated Parmesan and a competent pepper-mill passed at the table…)

So, although I couldn’t meet the artisan Corzetti stamp maker (Franco Casoni) when in Italy, that didn’t mean that I couldn’t eventually cook using an authentic, hand-made tool–by him,  just for me. 

The Point: Although I know that it probably seems very odd to start a blog all about the best parts of a trip –with something that happened once I got home (and not even from the exact territory where I traveled)–but I want to illustrate how this amazing company, Trufflepig, not only respected my desires but made it their mission to create the experience of a lifetime–And I just couldn’t go into all the wonderful things about this trip without saying a big fat public THANK YOU to those at Trufflepig!

The next blogs will be all about truffles, (including truffle hunting), tajarin, carne cruda, grissini, vitello tonnato, agnolotti dal plin, candied poached pears, hazelnuts–So many delicious, gorgeous experiences–with interwoven recipes all inspired by this trip to Piedmonte, Italy. I’ll be back (very soon)! (Yay, my blogging slump is officially over!)

A meatball story.

As a cook (and as an eater), I’m very passionate (ok opinionated) about certain foods–For instance, I feel the texture of matzo balls must be extremely light and tender and literally swollen with flavor. Then there’s roast chicken, which should be incredibly crisp and well-seasoned with cooked flesh that’s perfectly succulent (even the white meat). Ethnic, artisan breads (the large round and/or oblong kind) need to be externally VERY crusty–actually cracking in places– The color of the crust should be deep and dark–which indicates a caramelized, slightly charred taste–and the inner crumb needs to be soft–tender, yet chewy–but never tough. (FYI: Some recipes that aim for “big holes” in the baked flesh sacrifice tenderness–so home-bakers beware!) I like gravies that cling without being gloppy, tarts that celebrate the crust as much as the fruit and muffins that are so good that you eat the whole thing–not just the tops.

I’m also very particular about my meatballs. First inspired by Mabel, a large, round, southern woman-of-color (who had a gold front tooth), she worked for my parents when I was growing up in Long Island. Mabel was–how should I say it?–She was on the mean side–but she also made a mean meatball, which were almost base-ball sized, very tender and always gurgling in red sauce. (I think her sauce of choice was “Ragu”). I loved her meatballs so much that just smelling them simmer made me like her –even though she had absolutely no personality–except when being mean.

Since I didn’t grow up cooking (along side the meanie) I just would sit and ponder how making my own meatballs someday might make my children feel–My initial reaction to Mabel’s meatballs is actually quite integral to why I became so committed to “the power of cooking”  for my “someday” family–I would fantasize about how my kids would walk into our home (after school) and feel immediately kissed –completely bathed in sensory deliciousness–and I would be at the helm.  From the time I was the ripe-old-age of seven, I knew, for sure, that being the creator and orchestrator of such a satisfying dimension to life would be something to be very proud of–I still do. I also felt that doing so would be very healing for me–it was and still is.

So, you see, great meatballs are a big deal to me and growing up in a house that didn’t actually teach me how to make meatballs–I’ve had several twists and turns along the way to being able to make them successfully and (now)  to teach them to you.

Meatballs after Mabel…

As soon as my two older brothers were secured in college,  my parents decided to fire Mabel, give away Peter, my Maltese dog, and to sell our house in Long Island. Since I was only 15, they were stuck with me. So, the three of us (me and my parents) moved to NYC, where I finished high school. They employed a Chinese couple, the female (named MiMi) cleaned and the male (pronounced “I-O” as if saying each letter alone) –he cooked. I would try to watch I-O cook–He was very good at making Chinese food (duh..)–His food was more refined, though, and more of a French-Chinese fusion cuisine—So (I know) I should have thought twice before I adopted his “meatballs” as my own, especially considering they didn’t speak to either his Chinese heritage or his French-Chinese specialty…But, then again, I learned early on that sublime-ness can be found in the most unexpected places (remember who my original inspiration was (!) Don’t get me wrong–it’s not that I-O’s meatballs weren’t tasty–they were–and tender, too (although much smaller, they were almost as good as Mabel’s).  But, his ingredients would make any Italian worth a dime gag.  Listen to this: He reconstituted crushed cornflakes in milk and added this to the ground meat–See, I told you.

So, although these, my first stab at making homemade meatballs, were a good start, (I actually came up with a pretty good concoction and put that recipe in my first cookbook) they weren’t close to the meatballs that I make now –which I do believe are simply perfect.

The night I heard how to make real meatballs…

One night, a few years back, Jon and I were out to dinner, at an Italian restaurant.  Because it was crowded, we decided to eat at the bar–which we actually choose to do often, since we’ve met some very nice, interesting people that way. This night, the conversation (amongst the bar-tender and several women at the bar) turned to meatballs. As they talked, my life in Long Island (and my passion for meatballs) flashed before me–I became totally quiet and, with an intensity in my eyes that my husband knows well,  I looked at Jon with that “oh my God, I’m going to finally hear how real Italians make meatballs” look. I was determined to hear every word. 

Like all Italians that cook innately, they don’t measure anything –they just talk about food as if a dish would appear simply by uttering the words…(Trust me, I was being internally serenaded–visualizing meatball heaven, just by listening). I came home and, the very next day, I went to work—It took several times–and I deviated a bit from what I learned that night at the bar–adding a few ingredients that I feel made exactly what I wanted: Meatballs that are loaded with flavor and an oh-so-soothing texture.

Finally, here is my meatball recipe that I proudly give to you, with love.

(I think I’m gonna cry…)

Homemade Meatball Heaven

OK, don’t be mad but I’m going to give you a large recipe–simply because these meatballs are so delicious (and freeze so perfectly) and also because you need the exact same amount of tools and cookware to make a small batch. Having said this, I purposely created a recipe that can be halved right down the middle.

Another thing–I make BIG meatballs–I like it that way–so if you want yours smaller, be my guest (that’s part of the beauty of home cooking).

Ingredients for 22 to 24 large meatballs (mine start out the size of small soft-balls but, after simmering, they end up smaller):

  • 4 slices “hearty” style white or wheat bread, crusts removed and the bread cut into small cubes
  • ½ cup milk
  • 2 extra large eggs
  • 1 medium yellow onion, peeled and cut into quarters
  • 6 cloves garlic, coarsely chopped
  • ½ cup prepared basil pesto (homemade or your favorite store-bought brand)
  • ½ cup freshly ground best-quality Parmesan cheese (plus more for rolling meatballs and serving)
  • Freshly ground black pepper, to taste
  • 4 pounds ground meat (Ask the butcher to grind equal amounts of beef and veal together. You can also include ground pork in the mix.)
  • Between 5 and 6 quarts Marinara sauce (preferably with lots of fresh basil and sautéed mushrooms)

To soak the bread: Put the cubed bread in a bowl and add the milk. Use your hands to help the bread absorb the milk. Set aside.

To assemble the meatball mixture: Put the eggs, onion, garlic, pesto, ½ cup Parmesan and a generous amount of freshly ground black pepper into the blender. Puree until smooth.

Put the ground meat into a large (preferably wide) bowl and pour the pureed mixture on top of the meat.  Add the softened bread cubes to the bowl, as well.

Using your hands, work the pureed mixture and moistened bread into the meat, using a tender hand—you’re not squeezing or kneading the meat aggressively—which can toughen the meat. Just use your hands to fold the two consistencies together, turning this into one mixture.

To set up to form meatballs: Line two large shallow baking sheets (or trays) with wax paper and then sprinkle the paper generously with more grated Parmesan.

To form meatballs and chill: Use your working hand to scoop up some of the meat mixture (again, mine start out the size of a small soft-ball–but they get smaller after simmering). Gently round the shape by rolling the meat mixture between two hands. Lay the round on the cheese-lined tray and continue until you’ve finished shaping all the meatballs, dividing them between both trays (expect the meatball mixture to be soft).

Then, one by one, roll each meatball in the cheese, then round the shape again, helping the cheese to adhere.

When all the meatballs are coated with the cheese, cover the sheets with plastic wrap and refrigerate for at least 30 minutes (and up to several hours).

To set up to cook the meatballs: Bring the marinara sauce to a simmer in a 10-quart heavy bottomed saucepan, over low-heat, with the lid ajar. Remove the meatballs from the refrigerator.

To brown the meatballs and simmer: Heat one or two large non-stick skillet(s), over medium-high heat, with a shallow layer of olive oil. When the oil is hot, brown the meatballs, in batches, turning the meatballs over carefully, to brown on at least two sides—(Before placing the meatball into the pan, use your hands to re-round the shape and avoid damaging the meatball when turning—using a non-stick turning spatula as well as tongs, will help give you the dexterity you need.)

Try to shift the meatballs, so they brown on three sides…

As you brown the meatballs, place on a clean tray. Once all the meatballs are browned, lower them into the simmering sauce. Once in the pot, don’t stir—using oven mitts, shimmy the pot –using the side handles—to help the meatballs settle in and become submerged in the sauce. The sauce should be on VERY low heat.

Cover the pot and simmer the meatballs (very gently!), over very low heat, for 45 minutes to 1 hour. Don’t wait for the sauce to return to a simmer before you begin timing–If the sauce was simmering at the start, you will only see the barest bubble at the center of the sauce, after adding the meatballs. If your meatballs are smaller, you’ll simmer them less.) Turn off the heat and add more black pepper and, if desired,  a few cloves of minced raw garlic and more fresh basil, to taste.  Shimmy the pot to distribute things. Take the pot off the stove.

Now…Dat-sa nice-a!

No joke. This recipe makes the best meatballs I’ve ever had.

To divide and store: If not serving right away, allow the meatballs to cool in the sauce (uncovered). Divide the meatballs between squatty-shaped plastic tubs. If you’d like to serve some and store the rest, transfer the amount of meatballs and sauce you’d like to serve into another pot and, if planning to reheat within two days, store that in the refrigerator, covered. (If planning to serve withing a few hours, leave the pot at a comfortable room temperature.) Place the rest into a freezer container and attach a label with the contents and date. Freeze. To thaw, remove from the freezer and leave in the refrigerator overnight. Once thawed, reheat very gently until piping hot, adding some more fresh pepper and basil, to taste.

To reheat and serve: Reheat the meatballs, covered, over very low heat, shimmying the pot as needed, to help things heat evenly. Serve the meatballs with sauce, piping hot, over freshly cooked spaghetti or linguine.

The Point: As a lonely little girl, I never would have guessed that meatballs constructed (simmered in Ragu, no less) and offered by someone I deemed “a meanie” could possibly help to create the impetus for so much of what my adult life would be about, both personally and professionally, but they DID just that! So, today, when I reflect back on Mabel, on her often hard, stoic ways–all mixed and simmered with her amazingly tender meatballs –I remind myself that these experiences are examples of how easy it is to acknowledge adversity -and then to simply stop there.  But, (and this is the important part) when we choose to use that same perception of lack as fuel to build the kind of life we really want –Now, that’s the secret of a great meatball in a whole different category.

Click here, for a printable version of this meatball recipe.

Home Alone Food

Jon qualified for a national golf tournament! We had been talking about him going to Orlando for weeks–yet I never thought about eating alone–until the day before he left. 

A little history: I’ve been living with Jon since I’m a whopping 17 years old–married at 19. My oldest child, Ben, will turn 28 at the end of this month–and he was born when I was 24 (I’ll let you do the math…). So, eating alone wasn’t something that I’ve had too much experience with–other than when I had to relocate to Vancouver, to shoot the TV series for PBS. But that was different. Being alone all day and night in the home where my children, my marriage and my career all evolved–this impending solitude felt bizarre–and yet (dare I say…) exciting!

So, here I was, at home alone with Mango, my 4 year old yellow Labrador Retriever. Friends would call and let me know they were there–but, the truth is that I wasn’t looking to fill up my dance card. I wanted to really use this time to see how I felt about being all alone with myself.

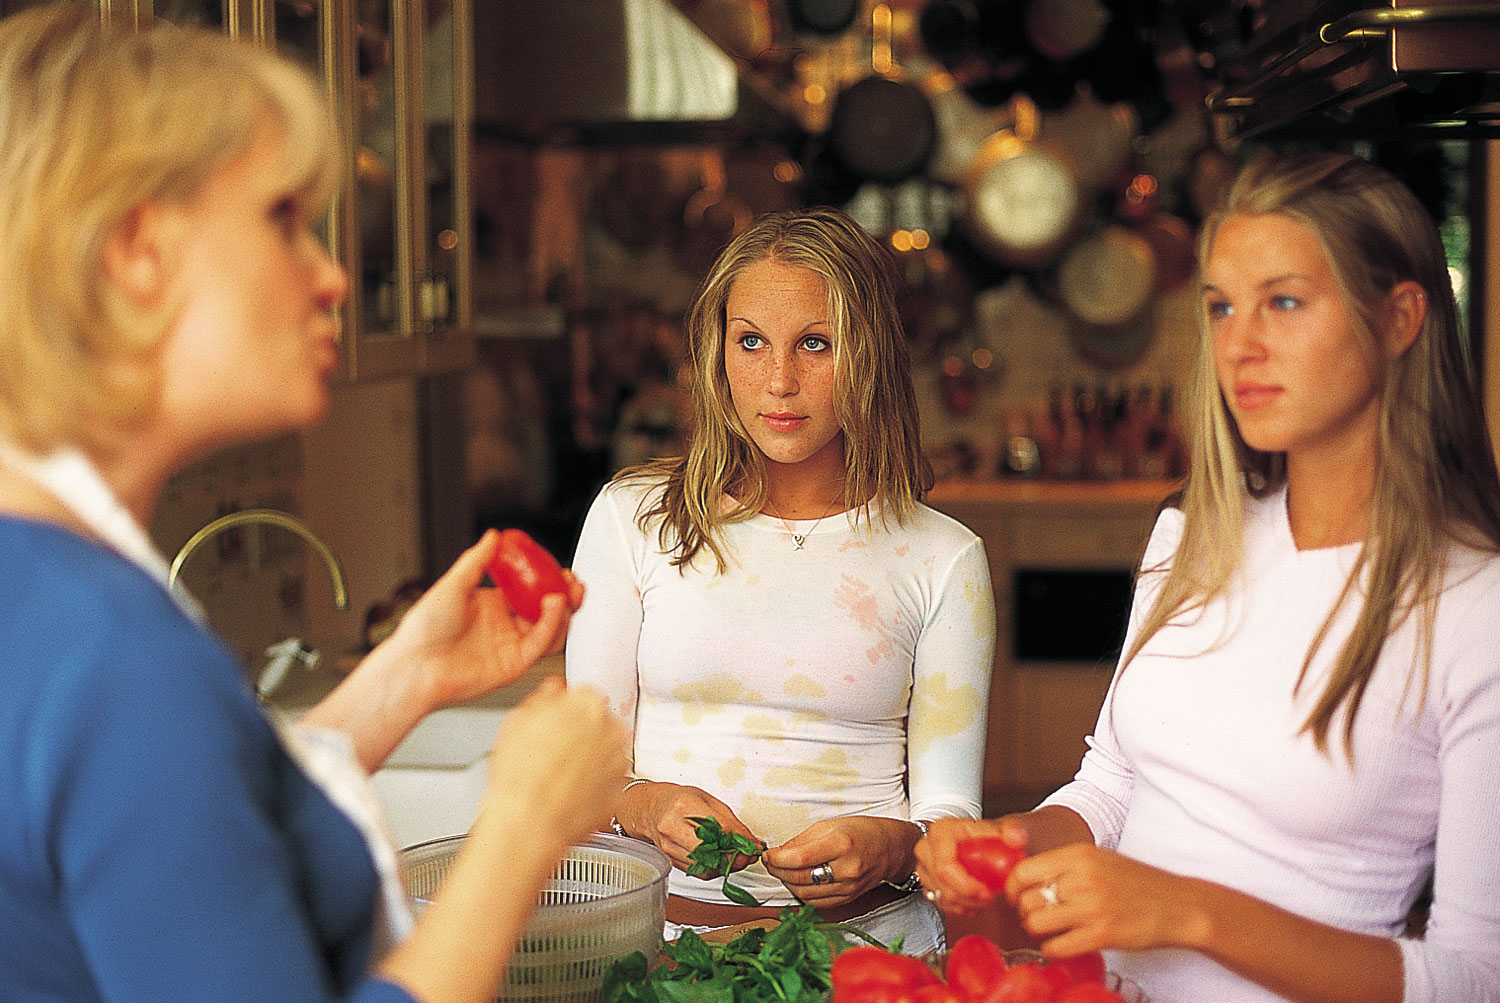
Over the years, many of my students have expressed their frustration–either because a spouse didn’t arrive home at an hour conducive to shared meals or due to sudden (or not so sudden) circumstances, there was no spouse at all, due either to divorce or becoming widowed. Either way, the result of being partnerless was always the same: Lovely and lovable people who didn’t feel motivated or entitled to cook and/or bake for themselves–or for their children–without the presence of another adult —someone else that would somehow validate their entitlement to have a fine meal at the end of a long day, simply because they’re worth it. So, suddenly this time felt special–and valuable to more than just me– this was my time to show us ALL that we ALL certainly are worth it.

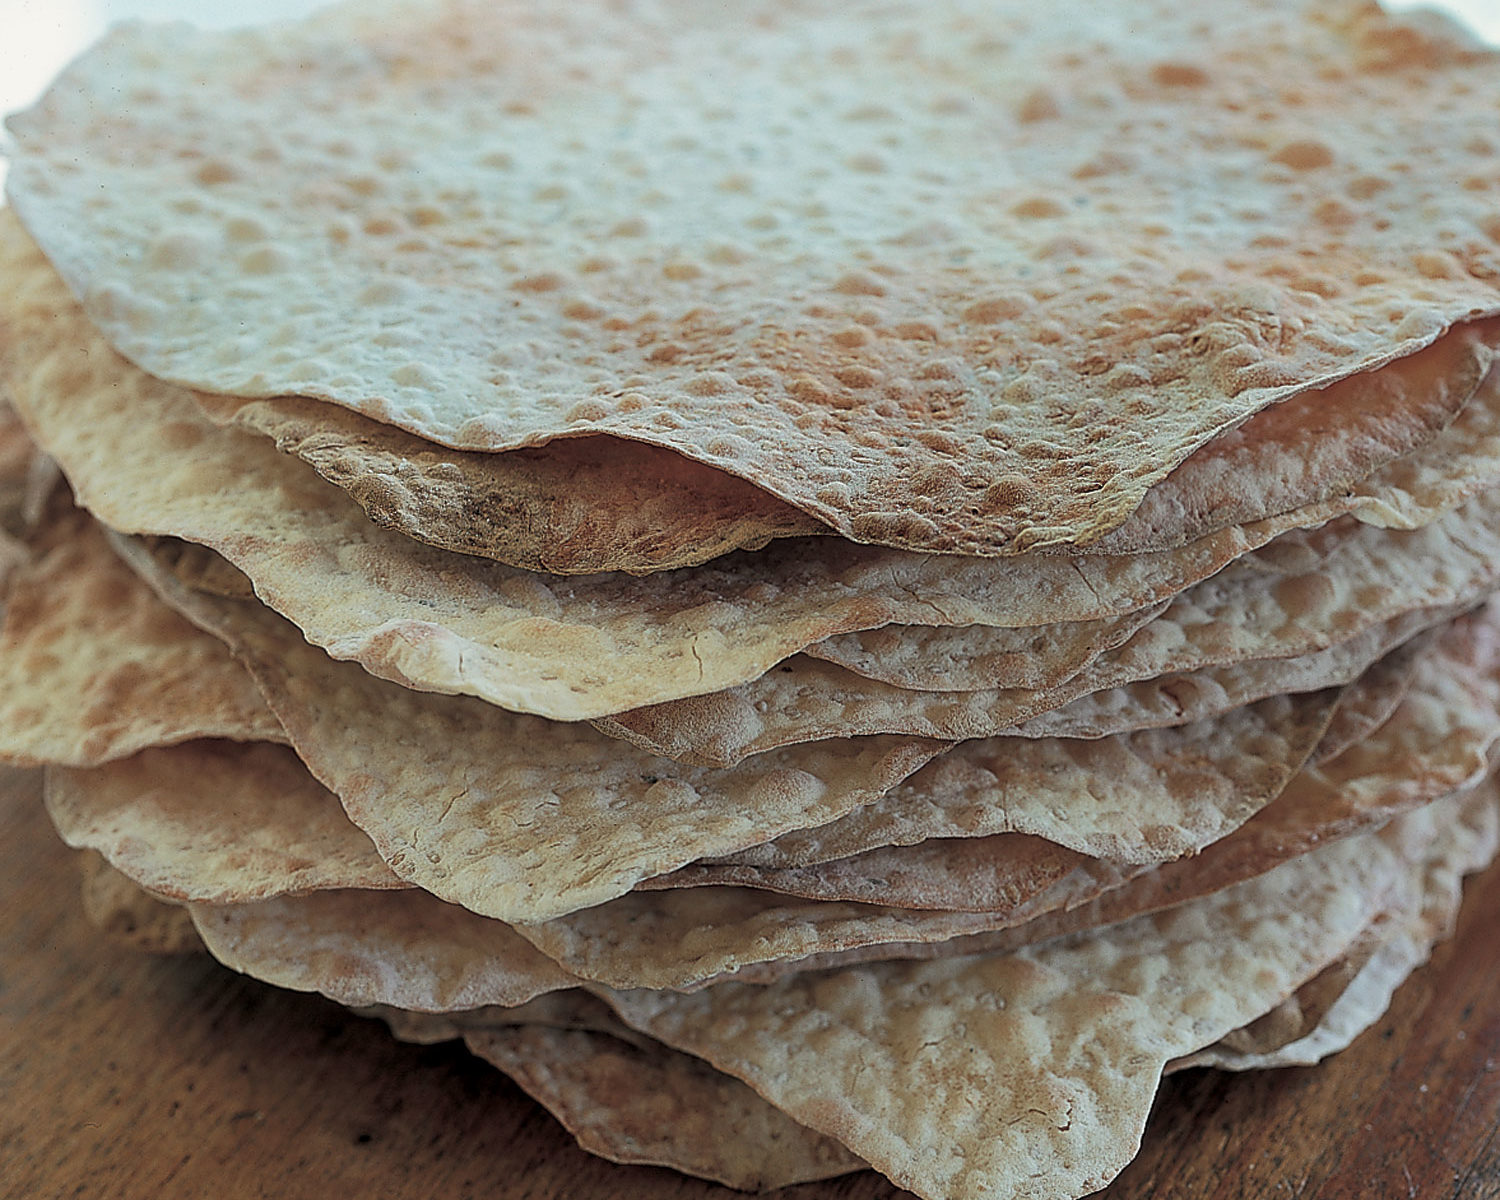
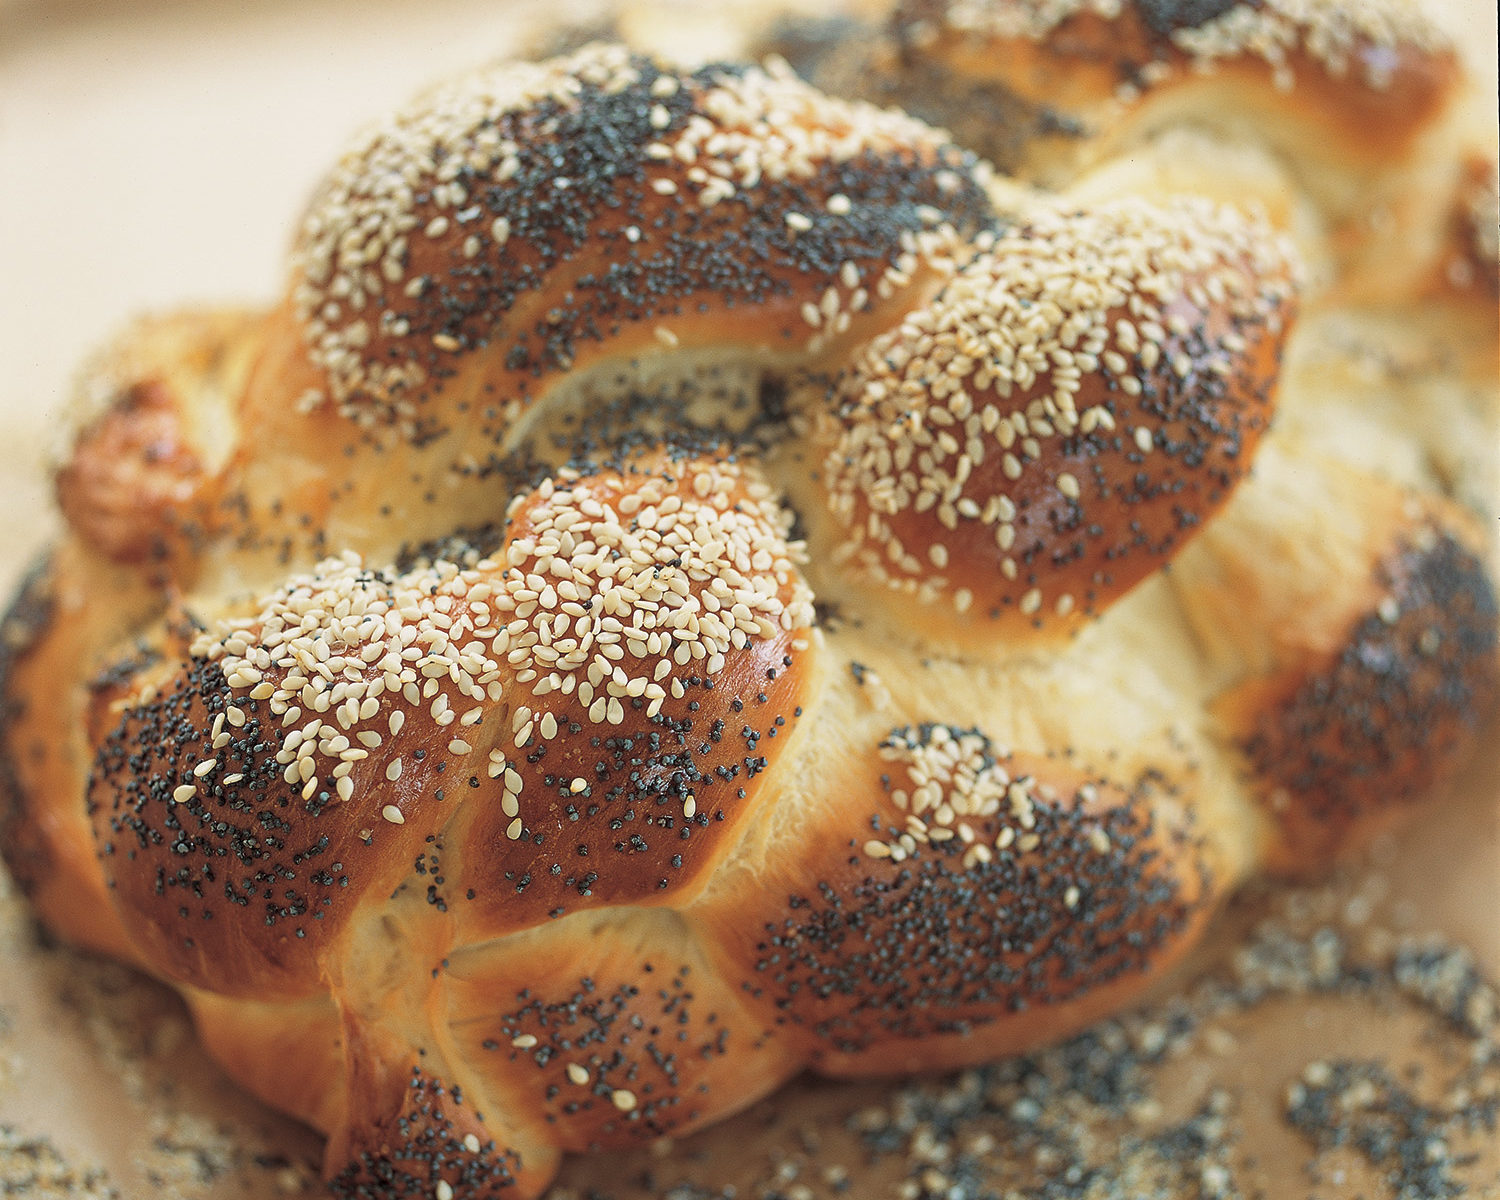
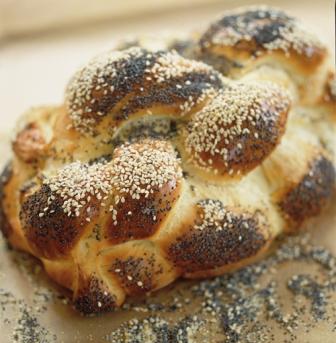
When Jon left early that morning, he was lucky enough to miss the torrential rain that was about to descend (and relentlessly stay) for days–As soon as I knew he was up in the air–I asked myself “OK, Lauren, what now?” Then, I decided to do what I always do when I need to feel connected to my power to create my own happiness–I made bread. And, as expected, kneading the dough and knowing that it, too, needed me was all it took to get the ball rolling…

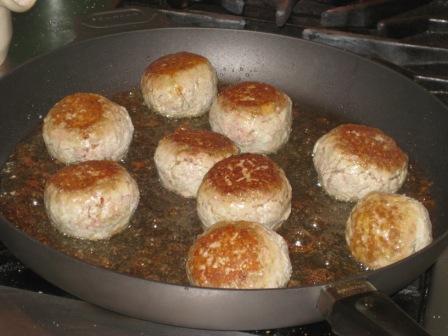
With the dough made and rising, I took a container of frozen meatballs that were suspended in a block of marinara sauce out of the freezer to thaw. I went to the market and bought a container of small floating balls of fresh mozzarella cheese and a single bunch of pencil-thin asparagus, which I washed, dried and then placed on my favorite blue-gun steel baking pan that I had first lined with non-stick aluminum foil.

Once on the pan, I rubbed the asparagus liberally with a mixture of extra-virgin olive oil, minced garlic, hot red pepper flakes and black pepper that I coarsely cracked and, over the top, I dropped a dose of  Kosher salt.

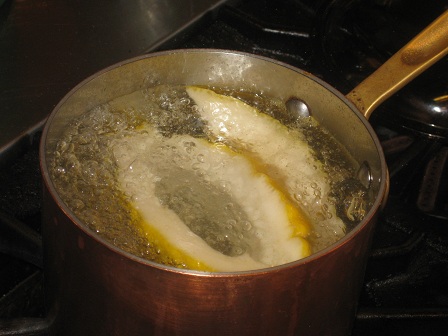
I had the music on (channel 31 on XM) while I shaped the oh-so-sticky dough, let it rise again until billowy, on a sheet of unbleached parchment paper that was first sprayed with olive oil –and then sprinkled with a mixture of cornmeal and whole wheat and white flour. Oh–and to help guide the sides of the dough as it rose, I had placed the paper (cradling the dough) seasoned side up, inside of a stainless steel bowl that measured about 9 inches across the top–While the dough was rising, I had the oven preheated to very hot (500F) with thick slab of terra-cotta (my pizza stone) on the center shelf and, on the stone, sat a cast iron pot, it’s lid secured.

When the dough was ready, I slashed and salted the top, took out the (extremely  hot) iron pot, placed it on a trivet, uncovered it and placed the lid on another trivet. I lifted the paper cradle and lowered the whole thing–the paper and the raw loaf–into the pot. I grabbed my mitts–recovered the pot and placed it back into the oven, onto the hot stone–shut the door, lowered the temp. to 475F and baked for 30 minutes. I then uncovered the pot, lowered the temp. to 450F and baked for 20 minutes more. I turned off the oven and let the bread sit there, undisturbed for 15 minutes.

I opened the oven…

ohhh….I felt so happy. Then I felt guilty about feeling happy (“Who makes bread for themselves when home alone?” I thought).

Then, as the bread sat on a wire rack,  the crust singing as it cooled,  I got annoyed about feeling guilty. (“What makes someone else more entitled to this loaf than me?”) I let the bread cool until dinnertime.

Mango and I had been out several times that day, walking up, down and around sopping wet streets and corners –those that hold many personal memories, especially since Jon and I both work from home and usually travel this same path together, daily. Every once in a while, Mango would look up at me, her eyes blinking at half-mast to keep out the rain. I imagined the question in her expression. “Walking me alone–and in the rain– is still fun for you, right?”)

As the night rose on a sunless day, rain still spilling from the sky, it was the first time I thought of the table. Where was I going to eat? From the very beginning, ever since Jon and I moved into the house–ever since my kids were born, each night at dinner, there they were–first reclining in padded infant-seats–then propped in high-chairs–then balanced in booster seats, etc. And to this day, every night, whenever we eat at home (regardless of what I’m serving), we always eat at a set table and always by candle-light. Would things change now that I was home alone? Should they change?

Oh, please. Are you kidding?!

Although I didn’t want to eat alone at a big dining room table, I also didn’t want to eat on a couch, in front of a television set. So, since we have a counter and stools in the kitchen, I “set” the counter.

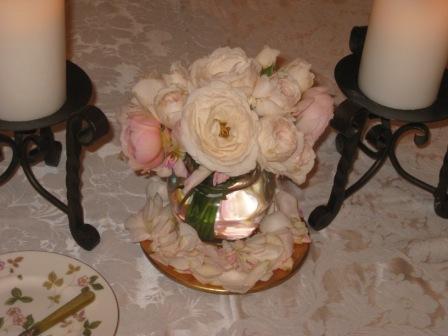
But something was missing…

I slipped on my water-proof shoes and blue hooded rain-jacket. I grabbed my scissors and, despite the pouring rain, I went outside into the garden.

I preheated the oven, for the asparagus, to 450F.

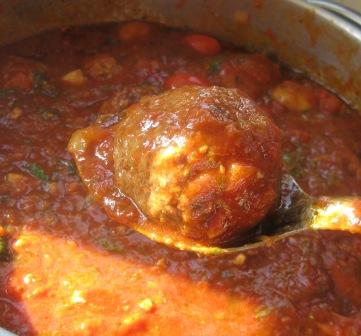
Meanwhile, I slowly reheated my meatballs…adding some fresh basil to the pot.

I brought some water to boil and then I turned the water to a simmer, while I roasted the asparagus for 20 minutes.

I assembled a simple salad.

Since I always keep roasted peppers in the fridge…

— I added them to the plate of heirloom tomatoes, mozzarella cheese and baby arugula, which I served with some great olive oil and balsamic.

Several minutes before the asparagus were done, I melted some butter in a pan with sloped sides and, to the butter, I added a few cloves of minced garlic and some beef stock (I always have tubs of all sizes of stocks of all kinds in the freezer.) 

Two minutes before the buzzer sounded for the asparagus, I raised the heat under the boiling water to the max–I added a great pinch of salt to the pot, and then added some dried cappellini pasta.

I sliced the bread…

 Buzzzzzzzzzzzzzzzzzzz…(the oven timer.)

Roast asparagus are amazing! Since they cook at such a high temperature, the spears get really crisp and caramelized (especially the tips)–which truly elevates the taste and texture.

I tossed the pasta with the butter and stock. (By the way, if you didn’t have stock, you could always just use the pasta water), and then I lit the candles…

I poured the wine (a red from Argentina). Yay, it’s time to eat!

Boy, that was GOOD!

Day Two: It was still raining. The wind was howling–and the covers on my patio furniture had half-blown off (the other halves were anchored down with the weight of rain-water). Several of the chairs around our table were knocked on their sides–random branches were down–and whatever ripe fruit that had been clinging to the tops of my fig trees were now, lucky for Mango, rotting in the soil below. The towels used to dry Mango were all damp, dirty and covered with pale hairs.

I had some appointments in Manhattan so I took the train into the city, looking forward to shop for dinner at the market in Grand Central Station.

As I traipsed around the market–After having meatballs last night, I knew I wanted fish for dinner. I also knew that I had leftover bread, cooked pasta and roasted asparagus–All things I wanted to revisit. I also knew that a friend, who runs a great Italian olive oil and cheese of the month club–she had sent me some of her most resent imports so I could develop some recipes for an upcoming newsletter.

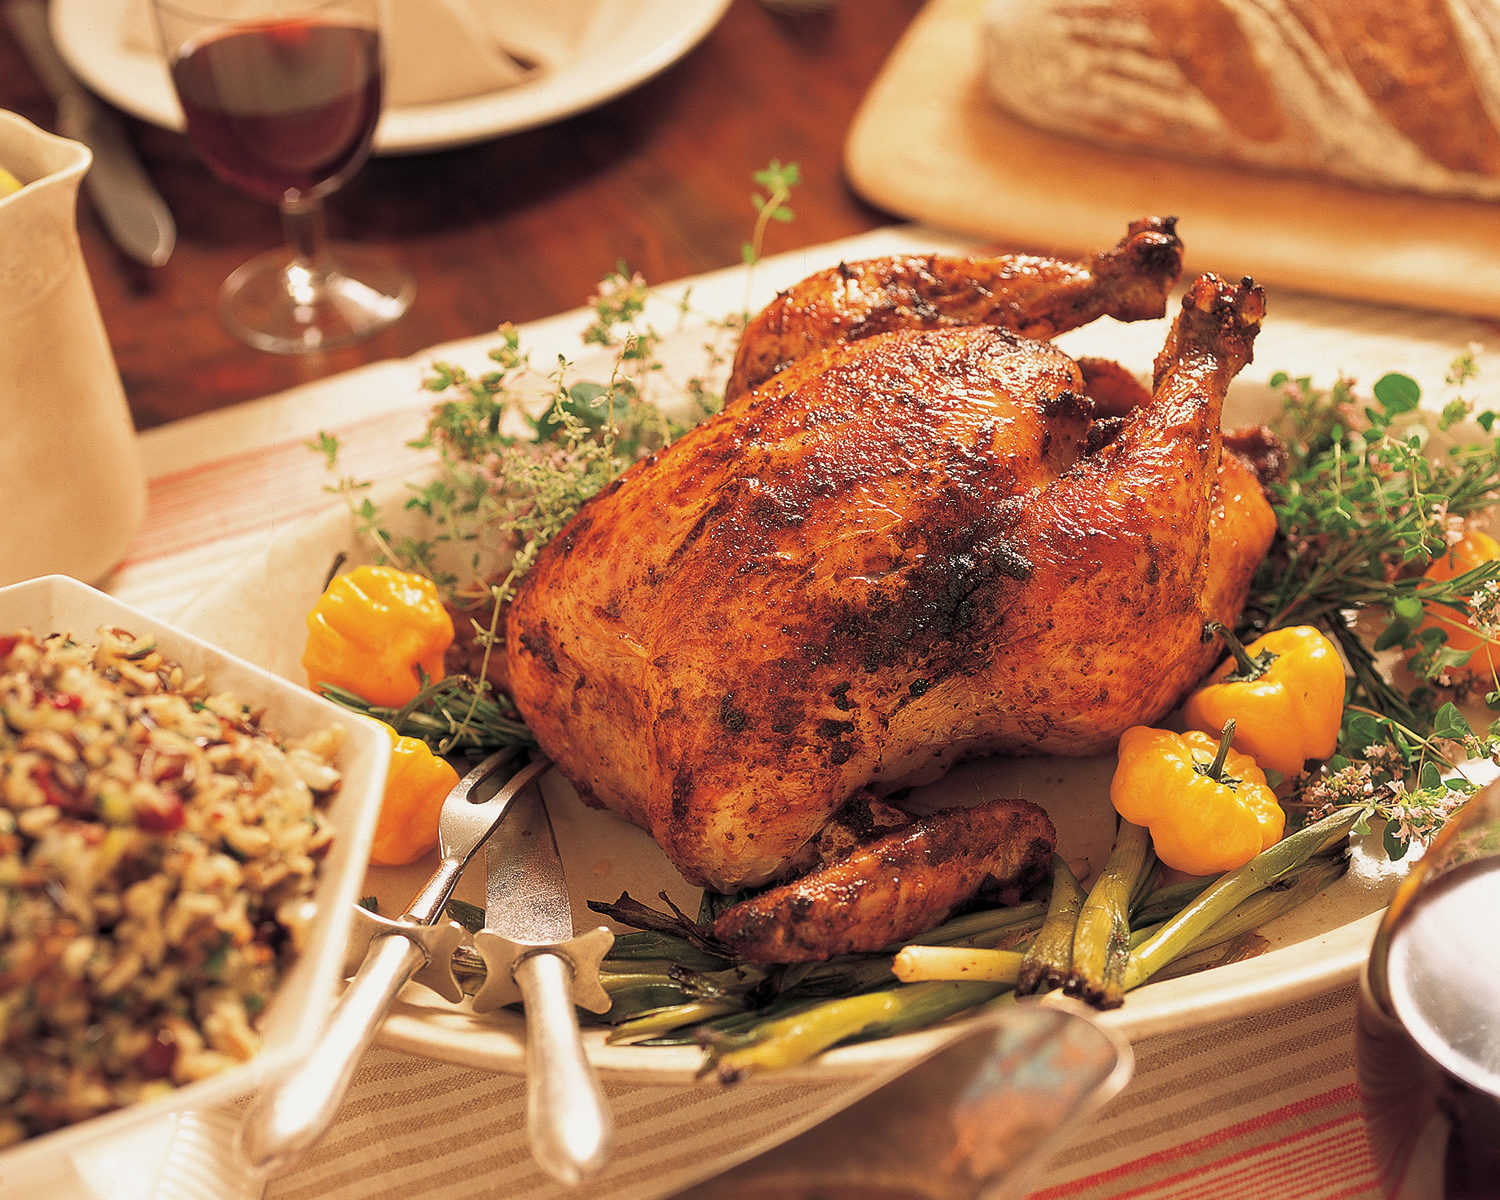
I bought an 8 ounce piece of halibut fillet…It surprised me how the words “I’ll take that one piece of halibut” didn’t hurt like when I finally succumbed and bought only one lonely chicken to roast, when the kids were all in college.

I rinsed, dried and seasoned the fish on both sides with salt and pepper and kept it in the fridge until ready to cook.


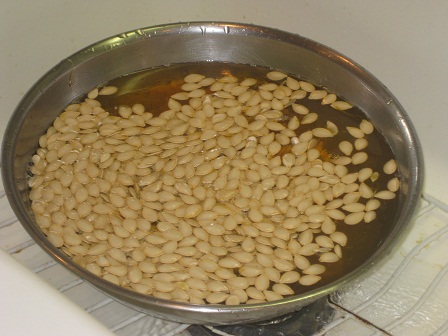
I also bought a bunch of  giant black seedless grapes, which I rinsed and placed into a bowl…


I took out the bowl of pasta so it wouldn’t require lengthy reheating.

In preparation for the fish, I chopped some bottled pickled hot cherry peppers and a few cloves of fresh garlic. I drained a tablespoon of capers from their brine. I also cut up last night’s leftover asparagus, which I planned to use in the pasta.

For the bread, I mixed some minced garlic into extra-virgin olive oil and added some crushed red pepper flakes and cracked black pepper.

I sliced some of the bread and brushed both sides with the garlic-oil-pepper mixture.

I positioned a non-stick skillet on the stove, for the fish. And a grill pan on the next-door burner, for the bread.

It was early evening–although I was hungry, I reminded myself that dinner tonight didn’t need to be at any specific hour–and not according to the pangs of others. It was just me so I could actually eat whenever I wanted!

Deeming that it wasn’t yet time to cook dinner, I decided to make a little something light –but delish.

Grapes and Cheese!

I took two grapes–I know this sounds small but these were giant grapes–if using the regular seedless grapes, you’d use four per person.–Anyway, I cut each grape in half, lengthwise. I then cut each half in half again, lengthwise, but without cutting all the way through the bottom skin. Like this…

If using regular grapes, just cut each whole grape in half, lengthwise, without going through the bottom skin.

I was sent this amazing new cheese (new to me) called Manouri–very similar to feta–but a bit milder, softer and a lot less salty–really good. So, I took a knife and cut off a few small pieces–and then placed one inside of each opened grape. Then I drizzled extra-virgin olive oil lightly over the top and added some black pepper.

My amuse-bouche–such a perfect way to softly stall an early evening appetite.

Each small bite delivered such extraordinary contrasts in tastes and textures–I thought “Oh Jon has to taste this!”…Suddenly, being alone felt stingingly singular. I was, for the first time in a very long time unable to, a whim, reach inside of another person–someone that I loved sharing with– and touch them simply yet profoundly. I didn’t mind being home cooking for myself–but I wanted to share. I thought about how being alone and sharing seemed in-congruent.

Still raining and now dark, I put some all-purpose flour on a small tray and seasoned it with salt and pepper. I took out the fish and laid it, skin side down, in the seasoned flour.

I poured a shallow layer of olive oil in the nonstick pan and put a flame under it. Simultaneously, I also let the grill pan heat, on low, for the bread.    

As soon as the oil was hot–but not quite smoking–I added the fish to the pan, floured (skin) side down and cooked the fish until the skin was golden and the flesh was cooked about 1/3 of the way up the fillet (you can see the fish cook by noting the difference in it’s appearance–the flesh goes from being translucent to being whiter–It’s less about any specific amount of time and more about each piece of fish being treated individually, so you’ll need to pay attention to the way it looks–just remember to cook the flesh 1/3 of the way up.

Then turn the fish and sear on the other side…

After searing the top, the flesh will still be translucent in the center. Take the fish out of the pan, dump the oil into a heat-proof bowl (stainless) and place the fish on a plate.

See how the center is still translucent??

Put the hot pan back on the stove and, over medium heat, swirl in a few tablespoons of butter. Add the chopped cherry peppers, garlic and capers and then a nice squeeze of fresh lemon.

Allow the varied flavors and textures to mingle for a minute–then add the fish, tilt the pan and baste it liberally.  

Bring things back up to a bubble, then cover the pot and reduce the heat to very low. Simmer, covered, just until cooked almost through, 3 to 4 minutes.

Meanwhile, I reheated the pasta in the microwave for a few minutes with the cut up cooked asparagus. I also cranked up the heat under my grill pan and started on the bread.

I had prepared a salad that would go perfectly with the halibut and pasta…

Bibb lettuce with roasted peppers, mozzarella cheese and anchovy fillets.

Din-din on Day Two…

 I just couldn’t eat that second piece of bread…Jon and the kids would have really loved this meal. Although I was missing Jon so much, doing this for myself felt good–and important. 

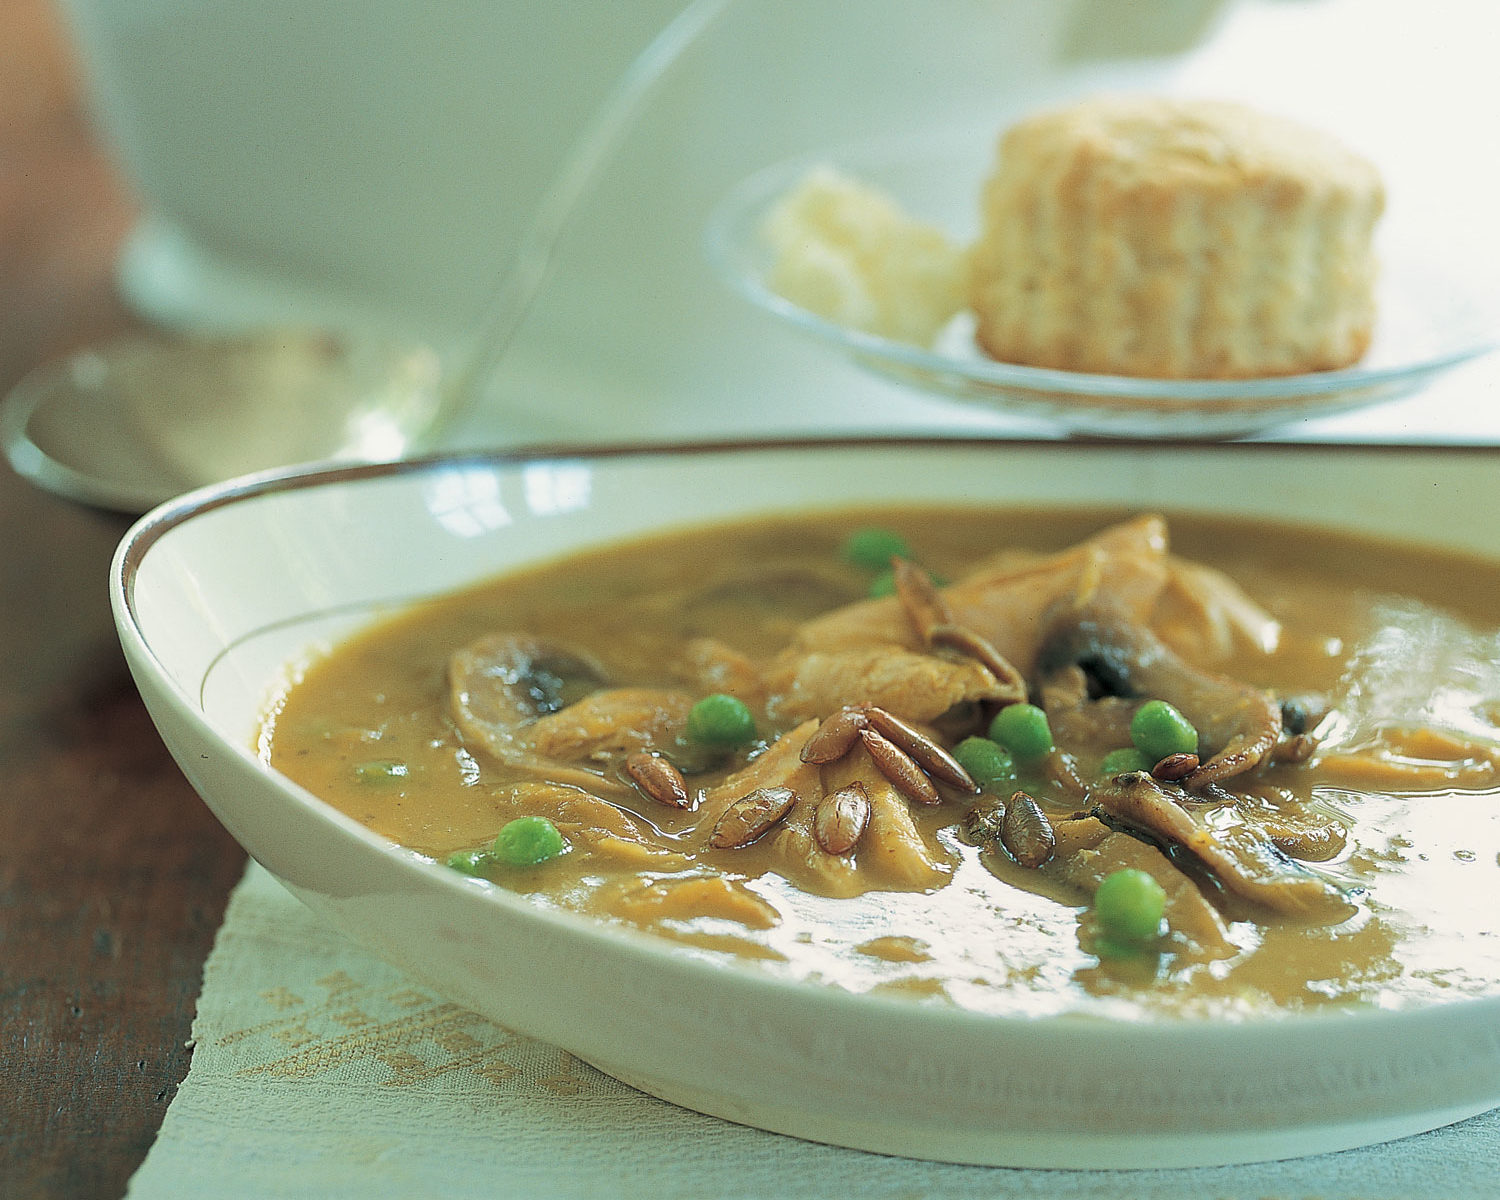
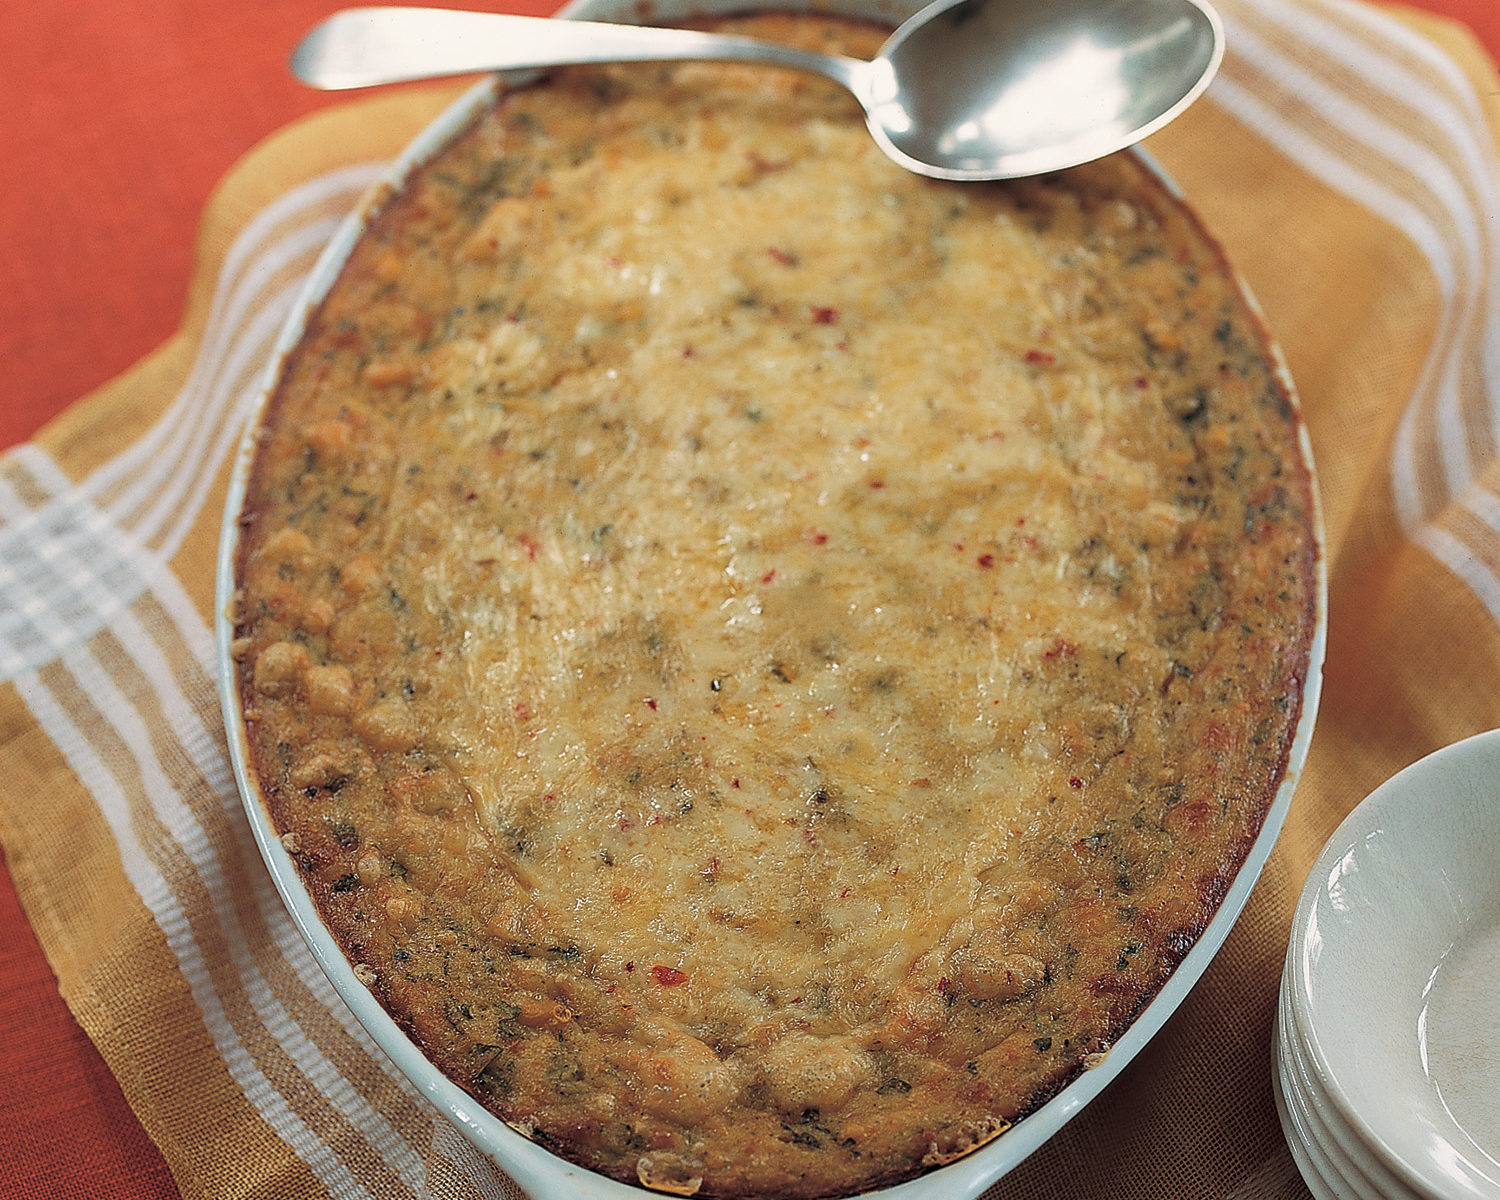
Day Three: My mood was starting to match the weather, which was still playing the same dreary song. So, I took a small tub of curried butternut squash soup out of the freezer to thaw.

I still had half of the original loaf of bread leftover. I also had a good amount of the garlic-oil mixture that I had used the night before for the garlic toast, so I did the same thing today, only this time after basting both sides, I grated on some Reggiano-Parmigiano to the tops. Since the cheese could stick to a grill pan, tonight I would broil the bread instead.


I wanted to make crostini (garlic toast that carries a topping)–something substantial to go with the soup.

I had a plump purple eggplant in the vegetable drawer. After rinsing and drying, I trimmed off the top of the eggplant, then took a vegetable peeler and removed lengthwise sections of the outer peel, creating a striped pattern. Then I sliced the eggplant into rounds that were about 1/2-inch thick.


I brushed the eggplant on both sides with the garlic-oil mixture, added some more cracked black pepper and some salt.


I covered the eggplant and let it sit out, at room temperature. I put a grill pan on the stove, for later.

I had some fresh Mission figs and thinly sliced Serrano ham in the fridge (I bought the ham yesterday in Grand Central Station). I had frisee lettuce and baby arugula. I also had work to do–I had to use the cheese that I had been sent specifically to develop recipes. One, as I said before is called Manouri (the feta-type) and the other is called Kefalograviera which is equally delicious–made from sheep and goats milk –semi-firm–tasted really nutty.

Suddenly, a “light” supper of soup and crostini” had the potential to turn into quite a masterpiece!

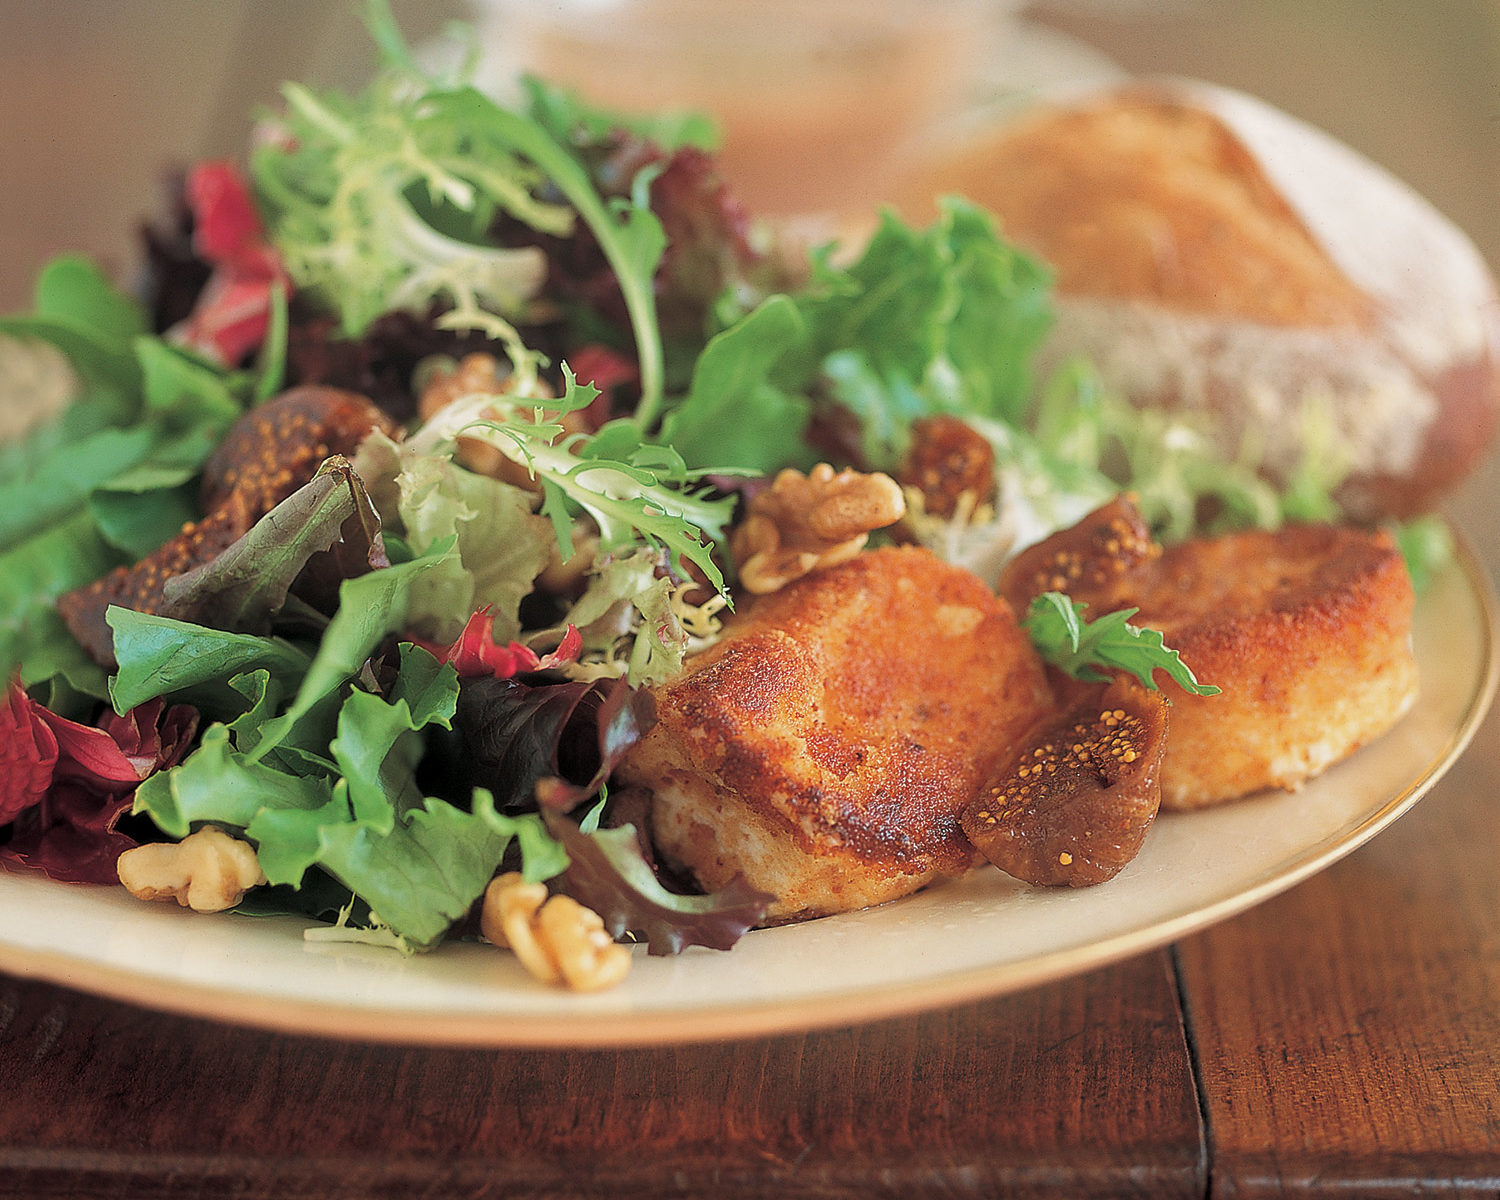
I decided to fill the figs with some of the Manouri cheese, then wrap them in the ham. This cheese is crumbly so it needed to be mashed with something soft and complimentary–just enough to make it spreadable. Since the flavor was mild, I didn’t want to mute it by using something made with cow’s milk. I wanted to increase the acidity–so I used Greek yogurt–which would help the cheese to stand up to the sweet figs, salty ham and the bitter greens that I would serve along side. 

So, I had everything set up…

I trimmed excess fat off the ham and then cut each long slice in half, width-wise. I halved each fig, through the stem-end, then I mashed some Manouri cheese with just enough yogurt to make it spreadable…

I spread a generous layer of the softened cheese over the cut side of each fig…(You want to allow one fig –two pieces–per person.)

I drizzled the cheese filling with a little extra-virgin olive oil and sprinkled on some cracked black pepper. Then I wrapped each cheese-filled fig with some ham enclosing it, and then laid each one, seam side down, on a covered platter and chilled them until later.

I started thinking–“These figs can be served several ways.”

Walnuts! I took a bag of shelled walnut halves out of the pantry. I melted some butter in a skillet and tossed in the nuts and sauteed them, stirring constantly, until both, the outer skins on the nuts and the milk solids in the butter were light golden. (Be careful, here. Nuts with skins can easily become over-browned which leaves them tasting acrid.)

I poured the nuts onto a plate lined with paper towels, then sprinkled the toasted nuts with salt and let them sit there until ready to put things together.

Then, just as dusk was about to make an entrance–

 THE SUN!!!!!!!!!!!!!!!!!!!!!!!!!!!!!!!!!!!!!!!!!!!!!!!

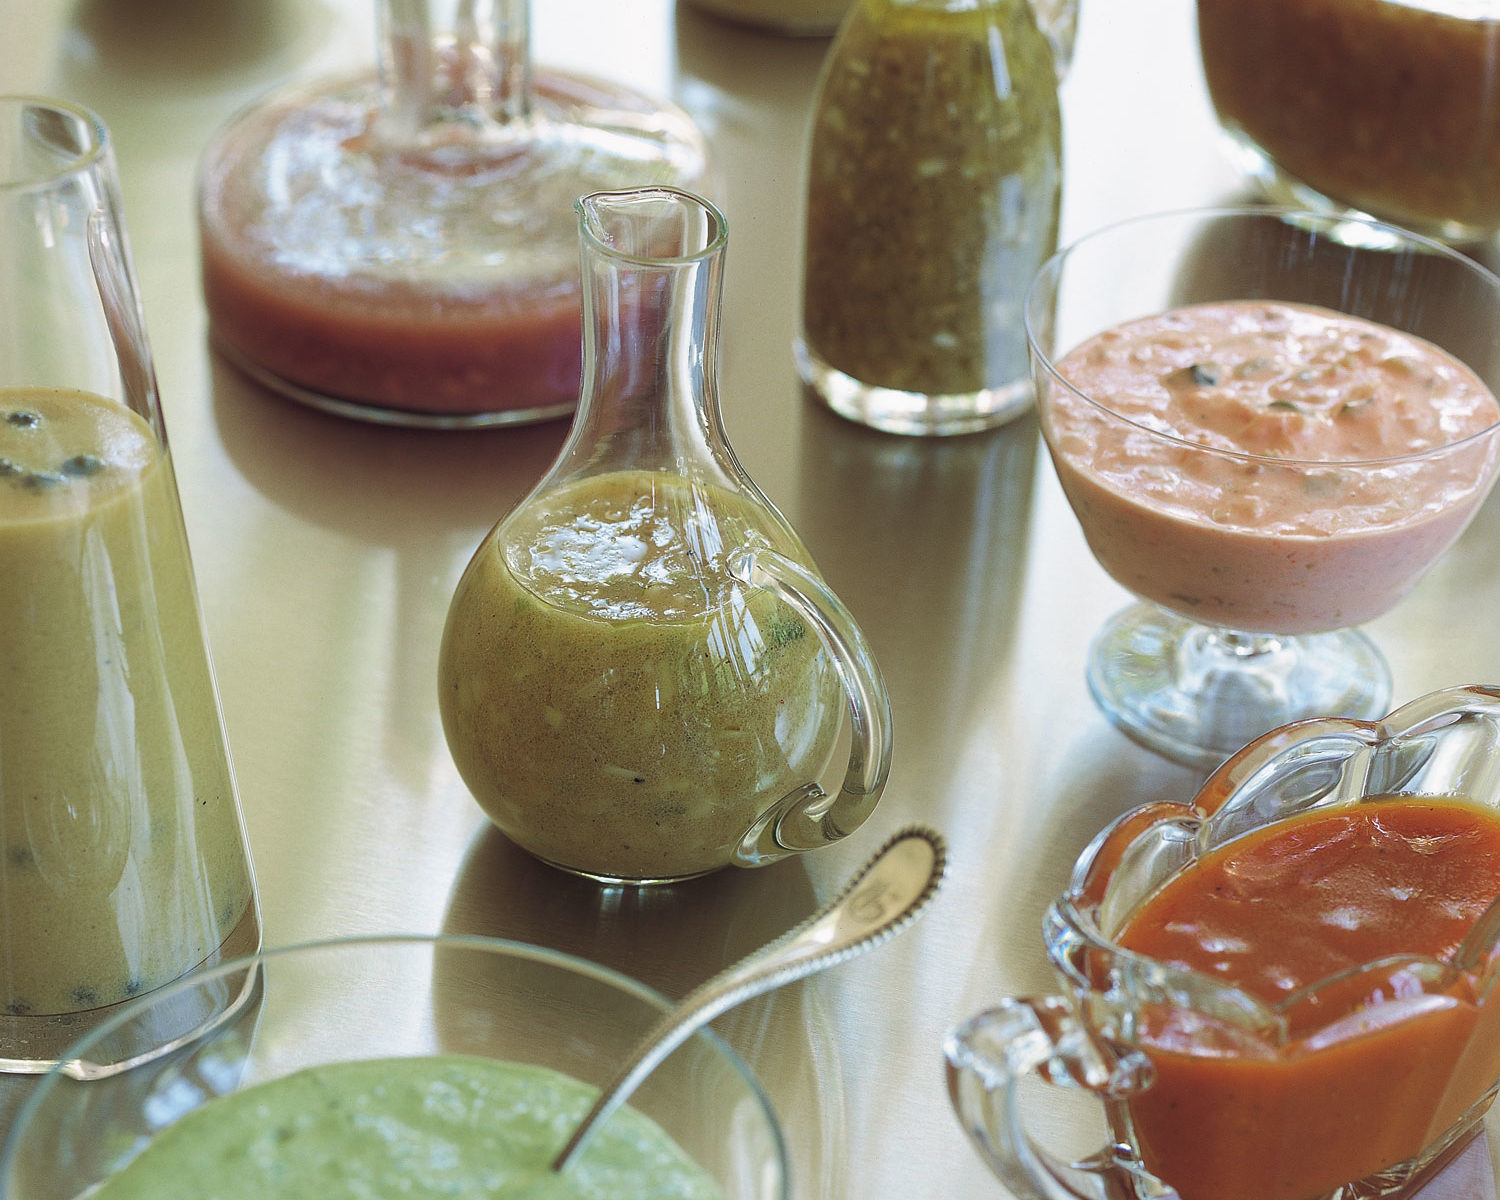
About an hour before I planned to cook, I took the stuffed figs out of the refrigerator. I also took out a mustardy-vinaigrette that I had made a couple of days earlier so that the texture could soften and the flavors could fully resurface: For the vinaigrette: 2 tablespoons Dijon mustard, 1/3 cup white wine vinegar, 2 tablespoons sherry wine vinegar, 2 or 3 cloves of minced garlic, 1/2 teaspoon salt, 1 tablespoon honey and 3/4 to 1 cup olive oil (mix pure and extra-virgin). Whisk, and then season with black pepper.

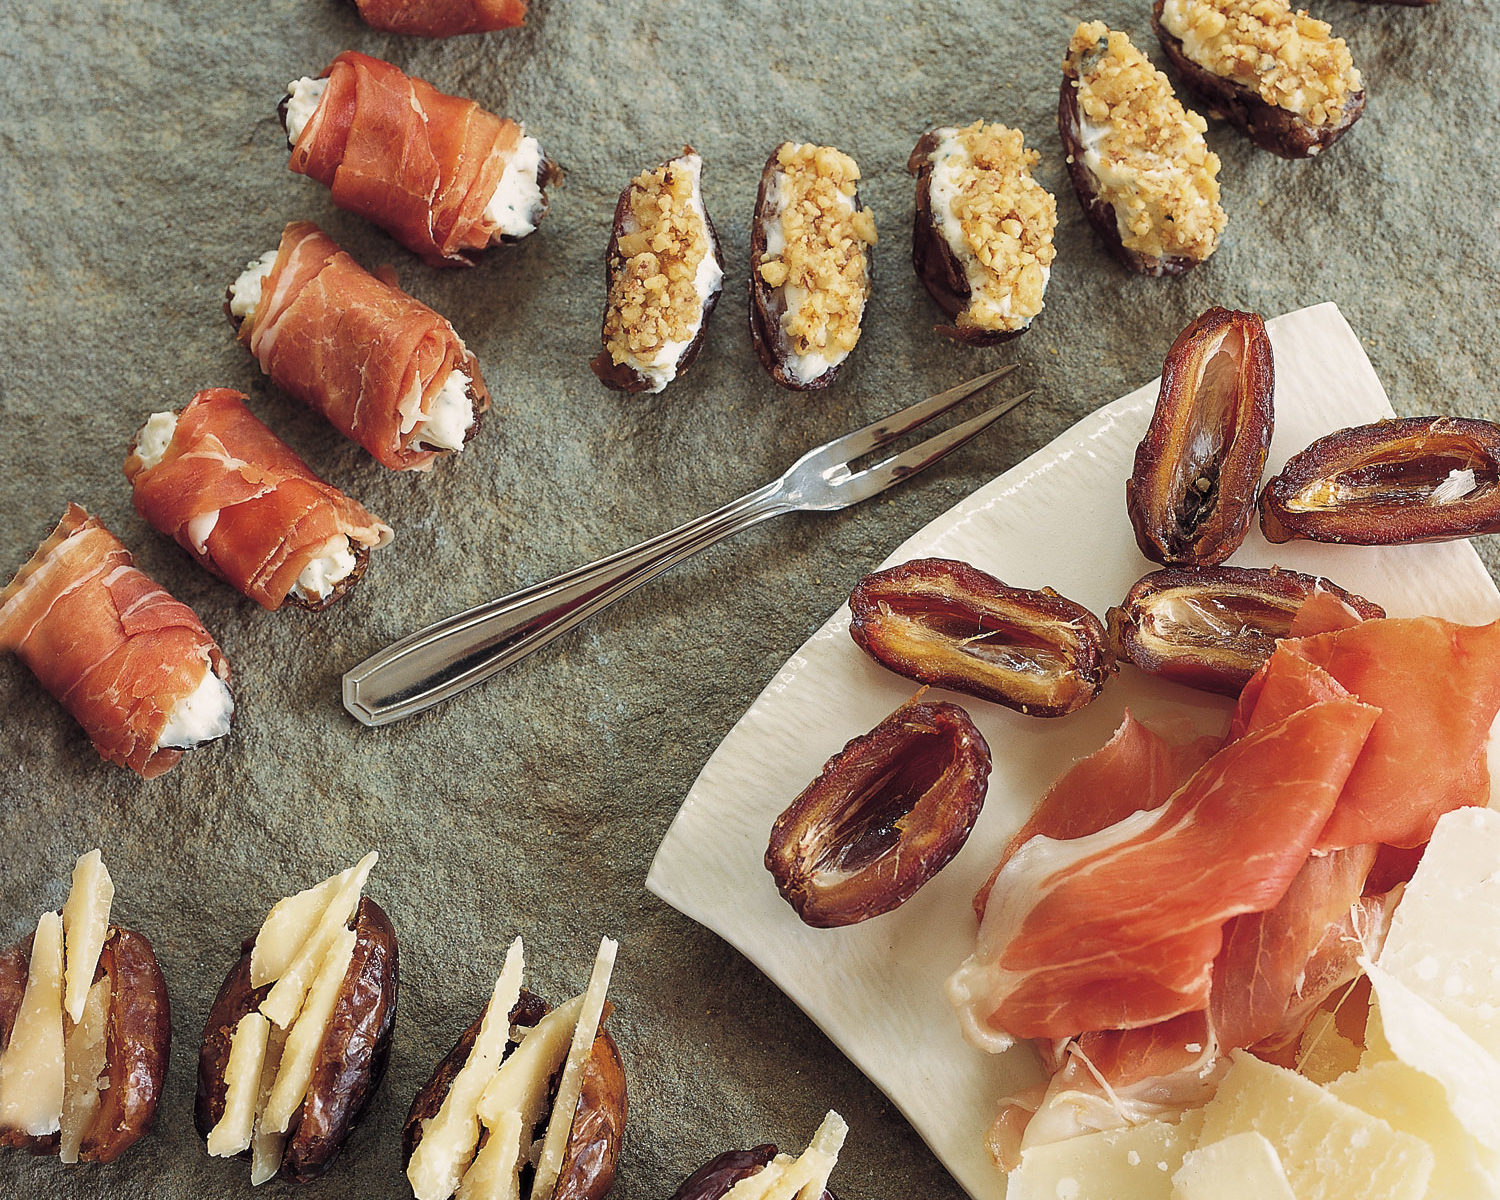
Before assembling the salad, I decided to take a picture of another way to serve the stuffed figs which, as expected, proved to be amazing as a “before dinner” treat.

The stuffed figs surrounding a mound of butter-toasted walnuts!

Ok, now I was hungry… Time to start cooking.

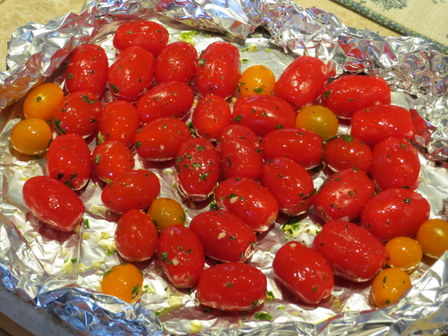
I used a vegetable peeler to shave long, thin strips from the wedge of Kefalograviera cheese, cut some heirloom cherry tomatoes into quarters and brushed them with some of the garlic-oil.

I put a mixture of torn frisee lettuce and baby arugula in a bowl, turned on a low flame under the soup, a high flame under my grill pan and preheated my broiler.

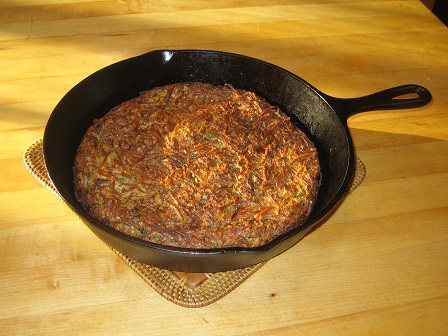
I grilled the sliced eggplant on both sides until tender and golden

I know I’m making more eggplant than I need–but leftovers taste great!

After placing the cooked eggplant on a plate, I broiled the garlic toast on both sides, then turned the slices cheese side up.

And topped the toast, first with some grilled eggplant, then with some halved cherry tomatoes and finally with some of the shaved cheese…

Once the soup was hot, I dressed the salad and mounded it in the center of the platter of figs, then I put the toasted nuts around the greens and on top.

I took a few pictures as part of my recipe development procedure…

Now, to my dinner!

I slid the baking sheet holding the crostini under the preheated broiler just long enough to melt the cheese…

And put the crostini on a plate with some of the salad that I tossed with the toasted walnuts…

And served the above with a bowl of piping hot curried butternut squash soup.

And, let’s not forget those gorgeous stuffed figs!

Yet another meal that could bring a stoic to tears.

Day Four: The sun was shining, I happily spent the entire day (and evening) in Manhattan-having brunch with my son Ben and one of my daughters, Jessie, then to a movie and out to dinner with Jessie.

Day Five: I flew to Orlando to proudly watch Jon compete in his tournament. It was so wonderful to be with him again.

I’m home again and no longer alone.

The Point: I’ve learned a lot from this experience. Mostly, that we can be alone, even lonely and still show ourselves great love. That regardless of the status of our other relationships, doing things to nurture the life-long bond we have with ourselves makes good times and difficult times substantially better –and that matters a lot– not just to the quality of our overall existence but also to what we teach our children about what they, too, should want for themselves when they’re grown.  This blog was meant to help you to see that, being without an adult partner does not dictate our ability or level of entitlement to create and enjoy the many benefits of living a homemade life. I hope this blog inspires you to love yourselves more and to back that up with self-caring gestures, no matter who is or is not around. I guess being alone and sharing isn’t so in-congruent after all.

Humble ingredients get royal status and inspire awesome feelings.

It’s becoming comical how, after all these years–after writing cookbooks, hosting television and radio shows–after working with culinary giants like Julia Child, I’m still just NEVER over it! Creating in my kitchen brings me such awesome feelings–literally–when doing everything, but especially when baking.

Sometimes I think my computer will explode from all the food pictures–Especially because so many of them are duplicates

For example, I must have about 4,000 pictures of my pane di casa-

And here’s my latest picture of what I served for dessert last night for dinner guests…


One of about 1,000 photos of this crisp and glistening  Apple-Cinnamon Galette.

And yesterday, while my French rolls were rising, I couldn’t resist re-capturing their pudgyness.

 I shaped half of the dough into ovals and the other half into rounds…

And then, before slipping them into a very hot oven, I just HAD to quickly shoot them after slashing and snipping their tops (for the gazillionth time)…

As they baked, I (as usual) stood by the oven waiting for the buzzer to sound so I could finally get to see (and photograph) what their beyond-belief aromas promised– 


And, as the rolls sat perched on wire racks, their audible crackling sounds was like hearing a favorite song–but better– because this song was played “in person” and not on the radio– which (of course, once again) compelled me to wobble on a footstool, camera in hand, to give them the rock star status they deserve.

And, last week, these freshly baked pumpkin breads (recipe coming…) actually made me gasp –not just because of their beauty…

but also because I knew how the addition of plumped dried currants and chopped, butter-toasted pepitas would elevate the taste of the loaves…

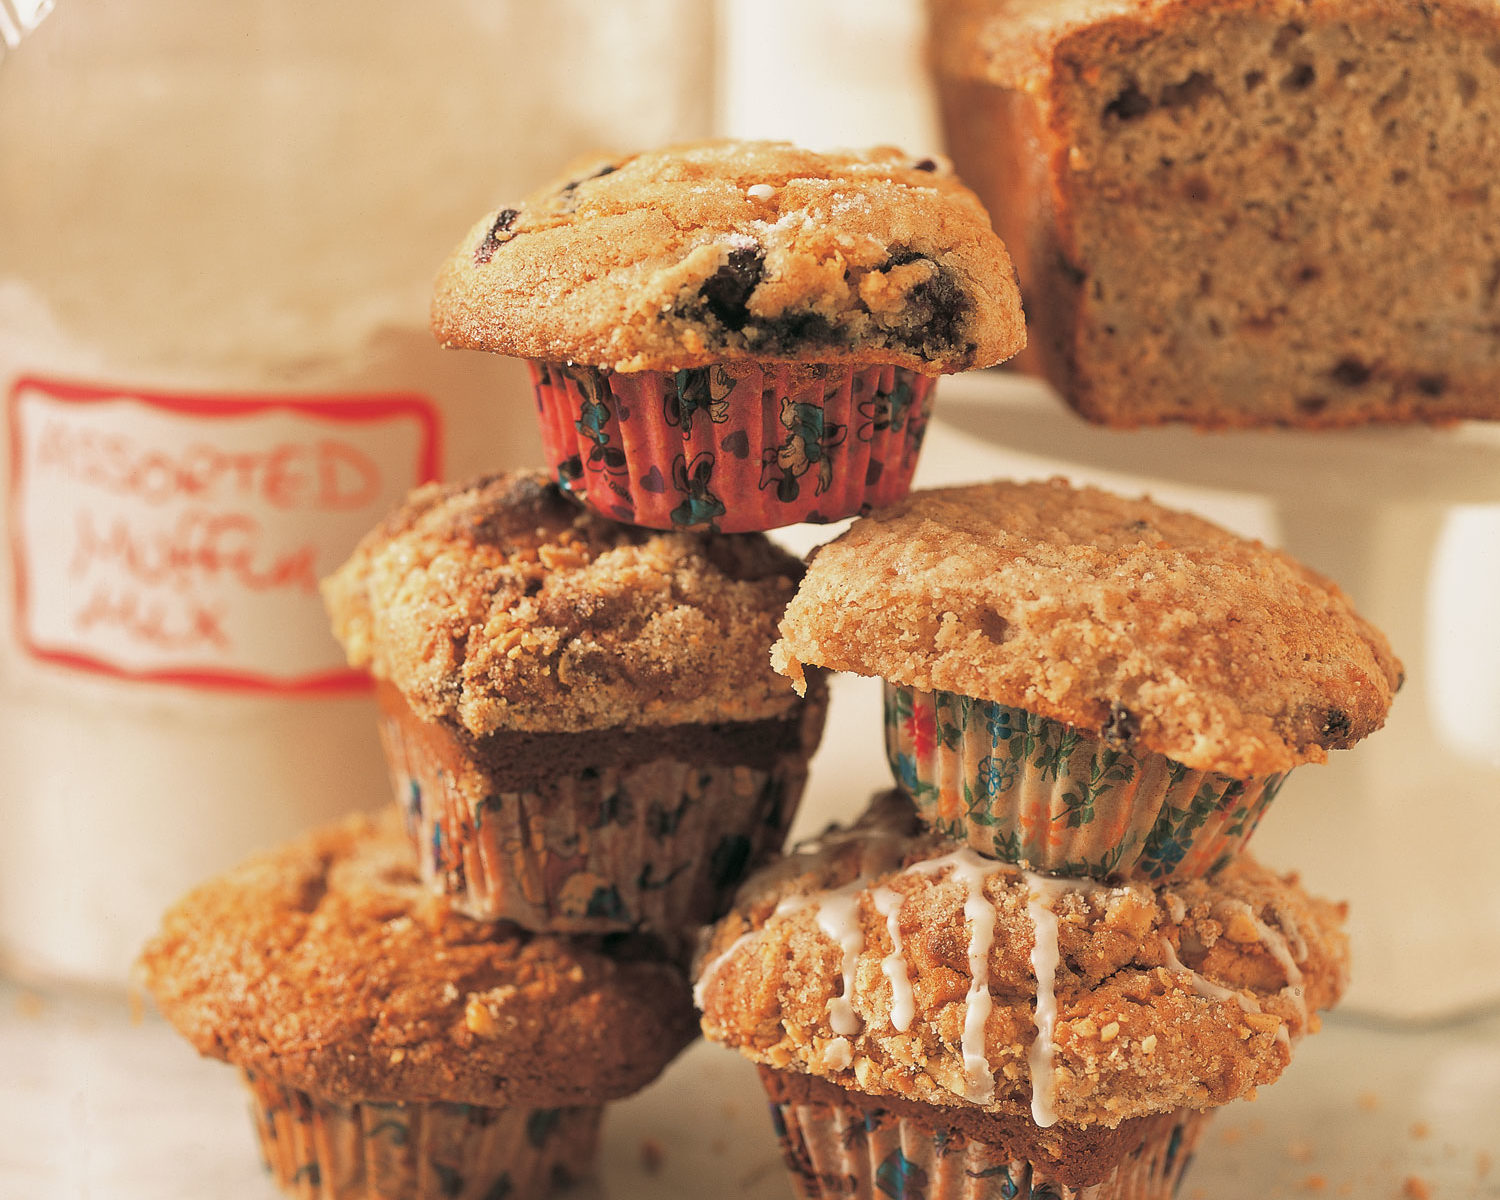
And that goes for the muffins, too! (This new recipe will, no doubt, be photographed over and over again…)
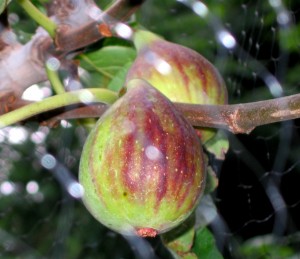
The Point: Although it might seem silly to keep taking pictures of the same recipe, it seems much sillier to give up any opportunity to personally experience (and to instigate in others) the feeling of awe. I hope I’m never “over it.”

A summer to be savored.

I know, I know–I have (once again) fallen off the blogging band-wagon! Thank you, to those that have written asking “where the heck are you?!”

This summer has been amazing–and it’s all been about family. Although I know it’s just August, sadly, I can feel summer leaving. Not only has one of my daughters (Julie) just departed from her month-long time with us here at home (she’s working for her doctorate in clinical psychology in San Francisco) but my eldest, my son (Ben), recently left for Bangladesh (of all places!) for business. And, my youngest (Jessie) is gearing up to soon begin her last year of graduate school to become an art-therapist –while also maintaining a rigorous work schedule. So, although this summer I’ve had some of the best and most loving times with Jon and my kids, I’m more than a bit bummed to feel the physical scattering. There have been so many delicious things for us all to remember…

Here are some scrumptious “homemade highlights” from summer, 2010…

Jules, Me and Jess 

Benjamin taking a snooze on the grass.

The kids playing soccer in the yard.

Mango Margaritas!

Jules, Jess, Jen (Ben’s wonderful girlfriend.)

My wood-burning oven, all seasoned and I’m ready to cook!

Here, I’m cooking butterflied chickens with a medly of fresh herbs from the garden, olive oil, minced garlic, Kosher salt and fresh-cracked black pepper. The chickens cook covered loosely with foil–that way, they brown beautifully while keeping the meat succulent. When the fire is prepared properly, the chickens cook in the same amount of time it takes to cook in a conventional oven.

Hot out of the oven–A mixed berry double crust pie.

The pie didn’t last long…

Potato Gnocchi–made to celebrate Jen’s birthday.  Oh, don’t worry–A detailed blog is coming about how to make this. 

I actually made gnocchi twice for Jen and Ben. Once for her birthday (June 24th) …

 Jen’s birthday cake.

And I made gnocchi again, when Julie and Jessie were at the table to celebrate Jen’s birthday as a family.

This is a berry free-form tart—Ben said it was the best dessert he’d ever had!

A “No-Knead” Bread that I’ve been working on…

“Work” is SO satisfying!

Wouldn’t you like to relax like this? Mango might seem like she’s sleeping–but (trust me)  if I took out a vegetable peeler, she’d immediately run and stand by my side. She loves vegetables–She’s a Lab.–she’d eat a can.

Here are two focaccia’s I made with my daughter, Julie. They had fresh tomato wedges, pitted olives (two kinds, oil-cured and kalamata) and small fluted rounds of zucchini. The shaped dough was swabbed (both before and just after baking) with extra-virgin olive oil, lots of fresh herbs from the garden, garlic, crushed red pepper flakes and black pepper. Mama Mia!

A Mixed Berry, Peach and Banana Crisp–I served this with creme fraiche that I whisked with some superfine sugar and vanilla.

My fig trees, netted to protect the fruit from nature’s little thieves.

Hey, it’s my tree–I’m allowed to pick the fruit!

The neighborhood always knows when I’m up to something good…

Fig leaves, fresh picked just after the rain (I have a reason.)

Fig leaves, doubled and seasoned with salt and pepper. (I really do have a reason.)

Branzino laying on seasoned fig leaves. (My reason.)

Mango is happily on “Branzino watch” while I check the grill…

When the charred fig leaves are peeled back (at the table) the reward is THE MOST SUCCULENT, DELICIOUS fish imaginable. Beyond good–

An assortment of heirloom cherry tomatoes, seasoned with olive oil, herbs, salt and pepper and ready to be roasted in a very hot oven (450F) for 20 minutes. This, then, gets poured over freshly cooked spaghetti that goes into a pan with crisp pancetta–and then the whole thing (the pasta, pancetta, roasted tomatoes with all their seasonings and juices get’s tossed with lots of fresh basil leaves, cut into ribbons).

Plain and flavor-all braided challah. I purposely made this two-loaf dough externally different. One was a “flavor-all,” which we ate with dinner on a Friday night–the other one (plain) was in case I had any “French toast” requests over that weekend. 

 Blueberry Muffins with a Sugar-Nut Topping

Heaven on a plate: Rotisserie chicken on the outdoor grill. Purposely made for our dinner on Julie’s last night home (before heading back to San Francisco) –The gentle, gorgeous outdoor wafts of these chickens spit-roasting surely spells love.

The Point: I thought I’d let you see why I haven’t been able to blog this summer. Sometimes it’s just impossible to write about life without sacrificing the literal things to do to create the yummy, loving life one wants. So, for me, living will always come first–and writing next. I’m always here, though. Just an email away! xoxo Lauren

Have parents gone absolutely mad?

In the paper this morning, on the front page, was the big news about finally finding Abby Sunderland, the 16 year old girl that was allowed to attempt to set a new world record for being the youngest person (ever) to go around the world on a 40-foot sailboat (ALONE!)–in what proved to be treacherous (extremely life-threatening) conditions (duh). Her brother had done it at 17–and you know what sibling rivalry does… 16 became the number that would beat her brother–What if instead of finally being located–if she had gotten irrevocably swallowed up by one of those 50 foot waves? Is that what it would take for her parents to be charged with child endangerment? I doubt it. Who’s idea was this anyway?? Oh, that’s right–it was Abby’s passion for sailing (and for beating her brother’s record)–I guess that makes it all OK.

Two pages later, there was an article about a 2-year old baby boy that was taught (by his father!) to chain-smoke cigarettes and, in this article, the father was boasting about how he had gotten the boy to “cut back” from two-packs to just a mere 10 cigarettes per day! If I hadn’t seen a video of this baby smoking like an out-of-control fiend (on a TV news show), I wouldn’t have believed that this was possible!  (Did I mention that this baby is also clinically obese?)

On the next page was an article about a 12 year old girl who was left home alone for a week because her mother decided to get married and go on a honeymoon (sans her child)! At least this woman was locked up and is being held on $100,000 bail.

Has this world gone crazy? Has the word “parent” totally lost it’s meaning? Listen, I’ve raised three kids–and several dogs–and, just this morning on my walk with Mango, while she was on a leash, we met another dog who was also on a leash. The dogs were pulling, twirling, sniffing, snorting–pleading to be set free to play–Did I and the owner of the other dog look at each other with empathy and compassion for how our dogs felt? –Of course. Did we ever doubt that there was anything but the purest of intentions to their desires? No. Did we also know that if we let them off leash, that they could run into the street and get injured by a moving vehicle? Yes.

So what happens? Do we, as dog owners, decide to throw caution to the wind, remove their leashes and just hope for the best?

Do we, as parents, allow our children’s desires to outweigh our first job–which is to protect them? I think not.  I hate to use a dog example, but I think there are a lot of parents (and pet owners) out there that need to wake up! Abby S. is a very lucky young lady, despite her parent’s lack of back-bone. There should be laws that protect children from an ineffective parent–She should have never been legally allowed to take this trip alone. (And these parents have an 11 and 12-year old at home and they’re already “accepting” that these kids might make this same attempt… Help!)

And, all I can say about the big, fat smoking baby is that his parents should be arrested and locked up (for a long time) for child abuse.

All three of these stories are examples of how people are actually able to live with themselves after blatently disregarding the most consequential job given to humanity: Parenting. It’s just horrifying.

I’m still a softie.

Ok, so my back tooth (that broke at a wedding) now has a temporary crown–which I don’t trust–so I will eat only soft things until I get the permanent one. ( Sheesh. This could get old quick)…Having said that, could there be anything more delish than eggplant parmesan, when needing to eat soft, soothing things?

This was din-din two nights ago…

Of course, I thought there could be NOTHING as soothing as eggplant parmesan until last night, when we had …


Wild mushroom stuffed agnolotti, by Buitoni (a great product).

First, I sweated the leeks in melted butter on the stove under a lid made of parchment.

This is to keep the condensation extremely flavorful–which will drop back down and into the leeks.

Then, I added leftover cooked fresh green peas that I served the night before (with the eggplant parmesan).

Then came some delicious chicken stock (thawed from the freezer) and the shaved black truffle…

Jon bought me a truffle on Arthur Avenue for an amazingly low price!


I brought the whole lot to a simmer, then seasoned with salt and pepper. Then added the cooked agnolotti.

Just to remind you of what we ate.

So, I figure–this could be kind of fun–having to eat soft things (for a while…)

Tonight’s dinner…

Oh baby–Now, THIS is the best. (Stay tuned for my meatball story.)

A rose is still a rose.

Today, when passing my “set” dinner table, I saw that the roses that I clipped just yesterday had released a lot of petals. One by one, as I picked them up, their intense fragrance captured me, as if each one contained the magnificence of the whole flower. So, instead of throwing the petals away, I decided to put my bud-vase on a coaster and then surround the base with all the fallen petals.  

Doing this not only bought me another day, without having to clip more flowers, but it also made my table more beautiful and seemingly twice as fragrant–Becoming present to these fallen petals deepened my understanding of the overall potency–and power for flowers (especially roses) to provide sensory pleasure.

The Point: Just like when we’re about to shrug off a “person of years” (or some really ripe, speckled bananas) if we take the time to stop, rethink and open up–that’s often when some of life’s most unexpected gifts are revealed.

Before I grow old, let me blog.

Ok, I get it–I need to blog more often. Believe me, it’s not for lack of wanting to but I’ve been so busy teaching (with all the inherent shopping, schlepping and prepping), life-coaching my individual clients and taking care of my family, that I’m practically comatose after the dinner dishes are all dried and tucked away. Yesterday, after teaching cooking all day in Brooklyn–I was so exhausted that in insides of my ears hurt and the only way to get a second wind, so I could cook dinner for my family, was to turn on the radio and start to dance around the kitchen. (By the way, this really shifted my energy–I felt so much better once I allowed myself to be moved by (and to move to) the music (on a classic rock station on XM) that my dog, Mango, (after first looking up at me like I had lost my mind) she became so excited that she started to jump and wiggle along with me!) 

So, after saying to myself “Lauren, people are going to think you’re ill or (worse)–that you’ve stopped living with opinions and have nothing to say” I’ve decided that it’s time to finally connect. (It’s a bit like when you’ve waited too long to call a friend because you feel like there’s just TOO much to say so you put off calling –and then feel guilty–and then end up forgetting all the things you would have told them way back when those things felt important to share (I knew you’d understand…).

I’m glad I got that off my chest!

Ok, so about the food. I’m “in process”–Meaning, I’m working on some stuff that’s important to me and I’m not 100% finished so I haven’t wanted to blog about it but I’ve decided to let you in.

One of the things I’ve been working on (and very excited about) is homemade potato gnocchi. (Personally, I never liked gnocchi–only had it once and it was so heavy and monotonous that I couldn’t figure out what the big attraction was until one day my son’s girlfriend Jenn told me that her “all time favorite food is potato gnocchi–just like grandma makes.” And so (you know me…) ever since that night I’ve been driven (I’m tempted to say “haunted” or “hounded” but both seem too dramatic and/or negative–and this feeling of wanting to understand Jenn’s devotion to gnocchi was the opposite of negative–Actually, this feeling is what makes me tick, tickled and, yes, turned on to the ever deepening ways to experience deliciousness!) Now was my chance–I finally had a real reason–a person–to help me get inside what makes gnocchi so adored by so many. The plan is to reveal my light, tender and scrumptious darlings for Jenn’s birthday dinner–it’s coming in June.

Yes, you might be saying to yourself “Lauren, shut up! Why would you want to spoil her surprise?!”

Well, it’s been done already…Jon (my adorable husband who, like me, is just so excited by this gnocchi) spilled the beans to Jenn in a restaurant. He said “Jenn, get ready, Lauren is working on potato gnocchi for your birthday and it’s SO delicious–you’re gonna love it!”  As the words were coming out of his mouth, I wanted to yelp “NO, PLEEESE…..DON’T SAY IT!” First, because I wanted it to be a surprise–but mostly because of the PRESSURE that I now feel! HOW CAN I, A JEWISH GIRL FROM LONG ISLAND, A GNOCCHI VIRGIN, POSSIBLY MEASURE UP TO JENNIFER’S ITALIAN GRANDMOTHER’S HOMEMADE MASTERPIECE? (Oy vey.)

Anyway, this particualr blog is not to tell you how to make gnocchi–that’s coming–this blog is to show you how WELL I’m doing! Take a look at this…

I am now a HUGE gnocchi fan! Ok, gotta go. (My blogging slump is now officially over.)

The “Catch” of a Lifetime.

Oh well. This weekend, Jon and I were “supposed” to go on a (very) short fishing trip. The kids are all in their respective places (school and work) and, for the very first time, I agreed to put Mango (our 3 year old Lab.) into doggie camp and we were going to Montauk, Long Island for a much needed, teeny-weeny vacation. Of course, that’s not to say that real fishing is easy–it’s not! But it’s really FUN!

Last March, we went to the Bahamas for a week and fished ALL day, every day …

We
We're fishing off shore and I have a big one on the line...
Me and my big-fat Mutton Snapper!
Here
Here's Jon with his big fat Mutton Snapper...
Here
Here's Jon with his amazing Grouper...
Here
Here's us with our "double catch" of Wahoo (we both had them on our lines at the same time!) If you've never eaten Wahoo, it's an incredibly meaty, succulent and delicious fish...

Each night, we would go to a different neighborhood restaurant near the marina and have the chef cook up our catch.

Jon and I caught these all in one day!
We would have the chef cook the fish and then share it with the kitchen staff...
After fishing, each day, the first mate on the boat would fillet the fish and then, after sharing our catch with him and the captain, we would take the rest to a local restaurant. What we couldn't eat, we happily shared with the kitchen staff...

Ever since this trip, it’s been really hard to call any fish “fresh” after having experienced the perfection of “just caught” fish.

Anyway, we didn’t get to go fishing this weekend. The weather forecast turned bad so  instead of having two days on the water, Jon (who, I knew, felt really bad) came to me and said (as if this would be as good…) “Hey, Laur…let’s go apple picking and we’ll take Mango with us!”

“Gee… ok,” I said.

So, we drove a bit over an hour upstate and traipsed through a huge orchard filled with tons of trees that grew a vast variety of apples. In just over an hour of picking, I must say, we did pretty well! We filled three large plastic bags, which wasn’t easy–especially considering that many of the trees were already well “picked-through” and whatever was left  were dangling higher than we were tall. Plus, we were also trying to manage a large (and very busy) dog on a leash.

Mango was very happy that we didn
Mango was so happy that we didn't go fishing...

After walking back to the car lugging both, our apples and mango, I realized that during all the reaching and bending, I lost my reading glasses!  (Anyone that knows me intimately, knows that losing my glasses is NOT an uncommon occurrence…) Jon, being the sweet man that he is, actually agreed to go all the way back with me…trying to retrace our steps through a gazillion trees, searching  for my glasses–which was really so silly, considering they had transparent frames and were completely unable to be seen (especially not by me, without my glasses!). So, after finally saying  “bye-bye” to my specs we got in the car, drove down lots of winding dirt roads, headed back to the front gates of the orchard where we were required  to pay a whopping $50 for our “apple-catch.” (I silently started doing the math, trying to figure out how expensive this day was now that I ALSO  had to replace my glasses…)

So, we drove home and then came the inevitable, after a day of picking.

What will I DO with all of these apples??

It’s not that I don’t like going fruit picking (I love it) but this particular time, my inner voice kept nagging….”Boy, right now, Jon and I could be toting our big fat fresh fish to a restaurant AND I could be staying in a hotel with turn-down service. This was supposed to be a vacation day!…”

Mango was (as was I)  totally pooped after our day of apple picking... Of course, Mango was thrilled as she lay splat on the floor of my kitchen, completely pooped after our day out in the fields…

After cleaning all the apples, I went to bed. (I was just as tired as Mango– I’ll spare you the photograph…)

compressed big bowls of apples

Anyway, the next morning, I made the logical choice when about to wrestle with a ton of apples… I decided to make applesauce. So, I cleaned them all up and seperated out the small ones (and all of the red delicious apples) for eating and used the rest for the sauce.

Today, it would be the smooth kind (instead of the chunky type that I also make).

Although I usually use Macintosh as the base (the ones that I cook and mash), because we had so many varieties, I used them all (Ida, Cortland, Macs…and some others that I haven’t ever eaten before.)

I cored them and cut them into wedges (I discard the core but leave the skin on to add a rosy color to my sauce–not to mention that it would take me about a decade to peel all those apples!) The best tool to use when working with lots of apples is an apple corer/wedge cutter (If you’re a mother, you probably have one of these in one of your kitchen drawers. If not, it looks like this… )

An apple corer.
An apple corer/wedge cutter.
How to use an apple corer/wedge cutter

compressed cropped big pot of apples cut up on the stove

I used a 16-quart pot and filled it to capacity with cored, cut up apples. I added a hefty splash of apple juice. (Actually, this time, I used apple cider, purchased from the orchard. I usually just use unsweetened apple juice.) I stuck several cinnamon sticks down into the apples, covered the pot and turned the heat to high. As the apples cooked…

compressed mashing apples

I occasionally uncovered the pot and would try to turn the apples so that some of those wedges more exposed to bottom heat would be rotated to the top. I also used a potato masher on the apples, trying to help them to break down.

compressed apples reducing

Once all the apples became good and hot, they started to reduce and became easier to mash.  I just kept (occasionally) opening the pot, turning the apples and mashing them down.

compressed mashed apples ready to be processed

It didn’t take long before the apples completely surrendered their texture (boy, that sentence makes me feel powerful…) and it was now time to transfer things to a food mill. So, I positioned a very large food mill over a very large bowl.

And I have quite the food mill…

compressed big food mill

This is a HUGE food mill that I purchased years ago from a restaurant supply store. It was pricey and I felt guilty but since I never (ever) seem to make a small batch of applesauce, and because I always had a really hard time positioning (straddling) a smaller food mill over the large bowl, I caved in and bought this big one. I’ve never regretted it…Having said this, all food mills are not easy to clean (especially this gargantuan one) unless you understand how to take it apart and put it back together. (I finally learned so PLEASE email me so I can help you…)

compressed apple sauce in a big bowl

As you churn the apples in the food mill, pick out the cinnamon sticks. If a stray one gets in there, don’t worry,  it won’t hurt anything but they can’t go through the holes and just slows things down a bit. Then, to the bowl of pureed apples, add some pure vanilla extract, ground cinnamon, freshly grated nutmeg and sugar (all to taste). Then add a pinch of salt (salt always helps to release sweetness).

compressed jars of apple sauce without tops

Then, ladle the applesauce into very clean quart-size jars and let it cool to just warm. (I drape a sheet of wax paper over the top, as it cools). Then put a piece of plastic wrap over the top of each jar and attached their lids…and into the fridge they go! If you don’t have enough refrigerator space, you can always process the jars in a boiling water bath. To learn about the tools and how to do this properly, read this blog.

So, the applesauce was finally put to bed and I was about to head to my office to write when Jon came into the kitchen and said with a smile “Honey, quick, come outside to see the big fat figs that are ripe and just waiting for you to pick them off the tree!” Now, if you’ve ever grown figs successfully…and if you’ve ever (then) had a season that failed to produce, you know how exciting this moment was (and what made it even sweeter was that Jon saved this for me).

So, I went outside and, there they were.

How sweet it is!!....
Today
Today's "pick." (YAY!)

This morning, as I laid in bed thinking and reflecting on this past weekend, I was no longer feeling robbed of a fishing trip. Instead I was filled with gratitude.  I have Jon as a husband and best friend who always supports my growth (he continues to buy me new glasses) and he never stops helping me see the bright spot in everything.

The Point: Although great vacations inevitably end and new ones can unexpectedly get canceled, great relationships can provide us all with everyday access to how amazing it feels to get the “catch” of a lifetime.


Get in touch with me

If you're interested in one of my services, or you'd just like to reach out about a recipe or an ongoing struggle in your life, please do so. I read each and every message personally.
© 2018 Lauren Groveman. All rights reserved. Site by Deyo Designs
As an Amazon Associate, I earn money from qualifying purchases.