

Outdoor cooking should be a fun, relaxing and delicious activity; however, without the right equipment, grilling can be messy, disorganized and downright dangerous. Browse the menu to the left to view some of the essentials to barbecue successfully, along with several definitions of outdoor cooking terms!
Many cookbooks differ when giving advice on the correct temperature of food before being placed on a hot grill. Contrary to popular belief, foods should not be brought to room temperature before cooking on the grill. Especially foods like boneless chicken breasts, delicate fish and even the thicker chops, butterflied leg of lamb or whole butterflied chickens with bones. Foods that are grilled to perfection are those that attain a deeply caramelized exterior while remaining moist and succulent within. If foods that don’t require lengthy cooking are brought to room temperature before cooking, chances are that by the time the exterior looks right, the interior will have become overcooked and dry. The exception here is when grilling a whole (uncut) leg of meat (lamb, veal or pork) or poultry. These larger cuts benefit by being removed from the refrigerator thirty minutes to one hour before grilling because they need longer exposure to heat in order to cook sufficiently. Most importantly, these cuts should always cook over indirect heat to prevent the exterior from burning. If, when almost cooked to your liking, the meat doesn’t have the desired savory look, simply place over direct heat for a couple of minutes to intensify the color.
It’s common for most people to use the terms “grilling” and “barbecuing” interchangeably when referring to “cooking food on a grill.” But the truth is, they are very different both in terms of timing, and heat intensity, and which technique you use will largely depend on “what’s cooking!”
Grilling
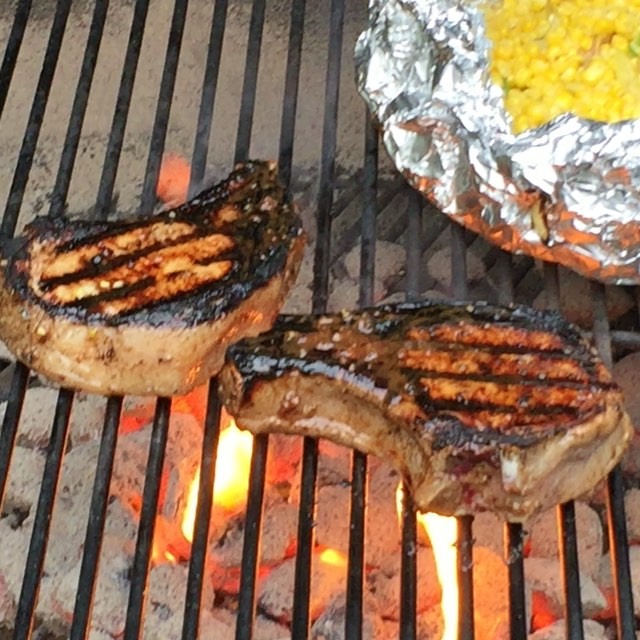
“Grilling” usually means to cook over intense heat for a shorter period of time. Regardless of whether grilling is accomplished over direct or indirect heat, never cook over red hot coals since you’re likely to quickly incinerate your food on the outside, while leaving it raw on the inside which tastes (and looks!) nasty. When coals have become red hot, allow them to subside, and when the coals are glowing from below and a fine layer of ash covers them, they’re ready. This takes a little patience and time planning. Closing the bottom vents halfway will help this occur and will also help slow down the burning. Figure a solid 30 minutes after the red-hot stage, before placing food on the hot rack. Then open bottom vents all the way to help feed the fire. Always lubricate the grill (use a long basting brush, or a rolled kitchen towel) and have your food lightly but evenly oiled before cooking. If your food looks great but is not cooked through to your liking, move food to side of grill (indirect heat) and apply the cover with top vents open. Cook a few more minutes and test for doneness.
Barbequing
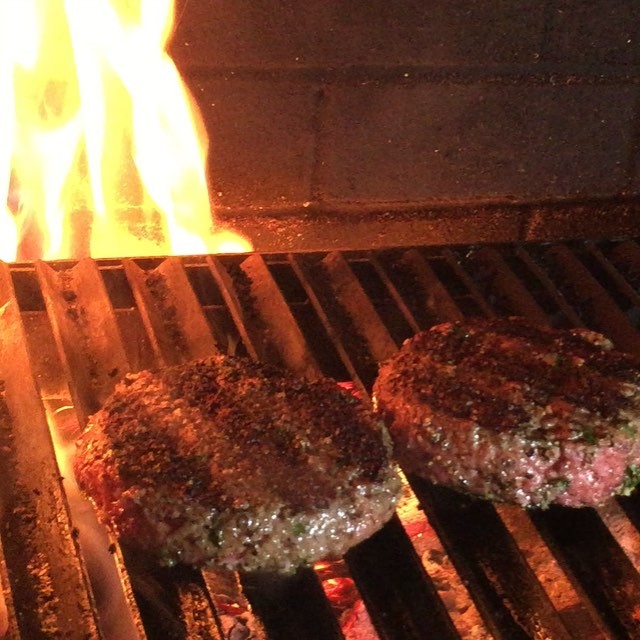
To “barbecue,” is to cook long and gently over slowly smoldering hardwood or charcoal. For best flavor, use either all hardwood or a mixture of hardwood and charcoal (and hardwood burns slower than charcoal briquettes). The grill should always be covered and the food should be cooked over indirect heat. Vents should be opened only halfway to slow air circulation. Most importantly (and here’s where most people get into trouble!), be patient when building your fire to just the right degree of heat. Arrange coals to one side of grill. Ignite and allow them to get red hot (bottom vents wide open initially). When hot, cover grill and close bottom and top vents halfway. Allow coals to become gray throughout and to heat enclosed space sufficiently. Wait until temperature drops to around 300°F (put an oven thermometer on grill rack on the side without coals.) Place food on the grill and apply cover. Allow food to cook very slowly, occasionally checking, basting and turning food. You may need to add more coals to keep fire smoldering. To do this, use strong metal tongs to remove food to a platter. Using the tongs, lift rack and scatter some coals over and around existing hot coals (don’t overdo it or you’ll extinguish the fire). Replace rack. Replace food and leave lid off for a few minutes (with bottom vents wide open) to encourage new coals to ignite. Cover grill and, after a few more minutes, close vents halfway and continue to cook. Don’t lift cover too often or you’ll cause the cooking temperature to drop. If you ever want to speed things up a bit, open vents wide to increase air circulation, which will help feed the heat. (If planning to cook a tough cut like brisket, be prepared to tend the fire for up to 6 hours.)
When coals are heated in a grill uncovered, with wide open vents on the bottom, the heat will be more intense (hotter) than in a covered grill because there is more air directly feeding the fire. The initial searing of foods should always be done on an open grill, over direct heat, after coals have calmed down. Then, after some color is achieved, you can move food over to indirect heat (not directly over heated coals) and apply the cover. That way, food will cook more gently and, ultimately, you’ll have more control. When almost done, uncover the grill and move food back to the hotter portion of the grill grate. Continue to cook, uncovered, until food is done to your liking.
Whether using a gas grill or cooking over hot coals, I suggest owning a grill with a vented cover, for versatility (cooking flexibility).
Most often, keep the top and bottom vents open to feed the fire; however, if you want a very slow fire, close vents halfway. If your food is very fatty, it’s a good idea to place a drip pan in the center of the grill under the grate, and shove hot coals to the sides. Fill drip pan with water (and herbs or soaked aromatic wood chips, if desired) and cook food over drip pan. This is indirect heat, since hot coals are not directly under food being cooked. The water in the pan creates a moister environment which helps to prevent flare-ups as the fat melts during cooking. Also, this added moisture helps protect—and preserve—the succulent texture of meats like ducks and other whole poultry, that require longer cooking. After the red-hot stage, close upper and bottom vents halfway and place a thermometer on the grill away from direct heat, let the fire calm (covered) and temperature reduce to 350°F. A whole leg of lamb will take about one hour and fifteen minutes—turning and basting occasionally.
Instant thermometer test: Beef should reach 125°F at thickest spot, lamb 130°F, pork 145°F and poultry 160°F always check the thickest part of the thigh). Turn meat and baste every 20 minutes or so.
Outdoor temperature will affect the time it takes for the internal temperature of a covered grill to reach the desired cooking temperature. Building an uneven fire can also alter heat intensity, so use an instant thermometer to gauge cooking progress.
The shape of your food will also help determine overall cooking times: A long, narrow loin of beef or pork will take about 30 to 45 minutes on the grill, total.With a chubbier, thicker roast, figure about 15 to 20 minutes per pound, total. Regardless of cut, always allow meat to rest for 10 to 15 minutes after removing from the grill, covered loosely with aluminum foil. This finishes the cooking process by letting the internal juices to centralize, and allowing the temperature to make its final rise (about 10 degrees). The exception to this is when grilling fish. Fish should be served immediately after removing from grill.
Take the coals out of the paper and store them in a tightly covered garbage bin; a plastic one is fine. Leave a short shovel and a pair of heavy-duty gloves in the bin (on top of the coals) to protect your hands.
There are several ways to start a charcoal grill fire, and which one works best for you may just be just a matter of personal preference. My favorite is to use a chimney starter, but here is my take (and recommendations) on all the tools and methods commonly used to get those coals going.
A great way to start a fire is to use kindling (dry, thin, clean scraps of wood or twigs) which can be bought in a hardware store. First make sure the bottom vents of the grill are wide open. Begin the fire with newspaper, by rolling and twisting a couple of sheets of newspaper into a figure eight and placing it on the fuel grate. Place lots of kindling over the paper and then lay the charcoal on top of the kindling. Light the paper and let the paper ignite the kindling which will, of course, ignite the charcoal.
My favorite tool for starting a charcoal fire is a chimney starter; they’re available at your local hardware store. To use this perforated metal cylinder, first crush a few pieces of newspaper in the bottom of the cylinder, then pile coals on top of the paper, filling it almost to the top. Make sure the bottom vents of the grill are wide open. Remove the cooking rack. Then grasp the handle of the filled cylinder and place it on the fuel grate. Ignite the paper by sticking a long (lit) fireplace match or a lit ignitor gun into one of the holes in the bottom of the cylinder. The paper will ignite and then the coals. When the coals at the top are clearly hot, and the flaming has ceased, put on your long protective oven mitts (always!) and, using the handle, carefully dump the coals onto the fuel grate. After dumping out your red hot coals, scatter more coals on the already lit ones and allow them to ignite on their own. Chimney starters come in two sizes; I suggest buying two of the larger ones. That way you can have another filled cylinder waiting in the wings, to be heated, if you need to feed more hot coals to the fire. This is a low cost, very efficient way to safely ignite coals.
An electric starter is an appliance with a coil extending out of a long heavy-duty plastic handle. To use, bury the coil within a layer of coals or hardwood (over the grill grate), then plug into an outdoor electrical outlet. Within just a few minutes, the coil becomes visibly red hot and will then heat the surrounding coals. Once coals become good and hot, unplug the starter and carefully remove coil. Although this works, there are several things about this appliance that really bothers me. First, you must have an electrical outlet near your grill, or you’ll need a long extension cord to plug it into an outlet. (By the way, if you need an extension cord, be sure to purchase one designed specifically for outdoor use.) Now, let’s say your all plugged in and charged up—what happens if the dog or a child (or the cook!) happens to trip over the cord? Bad news. And what do you do with a red hot starter after you remove it from the coals? Throw it in the bushes? My verdict: effective, but not safe.
No, I don’t ever recommend using chemical (liquid) starters. They smell bad; they’re bad for the environment, and if you’re not careful and squirt them on an already ignited piece of charcoal, your own mother won’t recognize you after the big boom!