

Janice asked Lauren:
Dear Lauren,
I have made bread a couple of times, but I still feel really new at it. The step that always concerns me is when I’m instructed to “punch down” the dough, after the first rising. Could you please explain this step and what I should expect from it? How “flattened” should it become? Also, I’m a bit intimidated and confused after the second rise, when I’m trying to shape the dough. It just seems that I am ruining the “poofy” look and feel. Please help me get over the intimidation by helping me to understand the process more. Thank you!
Lauren says:
First, Janice, let’s address your sense of intimidation, as a newcomer, when asked to give a swift swat of the hand to a gorgeous swollen yeast dough. (Interestingly, children rarely feel this same sense of hesitancy.) The “punching down” process is not a violent act. Actually, the words “relaxed swat,” using the back of your working hand, is a much more accurate description. This part of the process is, of course, to deflate the dough and here are the reasons:
First, it’s good to understand what’s happening as the dough rises. As you aggressively work the dough with your hands, creating those bands of elasticity, you’re also dispersing the yeast throughout that elastic network. So afterwards, as the dough sits, quietly, in a covered bowl, the yeast (which is living until it’s baked in a hot oven) is thoroughly enjoying its surroundings, eating all those natural sugars in your dough. And, as the dough eats, it also does something called “budding” which is an “a-sexual” form of reproduction. As the dough eats and multiplies, it also excretes carbon dioxide (think of it as yeast’s way of burping). So, all this burping and multiplying causes the dough to rise upward since the yeast cells are growing within that original elastic network that you so successfully built, during the kneading process. So, that’s why, after a 2 hour rise, you find the dough so “poofy.” And, if left alone, the yeast would just eat and burp and multiply (and rise) until it eventually exhausted itself and died (which is the reason for deflating it.) The deflating process is this: Once the dough has doubled its original size, uncover the bowl and, after giving it several swift swats with the back of your hand, knead it gently and briefly in the bowl (turning it over is good). The size will go from being very big and “poofy” to something smaller, but much more supple than when you originally created the dough. Now, recover the bowl and let the dough sit, covered, for another rise at a comfortable room temperature. Then, uncover and deflate it again, as before, and turn the dough out onto a lightly floured surface. The dough is now ready to be shaped.
For the best flavor and texture in baked bread, it’s good to allow the dough to rise three times before baking. Then, the last (fourth and final) rise will take place after shaping, during the initial stages of baking. After that, the yeast dies and any remaining upward movement is accomplished from rising trapped steam that is then released within the dough, as the liquid components interact with a hot oven. If left too long, at any stage, the dough could over-rise in the bowl, which could prevent your dough from rising in the oven (which would adversely affect texture). So, repeatedly deflating a dough after it has been allowed to rise just enough, without allowing it to exhaust itself, is one secret to successful bread making. Most important is to save the last rise (yeast’s last hurrah) for the oven, since that’s when the shaped dough will rise within the boundaries that you’ve personally set (loaf pans, round free-form loaves, baguettes, etc). If your bread comes out too flat, a common cause is because it’s been allowed to “over-proof” after being shaped. At that point, the yeast is just too tired. Shaping is another issue entirely, with many different answers, depending on what shape you’d like to achieve. Here’s a wonderful recipe for a Six-Strand Braided Challah Bread that I suggest all new bakers start with. It’s not too big and it’s very versatile (meaning it can be shaped and served a ton of different ways, depending on your mood, your timing agenda or your audience). Let me know how you do!
 Delicious
 You are enough.
 How to feed your sourdough starter right!
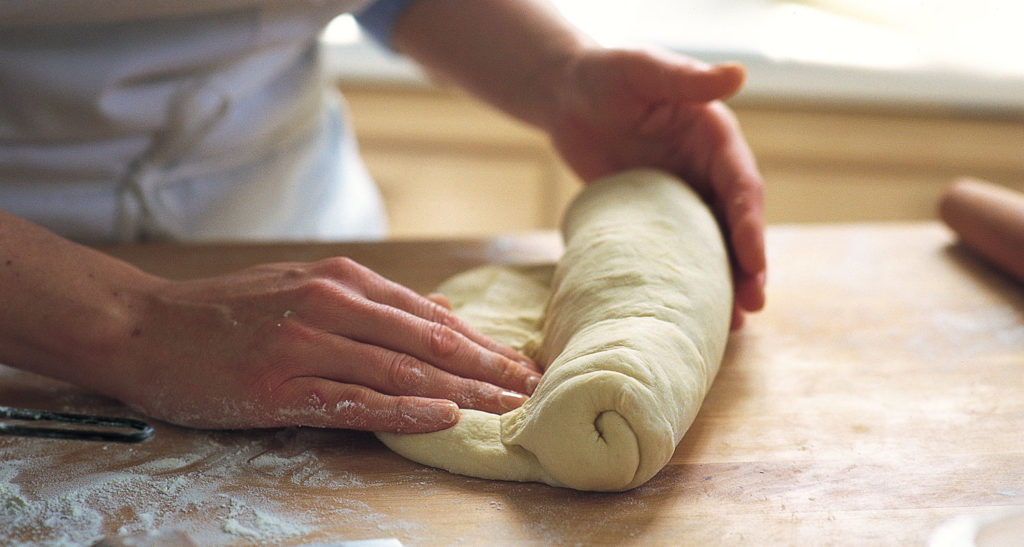 Disappointment
 How Religious are You?
 Some foods to always have prepared and ready.