

You’ll notice that throughout this recipe I’ve specified my favorite specialty “brand names” of cookies and candies and I kept things simple with vanilla, chocolate and strawberry ice cream. This is only a guide. The ingredients you choose are strictly about the person being celebrated so pick those that would make them the happiest.
Any time I’ve suggested a tool, a piece of equipment, or a culinary term that’s unfamiliar to you, you can go to Learn to Cook for more information.
Put chocolate wafers in the bowl of a food processor fitted with the steel blade and grind them fine. Alternatively, place broken up cookies (in batches) in a heavy-duty plastic bag and roll over them with a rolling pin until finely crushed. Transfer crumbs to another bowl and whisk in cinnamon, if using. Add melted butter, mixing with a fork until thoroughly blended. Press a thin layer of crumbs on the bottom and up the sides of a 9-inch spring-form pan, using all of the crumbs. Place pan in freezer to firm up crust while ice cream continues to soften to a spread-able consistency.
Line a shallow baking sheet with waxed paper and place chilled crust on the tray. Squeeze vanilla ice cream out of its containers onto the bottom of the crust. Using a metal spatula and your hands, spread the softened ice cream evenly over the bottom of the crust. (Dip your hands in the hot water as necessary but always dry them thoroughly before continuing.) Cover ice cream with crumbled Butterfinger bars, pressing gently. Spread chocolate ice cream over crumbs and cover with crushed Oreos, again pressing gently. Cover crushed cookies with strawberry ice cream and smooth the top with a metal spatula. Place into the freezer to firm for 4 hours.
Prepare Perfect Whipped Cream as directed in recipe. Spread 2/3 of the whipped cream over the top of cake and reserve the rest for a decorative border. (For smoothest surface, spread only once, in one direction, and then scrape off excess whipped cream into the bowl. Continue spreading and scraping until surface is perfectly smooth.) Return cake to the freezer for a minimum of 20 minutes, just to firm the whipped cream.
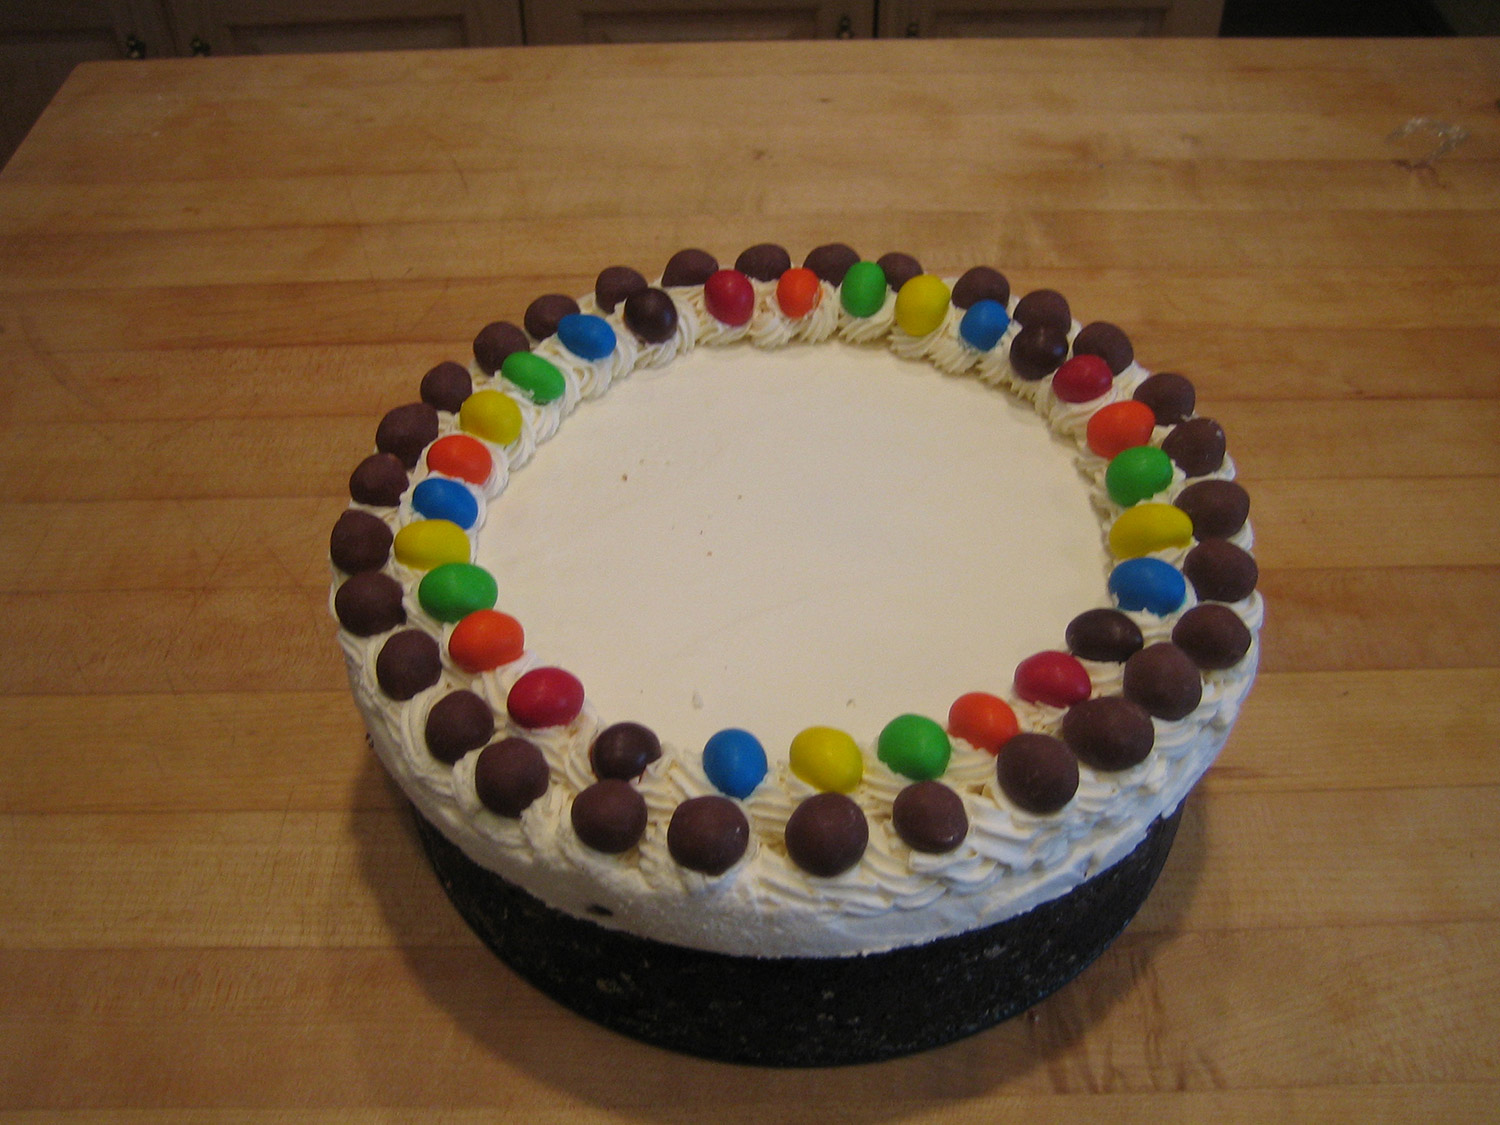
Fit your pastry bag with a star tip and fill bag with remaining whipped cream. Remove cake from freezer and pipe on a simple swirled border around its circumference. If desired, sprinkle border with some colored sprinkles. Return to freezer to firm for 4 hours, uncovered (or freeze for several days). Once very firm, you can cover the cake with plastic wrap. The day of serving, write a message on top with decorating gel and/or sprinkle the inside of the piped whipped cream with another thin border of crushed unsalted peanuts or a ring of M&M’s.
Either purchase a cardboard cake box from a bakery or stick toothpicks in the border of whipped cream (to camouflage the holes) and drape aluminum foil loosely over the top. This will help prevent freezer burn.
When cake is thoroughly frozen, dip a dish towel in very hot water and wring it out. Place the hot towel around the sides of the pan to help release it from the crust. Unlatch lock and ease off sides. Return cake to freezer. To serve, remove cake from freezer 30 to 40 minutes before serving to enable it to become softened enough to cut into wedges. Present the cake whole and cut into wedges at the table.
Increase the cookie crumbs (for the crust) to: 1 ½ boxes of chocolate wafers, mixed with 1 ½ sticks of melted, unsalted butter. Increase the amount of ice cream, per layer, to 2 pints. Use a bit more cookies and candies in between the layers and keep the whipped cream topping the same.
Increase the cookie crumbs (for the crust) to 2 boxes of chocolate wafers, mixed with 2 sticks of melted unsalted butter. Increase the amount of ice cream, per layer, to 3 pints. Use a bit more cookies and candies in between the layers and increase the whipped cream topping, as follows: Whip 3 cups heavy cream with 2/3 cup sugar and 1 1/2 teaspoons vanilla.
The star tip should first be inserted into the bag and secured in place. Place the bag with the tip facing down into a tall drinking glass. When the tip hits the bottom of the glass, fold the remainder of the bag down over the outside rim of the cup. Fill the inside of the bag with the filling. Alternatively, you may simply cuff the top portion of the bag over your left hand (if you are right handed) and fill the bag with your right hand. The glass method is particularly good for the beginner and when filling a pastry bag in advance of a procedure so the bag can stand upright without the contents spilling out.
The cake can be assembled two weeks ahead through step 4 and, after being fully frozen, covered with plastic wrap until the day of serving, which is when you’ll write your “celebratory message” on top.